Soft and Chewy Peanut Butter Cookies (marketgrow.com)
Soft and chewy peanut butter cookies are a timeless classic that blend the rich, nutty flavor of peanut butter with a soft, melt-in-your-mouth texture. Perfectly chewy with just the right amount of sweetness, these cookies make an irresistible snack or dessert. They’re quick and easy to prepare, making them an ideal treat for any occasion. Whether you’re looking to satisfy a peanut butter craving or just need a simple homemade cookie recipe, these soft and chewy delights are sure to become a favorite.
INGREDIENTS:
list of 10 items
? 1 cup creamy peanut butter
? 1/2 cup unsalted butter, softened
? 1/2 cup granulated sugar
? 1/2 cup brown sugar, packed
? 1 large egg
? 1 tsp vanilla extract
? 1 1/4 cups all-purpose flour
? 1/2 tsp baking powder
? 1/2 tsp baking soda
? 1/4 tsp salt
list end
INSTRUCTIONS:
list of 9 items
1. Preheat the oven to 350°F (175°C). Line a baking sheet with parchment paper.
2. In a large bowl, beat together the peanut butter, softened butter, granulated sugar, and brown sugar until creamy and well combined.
3. Add the egg and vanilla extract, and continue to mix until smooth.
4. In a separate bowl, whisk together the flour, baking powder, baking soda, and salt.
5. Gradually add the dry ingredients to the wet ingredients, mixing just until combined. Be careful not to overmix.
6. Scoop the dough into tablespoon-sized balls and place them on the prepared baking sheet, about 2 inches apart.
7. Flatten each cookie slightly with a fork, creating a crisscross pattern on top.
8. Bake for 10-12 minutes, or until the edges are lightly golden but the centers are still soft.
9. Remove the cookies from the oven and let them cool on the baking sheet for 5 minutes before transferring them to a wire rack to cool completely.
list end
Enjoy your soft and chewy peanut butter cookies with a glass of milk!
|
Crispy Roasted Pork Belly (marketgrow.com)
Crispy roasted pork belly is a mouthwatering dish that combines succulent, juicy meat with an irresistibly crispy, crackling skin. This dish is a showstopper, perfect for special occasions or a hearty weekend meal. The secret lies in properly scoring the skin, seasoning generously, and slow-roasting the pork to render the fat and create that signature crunch. Served with tangy sauces or roasted vegetables, this pork belly is rich, flavorful, and deeply satisfying.
-----
Ingredients:
list of 7 items
? 2 lbs (900g) pork belly, skin on
? 1 tablespoon kosher salt (plus extra for skin)
? 1 teaspoon black pepper
? 1 teaspoon garlic powder
? 1 teaspoon paprika (optional for color)
? 1 tablespoon olive oil
? 1 tablespoon white vinegar or lemon juice (for skin crisping)
list end
Instructions:
list of 7 items
1. Prep the Pork Belly:
list of 2 items nesting level 1
? Pat the pork belly dry with paper towels. The drier the skin, the crispier it will become.
? Use a sharp knife to score the skin in a crosshatch pattern, being careful not to cut into the meat.
list end nesting level 1
2. Season the Meat:
list of 2 items nesting level 1
? Flip the pork belly over (skin side down) and rub the meat side with olive oil, salt, pepper, garlic powder, and paprika (if using).
? Turn the pork belly back over and rub the skin with white vinegar or lemon juice, followed by a generous layer of salt. This will help draw out moisture
and crisp the skin.
list end nesting level 1
3. Rest Uncovered:
list of 1 items nesting level 1
? Place the pork belly on a wire rack over a baking sheet and refrigerate uncovered for at least 4 hours or overnight. This step helps dry out the skin
for maximum crispiness.
list end nesting level 1
4. Roast Low and Slow:
list of 2 items nesting level 1
? Preheat your oven to 300°F (150°C).
? Roast the pork belly for 2 hours, allowing the fat to render and the meat to become tender.
list end nesting level 1
5. Crisp the Skin:
list of 1 items nesting level 1
? Increase the oven temperature to 450°F (230°C). Roast for another 20-30 minutes, or until the skin is blistered and crispy. Keep an eye on it to prevent
burning.
list end nesting level 1
6. Rest and Slice:
list of 1 items nesting level 1
? Remove the pork belly from the oven and let it rest for 10 minutes. Slice into bite-sized pieces using a sharp knife.
list end nesting level 1
7. Serve:
list of 1 items nesting level 1
? Enjoy your Crispy Roasted Pork Belly with roasted vegetables, steamed rice, or a tangy dipping sauce like hoisin or spicy mustard.
list end nesting level 1
list end
Tips for Extra Crispy Skin:
list of 3 items
? Make sure the skin is completely dry before roasting.
? Scoring the skin allows fat to render and bubbles to form, creating that crispy texture.
? Don’t skip the vinegar or lemon juice—it helps with blistering the skin.
list end
Enjoy this flavorful and texturally perfect dish that’s sure to impress!
|
Roasted Turkey with Gravy (marketgrow.com)
Roasted turkey with gravy is a classic centerpiece for festive occasions, combining succulent, golden brown turkey with rich, savory gravy. This dish starts with turkey seasoned simply with salt, pepper and herbs, like thyme and sage, then roasted to perfection to achieve a crispy skin and tender meat. The gravy, made from the pan drippings mixed with flour and broth, complements the turkey with its deep flavor and smooth texture. Often served with sides like stuffing and cranberry sauce, this meal epitomizes traditional holiday feasts.
INGREDIENTS:
list of 7 items
? 1 whole turkey (10-12 lbs), thawed
? Salt and pepper
? Fresh herbs (thyme, sage)
? 2 tablespoons olive oil
? 4 cups chicken or turkey broth
? 1/4 cup all-purpose flour
? Additional seasonings (optional): garlic, onion, celery
list end
INSTRUCTIONS:
list of 4 items
1. Prep the turkey: Pat dry, season inside and out with salt, pepper, and herbs. Optionally, stuff with aromatics like onion, celery, or garlic. Tie legs
together, tuck wing tips.
2. Roast: Place in a roasting pan, breast side up. Brush with olive oil. Roast at 325°F, basting occasionally with broth.
3. Make the gravy: After roasting, set turkey aside, tent with foil. For gravy, skim fat from pan drippings, add flour, cook until golden. Gradually whisk
in broth, cook until thickened.
4. Serve: Carve turkey and serve with gravy on the side.
list end
This roasted turkey with gravy is sure to be the highlight of any holiday meal, providing comfort and joy to your table.
|
Portobello Buffalo Burgers with Celery Apple Slaw
Portobello Buffalo Burgers with Celery Apple Slaw
Makes 4 burgers. Recipe from?. 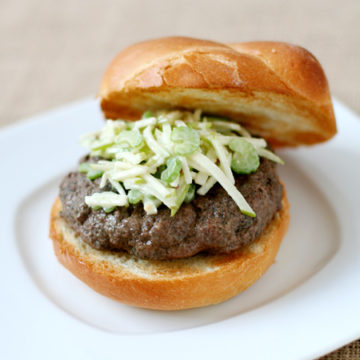 Ingredients:For burgers:
1 medium onion, chopped
10 ounces portobello mushrooms, trimmed and quartered
2 tablespoons plus 2 teaspoons olive oil, divided
1 pound ground buffalo For slaw:
2 celery ribs
1/2 Granny Smith apple, cored (left unpeeled)
1 tablespoons mayonnaise
1 1/2 teaspoons cider vinegar
1 teaspoon olive oil
1 teaspoon whole-grain mustard
Rounded 1/4 teaspoon sugar 4 hamburger buns or brioche rolls, split and toasted Directions:Pulse onion and mushrooms in a food processor until finely chopped. Heat 2 tablespoons oil in a 10-inch heavy skillet over medium heat until it shimmers. Add mushroom mixture, 3/4 teaspoon salt, and rounded 1/4 teaspoon pepper and cook, stirring occasionally, until vegetables begin to brown and liquid has evaporated, 8 to 10 minutes. Transfer to a bowl and cool to warm, stirring occasionally, about 15 minutes. Meanwhile, cut celery and apple into 2-inch-long thin julienne with slicer. Whisk together mayonnaise, vinegar, oil, mustard, sugar, rounded 1/8 teaspoon salt, and 1/8 teaspoon pepper in a medium bowl. Add celery and apple, tossing to coat. Let stand 15 minutes to develop flavors. Mix buffalo into cooled mushroom mixture with your hands until well combined. Form into 4 (4-inch) patties. Heat remaining 2 teaspoons oil in a 12-inch heavy skillet over medium-high heat until it shimmers. Cook burgers, turning once, about 8 minutes total for medium-rare. Pay attention, since buffalo meat is not as fatty as ground beef, it is not as forgiving to overcooking. Serve burgers, topped with slaw, on toasted buns.
Source: Love and Olive Oil
|
Carrot Soup with Carrot Top Pesto
Carrot Soup with Carrot Top PestoCook Time:?45 minutes ? Total Time:?1 hour Luxuriously rich and velvety, this creamy carrot soup is topped with a tangy pesto made from the carrot tops and served with crusty grilled baguette spears. 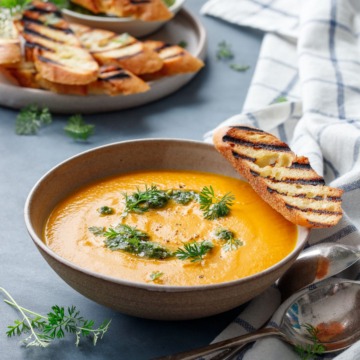 Ingredients:For Carrot Soup:- 1/4 cup extra virgin olive oil
- 4 large carrots (about 1 pound), chopped (removed and reserve carrot tops for pesto)
- 1 medium shallot, minced (about 2 tablespoons minced)
- 4 cups vegetable stock
- 1 bay leaf
- 1/2 cup heavy cream
- 2 tablespoons unsalted butter, cut into pieces
- salt and freshly ground black pepper, to taste
For Carrot Top Pesto:- 2 cups ( 1.25 ounces) loosely packed carrot tops, rinsed well
- 1/2 cup extra virgin olive oil
- 2 tablespoons toasted shelled pistachios
- 1 tablespoon freshly squeezed lemon juice
- 1/4 teaspoon red pepper flakes
- 1/4 teaspoon fine sea salt (slightly less if using salted pistachios)
- 1/4 teaspoon freshly ground black pepper
For Grilled Bread:- 1 La Brea Bakery French Baguette
- olive oil, for brushing
Directions:- Heat olive oil in a large saucepan or Dutch oven over medium-high heat. Add carrot to hot oil; season with a generous pinch of salt and pepper and sauté until starting to soften, about 6 to 8 minutes. Add shallots and cook until translucent, another 5 minutes or so.
- Add vegetable stock and bay leaf and bring to a simmer. Reduce heat to low and continue to gently simmer, stirring occasionally, until broth is noticeably reduced and carrots are very soft, about 30 minutes. Remove bay leaf.
- Carefully transfer soup to a blender and puree until smooth (take care blending hot liquids, work in batches if you need to).
- Return pureed soup to saucepan and set over low heat to keep warm. Stir in cream and butter and stir until melted and smooth. Taste and add additional salt and pepper as necessary (you may need more or less depending on the saltiness of your stock).
- For pesto, while soup is simmering, combine carrot tops, olive oil, pistachios, lemon juice, red pepper flakes, salt and pepper in the bowl of a food processor. Pulse until smooth. Taste, then add additional salt and pepper as needed. You can also add more olive oil as desired for a thinner, more ‘drizzle-able’ consistency if you prefer.
- For grilled bread, heat a grill pan over medium-high heat. Slice baguette diagonally into 3/8-inch thick slices. Brush one side of slices generously with olive oil. Place bread slices, oil side down, onto grill pan, lining up the grill ridges so the marks will run diagonally across the pieces of bread.
- Place a heavy skillet on top of bread slices to press them deeper into the grill pan, which will result in better defined grill marks. Let sit for about 2 minutes or until grill marks are very dark brown and crispy. If you want to grill both sides, brush the tops with more olive oil then flip slices over and repeat on second side.
- To serve, ladle soup into warm bowls. Top with a drizzle of pesto and a sprinkle of flake sea salt and finely ground black pepper. Serve with still-warm grilled bread and enjoy!
Source: Love and Olive Oil
|
Cabbage & Zucchini Okonomiyaki
Cabbage & Zucchini OkonomiyakiA savory Japanese cabbage pancake topped with a combination of okonomi sauce, Japanese mayo, crispy bacon, scallions, sesame seeds and bonito flakes. 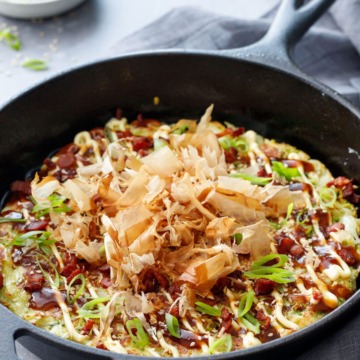 Ingredients:- 4 ounces bacon, chopped
- 1/2 head (300g) savoy cabbage, very thinly shredded (about 5 cups shredded)
- 1 medium zucchini (100g), grated
- 1 cup all-purpose flour
- 3/4 cup water
- 3 large eggs, lightly beaten
- 1 teaspoon chicken bouillon paste (optional, you can also use chicken broth instead of water)
- okonomi sauce
- kewpi mayonnaise
- sliced green onions
- toasted sesame seeds
- bonito flakes, for topping
Directions:- Cook bacon in a 9-inch cast iron skillet over medium heat. When crispy, transfer with a slotted spoon to a paper-towel lined plate and set aside.
- Spoon out about half of bacon fat and save for the second pancake (about 2 tablespoons worth).
- Return skillet to heat.
- In a large bowl, toss shredded cabbage and zucchini with flour, water, eggs and bouillon. Spoon half of mixture into hot skillet, patting it out into an even layer over the entire bottom of the pan.
- Cook for 8 to 10 minutes or until bottom is nice and browned. Carefully place a plate upside down on top of the skillet, then flip the entire skillet over so the pancake falls onto the plate (use silicone-grip oven mits if you have them, it’ll make things much easier!)
- Slide pancake back into skillet so the browned side is now facing up. Cook for an additional 5 to 7 minutes or second side is also golden brown. Slide out of skillet onto serving platter or a baking sheet (keep in a warm oven while you cook the second pancake).
- Return skillet to heat along with reserved bacon fat. Repeat process with remaining cabbage mixture.
- To serve, drizzle with okonomi sauce and kewpi mayonnaise and sprinkle with bacon bits, green onions and sesame seeds. Top with a handful of bonito flakes. Enjoy while still warm.
Source: Love and Olive Oil
|
Posole1 bag of dried red chiles
2 lbs of pork shoulder (cut into 1/2 inch cubes)
2 tbls salt
2 tbls minced garlic (~4 cloves)
1 tbls pepper
3 tbls oregano
4-29oz cans hominy, drained and rinsed
2 cups dry pinto beans
cabbage, onion, radishes, limes, fried tortilla strips (garnish) Remove stems and deseed chiles. Put in microwave-safe dish and cover with water. Microwave on high for 10 minutes. Set aside. Put meat and seasonings into a large pot and cover with 2-3 inches of water (above the meat). Bring to a boil, reduce heat, cook for 2-3 hours. Add pinto beans and cook 1-2 hours. Add hominy and cook 1 hour. Take chiles and put in a blender with a little salt, pepper, garlic, and oregano. Blend to make a paste. Add about half of the paste to the soup. Stir to combine. Taste. Add additional paste? if desired. Cook 1 more hour. (Note: Save remaining paste for another batch) For less fat, put finished soup in the fridge overnight and skim the fat off the top. Traditionally served with chopped white onion, shredded cabbage, sliced radishes, fried tortilla strips, and lime wedges. (In the picture above, Hubbyman added sour cream and shredded cheese.)
Source: Around My Family Table
|
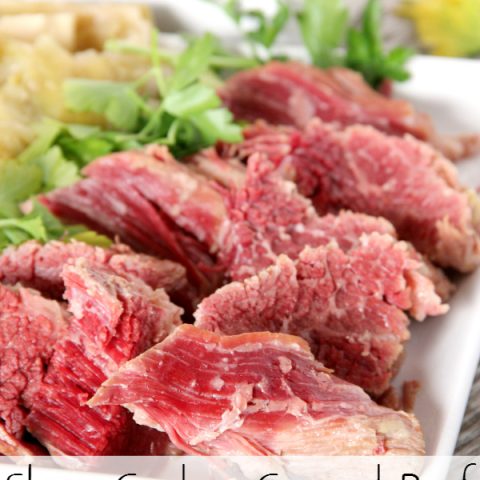
Slow Cooker Corned Beef RecipeMaking corned beef in a slow cooker produces tender, juicy corned beef, perfect for a St. Patrick's Day meal! Prep Time10 minutes Cook Time7 hours Total Time7 hours?10 minutes Ingredients- 5-6 pounds fresh corned beef
- 2 onions, studded with 4 whole cloves each
- 4 carrots, peeled and halved
- 2 ribs celery, halved
- 1 green cabbage, cored and cut into 4 wedges
- 12 small red new potatoes
- 6 carrots, peeled and cut into 2 1/2 inch lengths
- salt and pepper
- 2 tbsp chopped fresh parsley
Instructions- Line slow cooker with a disposable liner.
- Place corned beef brisket in the crock and add the onions, halved carrots, celery, & parsley. Cover with cold water and cook on high for about 5 hours.
- Remove the onion, parsley, and carrots from pot and then add the cabbage, potatoes, cut up carrots, salt, and pepper. Continue cooking for an additional 2 hours until meat is fall apart tender.
- Arrange beef on a serving platter and surround it with the cooked vegetables. Ladle the broth over the beef and vegetables and sprinkle with 2 tbls of chopped parsley.
Nutrition Information:?Yield:?16?开云体育 Size:?4 oz corned beef
Amount Per 开云体育:?Calories:?635Total Fat:?7.6gCarbohydrates:?133.08gProtein:?18.54g
Source: Around My Family Table
|
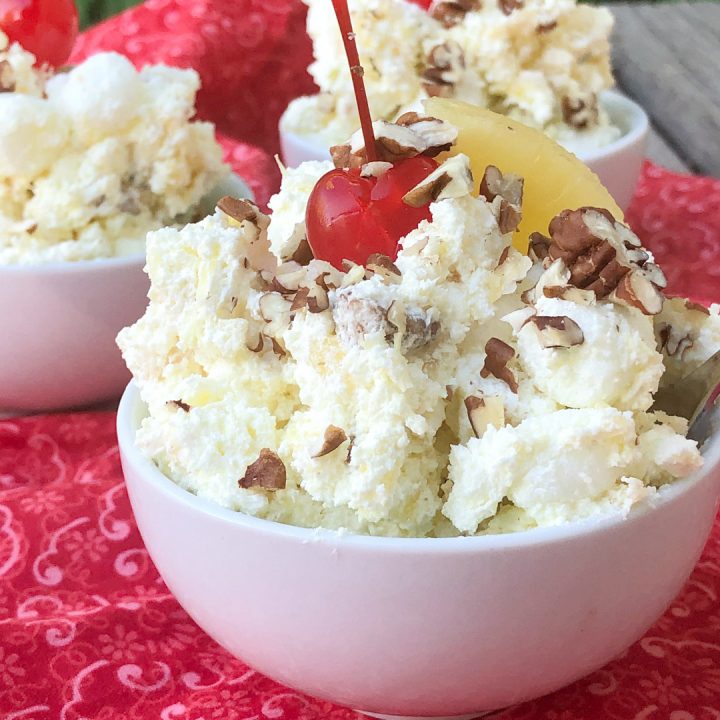
Classic Pineapple FluffCool and creamy, my Classic Pineapple Fluff has been a summer family favorite since I was a little girl.? It's the perfect dessert for summer, a BBQ, or just because you love pineapple! Prep Time20 minutes Additional Time2 hours Total Time2 hours?20 minutes Ingredients- 16 ounces Shamrock Farms cottage cheese
- 2 3-ounce boxes pineapple gelatin mix
- 16 ounces frozen whipped topping, thawed
- 1 20-ounce can crushed pineapple, well drained
- 2 cups?mini marshmallows
- 3/4 cup chopped pecans
InstructionsIn a large bowl, puree cottage cheese with an immersion blender (or use a food processor) until smooth.
Add in dry pineapple gelatin mixes until thoroughly incorporated. Then use a rubber spatula to fold in the whipped topping until no streaks remain.
Gently fold in crushed pineapple, mini marshmallows, and pecans.
Cover and refrigerate for at least 2 hours.
If desired, serve topped with fresh pineapple slices, chopped nuts and a cherry.
NotesIf you have trouble finding the pineapple gelatin, I've found it at??or?. Nutrition Information:?Yield:?20?开云体育 Size:?1
Amount Per 开云体育:?Calories:?161Total Fat:?10gSaturated Fat:?6gTrans Fat:?0gUnsaturated Fat:?3gCholesterol:?4mgSodium:?93mgCarbohydrates:?16gFiber:?1gSugar:?14gProtein:?4g
Source: Around My Family Table
|
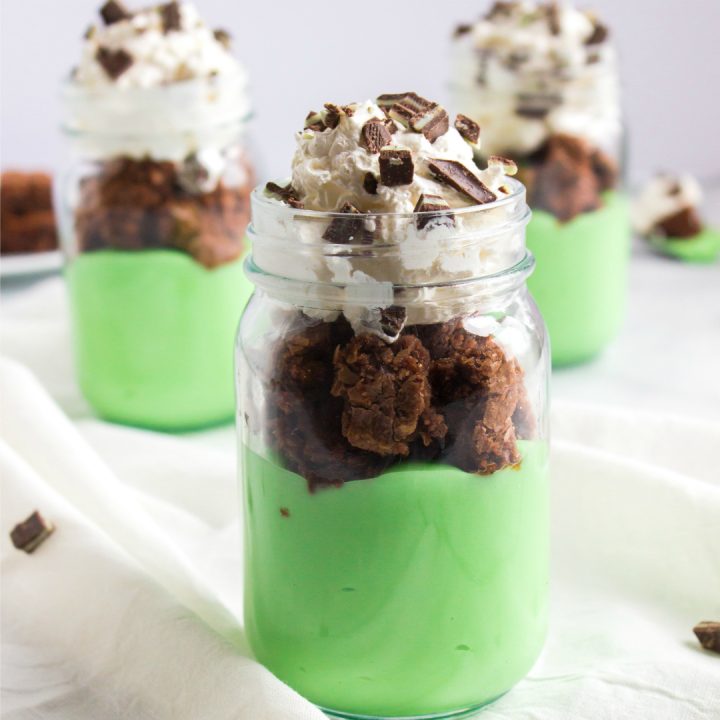
Chocolate Mint TrifleThis easy?Chocolate Mint Trifle Recipe?is the perfect addition to any March festivities, but it's great year round too. All you need is some homemade brownies, pudding, chocolate mints, and a little whipped cream for this fun dessert. Prep Time15 minutes Chill Time1 hour?30 minutes Total Time1 hour?45 minutes Ingredients- 1 brownie recipe (boxed or?, prepared according to directions and cooled
- 1 box (5.1 oz) instant vanilla pudding mix
- 2 cups milk*
- 1/2 tsp mint (or peppermint) extract
- 1/2 cup??or chopped Andes Mints
- whipped topping
Instructions- Cut prepared brownies into bite sized pieces.
- Combine vanilla pudding mix, milk (*amount according to package), and mint extract. Whisk well to combine or use a blender to gently mix. Add food coloring until desired color is reached. Store in refrigerator until pudding is set.
- In individual serving dishes or a large trifle dish layer pudding, brownie, mints, pudding, whipped cream, and top with additional mints.
NotesVariations: - Use mint oreos
- Use chocolate cake
- Use white chocolate pudding
- Use a gluten free cake or brownie mix
- Use dairy free pudding/whipped cream
- Use red food coloring for Valentine's
- Use an??(to keep it dye free)
Nutrition Information:?Yield:?8?开云体育 Size:?1
Amount Per 开云体育:?Calories:?259Total Fat:?11gSaturated Fat:?6gTrans Fat:?0gUnsaturated Fat:?4gCholesterol:?16mgSodium:?254mgCarbohydrates:?35gFiber:?1gSugar:?26gProtein:?5g
Source: Around My Family Table
|
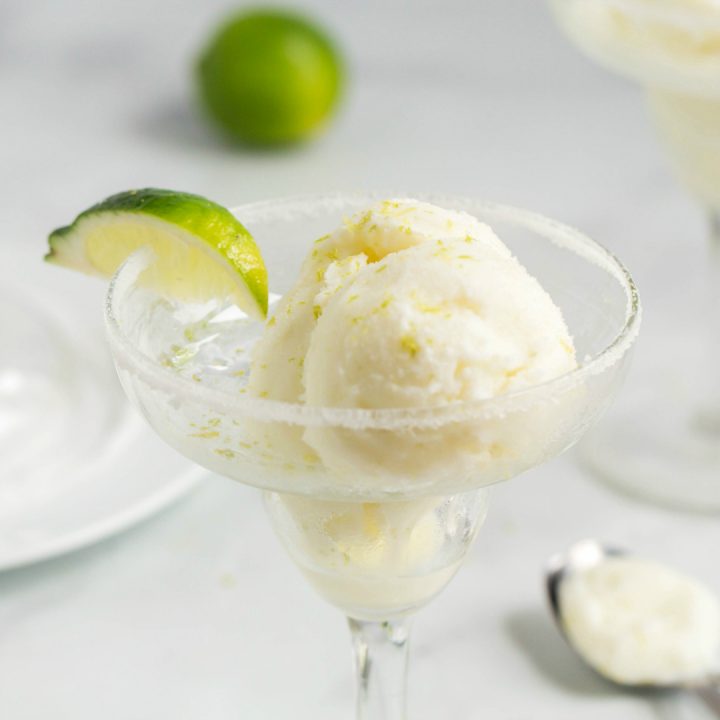
Frozen Margarita Lime Sherbet
Frozen Margarita Lime SherbetLime sherbet marries a frozen margarita recipe to make a delicious, cool dessert! Make this easy sherbet recipe to enjoy this summer! Prep Time25 minutes Freezing Time4 hours Total Time4 hours?25 minutes Ingredients- 1 tbsp lime zest (2 limes)
- 3/4 cup sugar
- 1/2 cup hot water (just use the hottest water from your tap)
- 1/2 cup lime juice (4 limes)
- 1/4 cup tequila
- 1 3/4 cup milk of choice (soy, almond, rice, 2%, etc)
- dash of salt
- additional limes, coarse kosher salt, coarse sugar for garnish (opt)
Instructions- **Plan ahead!?You will need about 4 hours to freeze the bowl and 4 hours for sherbet to set up in the freezer.**
- Place ice cream maker bowl in freezer to freeze for several hours.
- In a large bowl with a pour spout, add zest, sugar, and lime juice. Add hot water and stir well to dissolve sugar. Add tequila, milk, dash of salt and stir well.
- Assemble ice cream maker, turn on, and pour in liquid. Let mix for about 20 minutes or until it resembles soft ice cream. Pour into freezer safe dish and freeze for several hours or overnight.
Notes**Plan ahead!?You will need about 4 hours to freeze the bowl and 4 hours for sherbet to set up in the freezer.** Nutrition Information:?Yield:?4?开云体育 Size:?1
Amount Per 开云体育:?Calories:?242Total Fat:?2gSaturated Fat:?1gTrans Fat:?0gUnsaturated Fat:?1gCholesterol:?9mgSodium:?243mgCarbohydrates:?48gFiber:?1gSugar:?39gProtein:?4g
Source: Around My Family Table
|
DescriptionAn easy, moist, and flavorful cake with the flavors of your favorite classic banana pudding! Prepped in just minutes, this cake bakes up perfectly every time! - 1?(15.25- ounce) box yellow cake mix
- 1?(3.25- ounce) box Banana Cream Pudding mix
- 4?large eggs
- 1/4 cup?vegetable oil
- 1 cup?water
- 2?medium ripe bananas, mashed (about?3/4 cup)
- 2 cups?powdered sugar
- 1/3 cup?heavy cream, *see note
- 1 teaspoon?vanilla extract (or vanilla bean paste)
- 1/2 cup?coarsely crushed Nilla Wafer cookies
- Preheat the oven to 350°F. Coat a 10- cup??liberally with baking spray, set aside.
- Add the cake mix and pudding mix into the bowl of your??fitted with the?. Stir to combine.
- Add in the eggs, vegetable oil, water, and mashed bananas. Turn the mixer to low and mix for 30 seconds. Scrape the sides of the bowl as necessary and turn the mixer up to medium speed and mix for 1 minute.?
- Pour the batter into the prepared pan and bake for 50 – 55 minutes.?
- Allow the cake to cool in the pan for 15 – 20 minutes. Loosen the sides of the cake from the pan with a butter knife and then invert the cake pan onto a wire rack to cool completely.?
- Icing: Whisk together the powdered sugar, heavy cream, and vanilla until smooth. You can add more cream if you prefer a thinner icing. Spread the icing onto the cooled cake and garnish with crushed cookies.
Notes*if you don’t have heavy cream, you can use milk, but start with only 2 -3 tablespoons and add more until desired consistency is reached. Store airtight at room temperature for 3 -4 days.
Source: Cookies and Cups
|
DescriptionCongo Bars are an amped up chocolate chip cookie bar with 2 types of chocolate to make them extra gooey! - 1 cup?butter, room temperature
- 1 cup?dark brown sugar, packed
- 1 cup?light brown sugar, packed
- 3?large eggs
- 1 tablespoon?vanilla extract
- 1 teaspoon?kosher salt
- 2 teaspoons?
- 2 1/2 cups?all purpose flour
- 2 cups?semi-sweet chocolate chunks, or chopped chocolate
- 1/2 cup?milk?
- Preheat the oven to 350°F. Line a 9×13 pan with??and coat with nonstick spray. Set aside.
- In the bowl of your??fitted with the??mix the butter and the light and dark brown sugars together for 2 minutes on medium speed. Add in the eggs, vanilla, salt and??and mix for an additional minute on medium, scraping the sides of the bowl as necessary.
- Turn the mixer to low and add in the flour, mixing until just combined.
- Finally add in both kinds of chocolate and stir to incorporate.
- Spread the dough into the prepared pan and bake for 30 minutes or until the edges are set and lightly golden and the center appears slightly under-baked.
- Remove the pan from the oven and allow the bars to cool completely before cutting.
- Alternately you can chill the bars before cutting.
Notesstore at room temperature for up to 3 days or in the refrigerator for up to 5 days. Nutrition- 开云体育 Size:?1 bar
- Calories:?303
- Sugar:?29.5 g
- Sodium:?68 mg
- Fat:?14.8 g
- Carbohydrates:?41.5 g
- Protein:?3.8 g
- Cholesterol:?44.4 mg
Source: Cookies and Cups
|
Hawaiian Sweet Rolls (cookingcuriosity.com)
Hawaiian sweet rolls are a delightful and fluffy treat, known for their soft texture and sweet tropical flavor. These rolls are a favorite at both family dinners and festive gatherings, often served as a side to complement a variety of dishes or used as the base for savory sliders. Their unique sweetness, derived from pineapple juice and a touch of sugar, sets them apart from traditional dinner rolls, giving them a light golden crust and a tender, melt-in-your-mouth interior. Whether you’re an experienced baker or trying your hand at homemade bread for the first time, these Hawaiian Sweet Rolls will bring a touch of sweetness and softness to your table.
INGREDIENTS:
list of 9 items
? 1/2 cup pineapple juice, room temperature
? 1/2 cup warm milk (about 110°F or 43°C)
? 1/4 cup granulated sugar
? 1/3 cup unsalted butter, melted
? 2 large eggs, lightly beaten
? 1 teaspoon salt
? 4 to 4 1/2 cups all-purpose flour
? 2 1/4 teaspoons instant yeast (one packet)
? Additional melted butter for brushing
list end
DIRECTIONS:
list of 6 items
1. Prepare the Dough:
list of 3 items nesting level 1
? In a large bowl of a stand mixer fitted with a dough hook, combine the pineapple juice, warm milk, and sugar. Sprinkle the yeast over the mixture and
let it sit for about 5 minutes until foamy.
? Add the melted butter, eggs, and salt. Start mixing on low speed.
? Gradually add 4 cups of flour, continuing to mix until the dough starts to form. Increase the speed to medium and knead for about 7-8 minutes, adding
more flour as necessary until the dough is smooth and pulls away from the sides of the bowl but is still slightly sticky to the touch.
list end nesting level 1
2. First Rise:
list of 1 items nesting level 1
? Transfer the dough to a greased bowl, turning it once to grease the top. Cover with a clean kitchen towel and let it rise in a warm place until doubled
in size, about 1 to 1.5 hours.
list end nesting level 1
3. Shape the Rolls:
list of 2 items nesting level 1
? Punch down the risen dough and turn it out onto a lightly floured surface. Divide the dough into 12 equal pieces.
? Shape each piece into a smooth ball by pulling the dough underneath itself. Arrange the rolls in a greased 9×13 inch baking dish.
list end nesting level 1
4. Second Rise:
list of 1 items nesting level 1
? Cover the shaped rolls with a towel and let them rise for another 30-45 minutes, or until puffy and nearly doubled.
list end nesting level 1
5. Bake:
list of 3 items nesting level 1
? Preheat your oven to 350°F (175°C).
? Bake the rolls in the preheated oven for about 20-25 minutes, or until golden brown on top.
? Brush the warm rolls with additional melted butter for a soft, buttery crust.
list end nesting level 1
6. Serve:
list of 1 items nesting level 1
? Allow the rolls to cool slightly in the pan before serving. They can be enjoyed warm or at room temperature.
list end nesting level 1
list end
Hawaiian Sweet Rolls are wonderfully versatile and irresistible. Their unique blend of sweet and savory flavors makes them a hit at any dining occasion,
from a casual breakfast to a special holiday meal.
|
Linguini with White Clam Sauce (marketgrow.com)
Linguine with white clam sauce is a classic Italian pasta dish that brings the taste of the sea to your table with minimal effort. Briny clams are simmered in a rich garlic and white wine sauce, then tossed with al dente linguine for a perfectly balanced and flavorful meal. The dish is brightened with a touch of lemon and a sprinkle of fresh parsley, making it a simple yet elegant option for any seafood lover. Whether you’re preparing it for a special occasion or a quick weeknight dinner, this recipe is sure to impress.
INGREDIENTS:
list of 10 items
? 1 lb linguine
? 3 tbsp olive oil
? 4 cloves garlic, minced
? 1/2 tsp red pepper flakes (optional)
? 1 cup dry white wine
? 2 cans (10 oz each) whole baby clams, drained, reserving the liquid
? 1/2 cup fresh parsley, chopped
? Juice of 1 lemon
? Salt and freshly ground black pepper to taste
? Parmesan cheese for serving (optional)
list end
INSTRUCTIONS:
list of 6 items
1. Cook the pasta: Bring a large pot of salted water to a boil. Add the linguine and cook according to package instructions until al dente. Drain and set
aside, reserving 1/2 cup of the pasta water.
2. Prepare the sauce: While the pasta is cooking, heat the olive oil in a large skillet over medium heat. Add the minced garlic and red pepper flakes (if
using) and sauté until fragrant, about 1-2 minutes. Be careful not to burn the garlic.
3. Simmer with wine: Add the white wine and reserved clam juice to the skillet. Bring to a boil and let it simmer for about 5 minutes, allowing the alcohol
to cook off and the flavors to meld.
4. Add the clams: Stir in the drained clams and cook for another 2-3 minutes, just until the clams are heated through. Season with salt, pepper, and lemon
juice to taste.
5. Combine with pasta: Add the cooked linguine to the skillet and toss everything together. If the sauce is too dry, add some of the reserved pasta water
until you reach your desired consistency.
6. Serve: Garnish with fresh parsley and a squeeze of extra lemon juice if desired. Sprinkle with Parmesan cheese if you like. Serve immediately and enjoy!
list end
|
Casserole: Johnny Marzetti (marketgrow.com)
Johnny Marzetti is a classic American casserole that brings together ground beef, tender pasta, and a flavorful tomato sauce, all topped with melted cheese. This hearty dish has its roots in the Midwest, particularly Ohio, where it became a beloved comfort food in the early 20th century. Named after the brother of a Columbus restaurateur, Johnny Marzetti is perfect for family dinner, potlucks or any occasion where you want to serve something warm, filling and utterly satisfying. The combination of savory beef, tangy tomato sauce, and gooey cheese makes this casserole an instant crowd-pleaser, and it’s even better as leftovers the next day.
INGREDIENTS:
list of 15 items
? 1 lb ground beef
? 1 medium onion, chopped
? 1 green bell pepper, chopped
? 2 cloves garlic, minced
? 1 can (14.5 oz) diced tomatoes
? 1 can (8 oz) tomato sauce
? 1 can (6 oz) tomato paste
? 1 teaspoon dried oregano
? 1 teaspoon dried basil
? 1/2 teaspoon sugar
? Salt and pepper, to taste
? 8 oz elbow macaroni or other small pasta
? 2 cups shredded cheddar cheese
? 1/2 cup shredded mozzarella cheese
? Fresh parsley, chopped (for garnish, optional)
list end
INSTRUCTIONS:
list of 8 items
1. Cook the Pasta: Bring a large pot of salted water to a boil. Add the pasta and cook according to the package instructions until al dente. Drain and
set aside.
2. Brown the Beef: In a large skillet, cook the ground beef over medium heat until browned, breaking it up with a spoon as it cooks. Drain any excess fat.
3. Sauté the Vegetables: Add the chopped onion, green bell pepper, and minced garlic to the skillet with the beef. Cook for 5-7 minutes, or until the vegetables
are softened.
4. Add the Tomatoes and Seasoning: Stir in the diced tomatoes, tomato sauce, tomato paste, oregano, basil, sugar, salt, and pepper. Simmer the mixture
for 10-15 minutes, allowing the flavors to meld together.
5. Combine with Pasta: Preheat your oven to 350°F (175°C). In a large mixing bowl, combine the cooked pasta with the meat sauce, stirring until well coated.
6. Assemble the Casserole: Transfer the pasta and sauce mixture to a greased 9×13-inch baking dish. Sprinkle the shredded cheddar cheese evenly over the
top, followed by the mozzarella cheese.
7. Bake: Place the baking dish in the preheated oven and bake for 25-30 minutes, or until the cheese is melted and bubbly.
8. Serve: Remove the casserole from the oven and let it cool slightly before serving. Garnish with chopped fresh parsley if desired, and enjoy this warm,
comforting dish.
list end
Johnny Marzetti is a timeless casserole that’s sure to become a favorite in your home, offering a delicious and comforting meal that’s perfect for any
night of the week.
|
Dessert from the Middle East, basbousa (marketgrow.com)
Basbousa is a traditional Middle Eastern semolina cake that’s soaked in a sweet, fragrant syrup, creating a delightfully moist and tender dessert. This beloved treat is often flavored with coconut, rose water, or orange blossom water, giving it a unique and aromatic flavor profile. Topped with almonds and baked to golden perfection, basbousa is both simple to make and incredibly satisfying. It’s a perfect dessert to accompany tea or coffee and is often enjoyed during special occasions and celebrations. The combination of textures and the syrup-soaked goodness make each bite a delectable experience.
Ingredients:
list of 8 items
? 1 ? cups semolina
? ? cup sugar
? ? cup plain yogurt
? ? cup unsweetened shredded coconut
? ? cup melted butter
? 1 teaspoon baking powder
? 1 teaspoon vanilla extract
? ? cup almonds (whole or slivered) for topping
list end
For the Syrup:
list of 4 items
? 1 cup sugar
? 1 cup water
? 1 tablespoon lemon juice
? 1 teaspoon rose water or orange blossom water (optional)
list end
Instructions:
list of 7 items
1. Preheat Oven: Preheat your oven to 350°F (175°C). Grease a 9-inch square or round baking dish.
2. Mix the Batter: In a large bowl, combine the semolina, sugar, yogurt, shredded coconut, melted butter, baking powder, and vanilla extract. Mix until
well combined and the batter is smooth.
3. Prepare the Cake: Pour the batter into the greased baking dish and spread it out evenly. Score the top of the batter with a knife into diamond or square
shapes. Place an almond in the center of each piece.
4. Bake: Bake in the preheated oven for 30-35 minutes, or until the cake is golden brown and a toothpick inserted into the center comes out clean.
5. Make the Syrup: While the cake is baking, prepare the syrup. In a small saucepan, combine the sugar, water, and lemon juice. Bring to a boil, then reduce
the heat and simmer for about 10 minutes until slightly thickened. Remove from heat and stir in the rose water or orange blossom water if using.
6. Soak the Cake: As soon as the cake comes out of the oven, pour the hot syrup evenly over the entire cake. The syrup will soak into the cake, making
it moist and flavorful. Let the cake cool completely in the pan.
7. Serve: Once cooled, cut the basbousa along the scored lines and serve.
list end
Enjoy your Basbousa with a cup of tea or coffee for a delightful and sweet treat!
|
Red Velvet Cupcakes with Cream Cheese Frosting, from marketgrow.com
Red velvet cupcakes are a classic treat, beloved for their soft, velvety texture and vibrant red color. With a hint of cocoa and a subtle tang from buttermilk, these cupcakes strike the perfect balance between rich and light. Topped with a smooth and creamy cream cheese frosting, they offer a delightful contrast in flavor and texture. Whether you’re baking them for a special occasion or simply indulging a sweet craving, these cupcakes are sure to impress with their elegance and taste.
INGREDIENTS:
FOR THE CUPCAKES:
list of 11 items
? 1 ? cups all-purpose flour
? 1 tbsp unsweetened cocoa powder
? ? tsp baking soda
? ? tsp salt
? ? cup unsalted butter, softened
? ? cup granulated sugar
? 1 large egg
? 1 tsp vanilla extract
? ? cup buttermilk
? 1 tbsp red food coloring
? 1 tsp white vinegar
list end
FOR THE CREAM CHEESE FROSTING:
list of 4 items
? 8 oz cream cheese, softened
? ? cup unsalted butter, softened
? 2 cups powdered sugar
? 1 tsp vanilla extract
list end
INSTRUCTIONS:
list of 9 items
1. Preheat Oven: Preheat your oven to 350°F (175°C) and line a muffin tin with cupcake liners.
2. Mix Dry Ingredients: In a medium bowl, whisk together the flour, cocoa powder, baking soda, and salt. Set aside.
3. Cream Butter and Sugar: In a large bowl, beat the butter and sugar together until light and fluffy. Add the egg and vanilla extract, beating until well
combined.
4. Add Buttermilk and Color: Mix in the buttermilk, red food coloring, and vinegar until fully incorporated.
5. Combine Wet and Dry Ingredients: Gradually add the dry ingredients to the wet ingredients, mixing just until combined. Do not overmix.
6. Bake: Divide the batter evenly among the cupcake liners, filling each about ? full. Bake for 18-20 minutes, or until a toothpick inserted into the center
comes out clean. Let the cupcakes cool completely before frosting.
7. Make the Frosting: In a large bowl, beat together the softened cream cheese and butter until smooth. Gradually add the powdered sugar, one cup at a
time, and beat until creamy. Stir in the vanilla extract.
8. Frost the Cupcakes: Once the cupcakes are completely cooled, spread or pipe the cream cheese frosting on top.
9. Serve and Enjoy: Garnish with sprinkles, if desired, and enjoy your homemade Red Velvet Cupcakes!
list end
|
Bolognais Sauce (marketgrow.com)
Bolognese sauce, a rich and hearty meat-based sauce, is a staple in Italian cuisine. Originating from Bologna, this sauce is deeply flavorful, with a slow-cooked blend of ground meat, tomato, wine and aromatic vegetables, like onion, carrot and celery. Traditionally served with pasta, this versatile sauce can elevate any dish it touches. Perfect for a cozy dinner, Bolognese sauce takes time to reach its full depth, so enjoy the process of slow-cooking as the flavors meld in a deliciously savory masterpiece.
INGREDIENTS:
list of 16 items
? 2 tbsp olive oil
? 1 large onion, finely diced
? 2 medium carrots, finely diced
? 2 celery stalks, finely diced
? 4 cloves garlic, minced
? 1 lb ground beef (or a mix of beef and pork)
? 1 cup milk (whole or 2%)
? 1 cup dry white wine or red wine
? 1 can (28 oz) crushed tomatoes
? 2 tbsp tomato paste
? 1 tsp salt
? ? tsp black pepper
? 1 tsp dried oregano
? 1 tsp dried basil
? ? tsp red pepper flakes (optional)
? Fresh basil and grated Parmesan for serving
list end
INSTRUCTIONS:
list of 7 items
1. Prepare the Vegetables: In a large skillet or pot, heat olive oil over medium heat. Add the diced onion, carrot, and celery. Sauté for about 5-7 minutes,
until vegetables soften and begin to caramelize. Add the minced garlic and cook for another minute.
2. Brown the Meat: Add the ground beef (or beef and pork mix) to the pan. Break up the meat with a spoon and cook until it is fully browned, about 8-10
minutes.
3. Add Milk: Pour in the milk and stir well. Let it simmer until the milk has mostly evaporated, leaving the meat and vegetables with a slight creamy texture.
This step helps tenderize the meat.
4. Add Wine: Pour in the wine and allow it to simmer until it’s mostly evaporated, which takes about 5 minutes. This adds depth to the sauce.
5. Combine Tomatoes and Seasonings: Stir in the crushed tomatoes, tomato paste, salt, pepper, oregano, basil, and red pepper flakes if using. Mix well.
6. Simmer: Reduce the heat to low, cover partially, and let the sauce simmer gently for 1.5 to 2 hours. Stir occasionally to prevent sticking. The sauce
will thicken, and the flavors will deepen as it cooks.
7. Serve: Serve over your favorite pasta, topped with fresh basil and a generous sprinkle of Parmesan cheese.
list end
NOTES:
list of 2 items
? For an authentic experience, serve with tagliatelle or pappardelle.
? Bolognese can also be made a day in advance, as the flavors improve with time.
list end
|
Vanilla Glaze (marketgrow.com)
Vanilla glaze is a simple yet versatile topping that adds a perfect touch of sweetness and elegance to pastries, cakes, cookies, and breads. Made with just a few basic ingredients, this glaze comes together quickly and can be drizzled, poured, or spread to add a beautiful, glossy finish to your baked goods. The hint of vanilla enhances the flavor, making it a delightful addition to everything from donuts to bundt cakes. With its smooth, pourable consistency, vanilla glaze is an easy way to elevate any dessert.
INGREDIENTS:
list of 4 items
? 1 cup powdered sugar
? 2-3 tbsp milk or heavy cream
? 1 tsp vanilla extract
? A pinch of salt (optional, to balance sweetness)
list end
INSTRUCTIONS:
list of 3 items
1. Mix the Ingredients: In a medium bowl, sift the powdered sugar to remove any lumps. Add 2 tablespoons of milk and the vanilla extract, whisking until
smooth. If the glaze is too thick, add an additional tablespoon of milk a little at a time until you reach your desired consistency.
2. Adjust for Taste: Add a pinch of salt if desired, and mix well to balance the sweetness.
3. Use Immediately: Drizzle, pour, or spread the glaze over your cooled baked goods. Allow it to set for 10-15 minutes to create a slight crust.
list end
Enjoy this easy and delicious Vanilla Glaze as a beautiful finishing touch that adds a lovely sweetness and shine to your favorite treats!
|