
Keyboard Shortcuts
Likes
- DailyRecipes
- Messages
Search
|
Wacky Chocolate Cake (marketgrow.com)
Wacky chocolate cake is a classic, Depression-era dessert that’s beloved for its simplicity and rich flavor. Unlike traditional cakes, this recipe is made without eggs, butter, or milk, making it both budget-friendly and vegan by default. The cake gets its name from its “wacky” method, where dry ingredients are mixed directly in the baking pan, creating little wells for oil, vinegar, and vanilla. Despite its humble ingredients, this chocolate cake is incredibly moist and decadent, with a deep chocolate flavor that will satisfy any sweet tooth. It’s perfect for a quick dessert when you’re low on ingredients but still want something delicious. INGREDIENTS: list of 9 items ? 1 ? cups all-purpose flour ? 1 cup granulated sugar ? 4 tablespoons unsweetened cocoa powder ? 1 teaspoon baking soda ? ? teaspoon salt ? 1 teaspoon vanilla extract ? 1 tablespoon white vinegar ? 6 tablespoons vegetable oil ? 1 cup water list end INSTRUCTIONS: list of 7 items 1. Preheat the oven to 350°F (175°C). Grease an 8×8-inch (or 9×9-inch) baking pan. 2. In the baking pan, sift together the flour, sugar, cocoa powder, baking soda, and salt. Stir to combine evenly. 3. Use a spoon to make three wells in the dry mixture—one larger well and two smaller ones. 4. In the larger well, pour the vegetable oil. In one of the smaller wells, add the white vinegar. In the remaining small well, pour the vanilla extract. 5. Pour the water over all the ingredients in the pan. Using a fork or whisk, mix everything together until smooth and fully combined. 6. Place the pan in the preheated oven and bake for 30–35 minutes, or until a toothpick inserted in the center comes out clean. 7. Let the cake cool in the pan. Dust with powdered sugar or top with your favorite frosting if desired. list end Enjoy your moist and flavorful wacky chocolate cake! |
||||||||||||||||||||||||||
|
Brownie Cake (marketgrow.com)
A brownie cake combines the rich, fudgy goodness of a brownie with the lightness of a cake, making it the ultimate dessert for chocolate lovers. This decadent treat is perfect for any occasion—whether you’re celebrating a birthday, hosting a dinner party, or just indulging in a cozy night at home. The dense and moist texture is achieved by blending classic brownie ingredients with a few cake-like elements, resulting in a dessert that has a slightly crisp edge and a soft, melt-in-your-mouth center. Serve it warm with a scoop of vanilla ice cream or drizzle it with chocolate ganache for an extra touch of indulgence. INGREDIENTS: list of 10 items ? 1 cup (226g) unsalted butter, melted ? 1 1/2 cups (300g) granulated sugar ? 1 cup (200g) brown sugar, packed ? 4 large eggs ? 1 tablespoon vanilla extract ? 1 cup (120g) all-purpose flour ? 3/4 cup (75g) cocoa powder (unsweetened) ? 1 teaspoon baking powder ? 1/2 teaspoon salt ? 1 cup (180g) semi-sweet chocolate chips (optional) list end FOR CHOCOLATE GANACHE (OPTIONAL): list of 2 items ? 1 cup (240ml) heavy cream ? 8 oz (225g) semi-sweet chocolate, chopped list end INSTRUCTIONS: list of 8 items 1. Preheat and Prepare: Preheat your oven to 350°F (175°C). Grease and flour a 9-inch round cake pan (or line it with parchment paper) to ensure easy removal. 2. Make the Brownie Cake Batter: In a large mixing bowl, whisk together the melted butter, granulated sugar, and brown sugar until well combined. Add the eggs one at a time, mixing well after each addition. Stir in the vanilla extract. 3. Combine Dry Ingredients: In a separate bowl, sift together the flour, cocoa powder, baking powder, and salt. Gradually fold the dry ingredients into the wet ingredients, mixing until just combined. Be careful not to overmix to maintain a tender texture. 4. Add Chocolate Chips: If using, gently fold in the chocolate chips until evenly distributed. 5. Bake: Pour the batter into the prepared cake pan and smooth the top. Bake for 35-40 minutes, or until a toothpick inserted in the center comes out with a few moist crumbs. The cake should be slightly underbaked in the center for a fudgy texture. 6. Cool: Allow the Brownie Cake to cool in the pan for 10 minutes before transferring it to a wire rack to cool completely. 7. Prepare the Ganache (Optional): In a small saucepan, heat the heavy cream until it just begins to simmer. Remove from heat and add the chopped chocolate, stirring until smooth and glossy. Let the ganache cool slightly before pouring it over the cooled Brownie Cake. 8. Serve: Slice and serve your Brownie Cake warm or at room temperature, with an extra drizzle of ganache or a scoop of ice cream on the side. list end Enjoy this decadent dessert that’s sure to satisfy your deepest chocolate cravings! |
||||||||||||||||||||||||||
|
Flatbread from Malaysia: Roti Canai, from marketgrow.com
Roti canai is a beloved Malaysian flatbread known for its flaky texture and buttery flavor, perfect for dipping into curries. This dish involves a dough made from flour, water, and ghee (clarified butter), which is extensively kneaded, oiled, and allowed to rest. The magic of Roti Canai comes from the technique of stretching and flipping the dough to create thin layers before folding it into a round shape and grilling to crispy perfection. This bread is both a versatile staple in Malaysian cuisine and a delightful treat for any meal. INGREDIENTS: list of 7 items ? 3 cups all-purpose flour ? 1 teaspoon salt ? 1 tablespoon sugar ? 1 cup water ? 2 tablespoons condensed milk ? 1/2 cup ghee (clarified butter) ? Additional ghee for cooking list end INSTRUCTIONS: list of 5 items 1. Dough preparation: Mix flour, salt, and sugar. Gradually add water and condensed milk to form a dough. Knead until smooth. 2. Rest the dough: Coat dough balls with ghee, cover, and let rest for several hours. 3. Shape the roti: Flatten a ball, stretch it thinly, fold into a round, and flatten again. 4. Cook the roti: Heat a pan, add ghee, and cook each roti until golden and crispy. 5. Serve: Enjoy with curry or dal for dipping. list end Roti Canai offers a delightful culinary experience, serving as a testament to the art of Malaysian cooking with its rich flavors and textures. |
||||||||||||||||||||||||||
|
Hashbrown Patty Casserole, from cookingcuriosity.com
This Hashbrown patty casserole is a comforting and hearty dish that’s perfect for breakfast, brunch, or even dinner. Combining crispy hash brown patties with a rich and creamy sauce, topped with melted cheese and savory sausage, this casserole is a crowd-pleaser that’s easy to make and even easier to enjoy. The layers of hash browns, eggs, and cheese create a delightful texture contrast, while the sausage and spices add a burst of flavor. It’s the ultimate comfort food that you can prepare ahead of time, making it ideal for family gatherings or meal prepping for the week. INGREDIENTS: list of 12 items ? 8 frozen hash brown patties ? 1 pound breakfast sausage (or ground sausage of choice) ? 1 small onion, finely chopped ? 1 bell pepper, chopped ? 1 ? cups shredded cheddar cheese ? 6 large eggs ? 1 cup milk ? ? teaspoon garlic powder ? ? teaspoon onion powder ? ? teaspoon paprika ? Salt and pepper to taste ? 2 tablespoons chopped green onions (optional, for garnish) list end INSTRUCTIONS: list of 9 items 1. Preheat the Oven: Preheat your oven to 375°F (190°C). Grease a 9×13-inch baking dish. 2. Cook the Sausage: In a large skillet over medium heat, cook the sausage until it is browned and crumbled. Add the chopped onion and bell pepper, and sauté until the vegetables are soft, about 5 minutes. Drain any excess fat. 3. Layer the Hash Browns: Arrange the frozen hash brown patties in a single layer at the bottom of the prepared baking dish. 4. Add Sausage and Vegetables: Evenly spread the cooked sausage and vegetable mixture over the hash brown patties. 5. Prepare the Egg Mixture: In a large bowl, whisk together the eggs, milk, garlic powder, onion powder, paprika, salt, and pepper. 6. Pour the Egg Mixture: Pour the egg mixture over the sausage and vegetables in the baking dish. Make sure the mixture is evenly distributed. 7. Add Cheese: Sprinkle the shredded cheddar cheese evenly over the top of the casserole. 8. Bake: Place the casserole in the preheated oven and bake for 35-40 minutes, or until the eggs are set and the cheese is melted and bubbly. 9. Serve: Remove the casserole from the oven and let it cool for a few minutes. Garnish with chopped green onions, if desired, and serve warm. list end Enjoy your delicious Hash Brown Patty Casserole! |
||||||||||||||||||||||||||
|
Copycat Olive Garden Bread Sticks, from cookingcuriosity.com
These homemade Olive Garden-style bread sticks are soft, fluffy and perfectly seasoned with garlic and buttery goodness, just like the ones you love from the restaurant. They are the perfect complement to any meal, especially Italian-inspired dishes, like pasta or soup. Whether you’re making them for family dinner or serving them at a gathering, these bread sticks will be hits with everyone. The secret to their irresistible flavor lies in the combination of melted butter, garlic powder and a sprinkling of salt brushed on top after baking. Best of all, they’re easy to make from scratch, with just a few simple ingredients. INGREDIENTS: list of 9 items ? 1 1/2 cups warm water (110°F) ? 2 1/4 tsp active dry yeast (1 packet) ? 2 tbsp granulated sugar ? 4 cups all-purpose flour ? 2 tbsp unsalted butter, softened ? 1 3/4 tsp salt ? 3 tbsp unsalted butter, melted (for brushing) ? 1/2 tsp garlic powder ? 1/4 tsp salt (for topping) list end INSTRUCTIONS: list of 8 items 1. Prepare the dough: In a small bowl, combine warm water, yeast, and sugar. Stir gently and let it sit for 5-10 minutes until it becomes frothy, which indicates that the yeast is active. 2. Mix the dough: In a large mixing bowl, add the flour, softened butter, and salt. Pour in the yeast mixture and mix with a wooden spoon or dough hook until a soft dough forms. If using a stand mixer, knead the dough on medium speed for 5-7 minutes, or knead by hand for 8-10 minutes, until the dough is smooth and elastic. 3. First rise: Place the dough in a lightly greased bowl, cover with a clean kitchen towel or plastic wrap, and let it rise in a warm place for about 1 hour, or until it doubles in size. 4. Shape the breadsticks: After the dough has risen, punch it down and divide it into 12 equal pieces. Roll each piece into a 7-8 inch long breadstick and place them on a parchment-lined baking sheet, spaced about 1 inch apart. 5. Second rise: Cover the breadsticks loosely with a towel and let them rise for an additional 15-20 minutes while preheating the oven to 400°F (200°C). 6. Bake: Once the breadsticks have risen, bake them in the preheated oven for 12-15 minutes, or until they are golden brown on top. 7. Brush with butter: While the breadsticks are baking, melt the 3 tablespoons of butter and mix in the garlic powder and salt. As soon as the breadsticks come out of the oven, brush them generously with the garlic butter mixture. 8. Serve: Enjoy these delicious breadsticks warm, paired with your favorite dipping sauce or alongside your main course. list end These bread sticks are best enjoyed fresh out of the oven but can also be reheated for later indulgence! |
||||||||||||||||||||||||||
|
Baked Beef and Bean Chimichangas
开云体育Baked Beef and Bean ChimichangasServes:?8
Made By:
Eugene Williams Prep Time: 15 mins Cook Time: 30 mins Ingredients:
Directions:Preheat
oven to 350 degrees. --
Ginny Butterfield Cranberry Twp, Pa |
||||||||||||||||||||||||||
|
Sensational Sirloin Kabobs
开云体育I bet these could be done equally well on an indoor grill such as the George Foreman, an outside grill, or smoker.? The marinade sounds good and I also think you could swap the beef for chicken or pork.? --GinnySensational Sirloin KabobsServes:?8
After a
wild night marinating in a slightly sweet soy sauce and
lemon-lime mixture, sirloin steak chunks are skewered with
veggies and grilled. You'll want to make these again and
again! Prep Time: 15 min Cook Time: 15 min Ingredients:
Directions:In
a medium bowl, mix soy sauce, light brown sugar, distilled
white vinegar, garlic powder, seasoned salt, garlic pepper
seasoning, and lemon-lime flavored carbonated beverage.
Reserve about 1/2 cup of this marinade for basting. Place
steak in a large resealable plastic bag. Cover with the
remaining marinade, and seal. Refrigerate for 8 hours, or
overnight. Ginny Butterfield Cranberry Twp, Pa |
||||||||||||||||||||||||||
|
Ground Beef Enchiladas (marketgrow.com)
Ground beef enchiladas are flavorful and satisfying dishes featuring seasoned ground beef, melty cheese and tangy enchilada sauce, all wrapped up in soft tortillas. This easy-to-make Mexican-inspired meal is perfect for a weeknight dinner and can be customized with your favorite toppings. INGREDIENTS: For the filling: list of 9 items ? 1 lb ground beef ? 1 small onion, finely chopped ? 2 cloves garlic, minced ? 1 tablespoon chili powder ? 1 teaspoon cumin ? 1/2 teaspoon paprika ? Salt and pepper, to taste ? 1 can (4 oz) diced green chilies (optional) ? 1 cup shredded cheddar or Mexican cheese blend Mexican cheese blend list end For the enchiladas: list of 5 items ? 10-12 small flour or corn tortillas ? 2 cups enchilada sauce (store-bought or homemade) ? 1 1/2 cups shredded cheese (cheddar, Monterey Jack, or Mexican blend) ? Fresh cilantro, chopped (for garnish) ? Sliced green onions or jalape?os (optional) list end INSTRUCTIONS: list of 6 items 1. Preheat the oven: list of 1 items nesting level 1 ? Preheat your oven to 375°F (190°C). Grease a 9×13-inch baking dish. list end nesting level 1 2. Cook the beef: list of 2 items nesting level 1 ? In a large skillet, cook the ground beef over medium heat until browned, breaking it up as it cooks. Add the chopped onion and garlic, and cook for another 3-4 minutes until the onion is soft and translucent. ? Stir in the chili powder, cumin, paprika, salt, and pepper. Add the diced green chilies (if using) and cook for 1-2 more minutes. Remove from heat and stir in 1 cup of shredded cheese. Set aside. list end nesting level 1 3. Assemble the enchiladas: list of 2 items nesting level 1 ? Spread a thin layer of enchilada sauce on the bottom of the greased baking dish. ? Warm the tortillas slightly (to make them more pliable) and place about 2-3 tablespoons of the beef mixture in the center of each tortilla. Roll them up tightly and place them seam-side down in the baking dish. list end nesting level 1 4. Top with sauce and cheese: list of 1 items nesting level 1 ? Pour the remaining enchilada sauce over the rolled tortillas, spreading it evenly. Sprinkle the remaining 1 1/2 cups of shredded cheese over the top. list end nesting level 1 5. Bake: list of 1 items nesting level 1 ? Bake the enchiladas in the preheated oven for 20-25 minutes, or until the cheese is melted and bubbly. list end nesting level 1 6. Garnish and serve: list of 1 items nesting level 1 ? Remove the enchiladas from the oven and let them cool for a few minutes. Garnish with fresh cilantro, sliced green onions, or jalape?os, if desired. Serve with sour cream, guacamole, or salsa on the side. list end nesting level 1 list end These Ground Beef Enchiladas are flavorful, cheesy, and easy to make, making them the perfect family-friendly meal! |
||||||||||||||||||||||||||
|
Layered Salad (marketgrow.com)
Layered salad is a visually stunning and delicious dish that’s perfect for potlucks, picnics or family gatherings. This salad is composed of layers of crisp lettuce, colorful vegetables, creamy dressing, cheese and crunchy toppings, like bacon and hard-boiled egg. Each layer adds different texture and flavor, creating a balanced and refreshing salad that’s as delightful to eat as it is to look at. The best part? It’s easy to customize with your favorite veggies, and it can be made ahead of time, making it a go-to dish for entertaining. INGREDIENTS list of 13 items ? 4 cups iceberg or romaine lettuce, chopped ? 1 cup cherry tomatoes, halved ? 1 cup cucumber, diced ? 1/2 cup red onion, thinly sliced ? 1 cup frozen peas, thawed ? 1 cup shredded cheddar cheese ? 4 hard-boiled eggs, sliced ? 6 slices bacon, cooked and crumbled ? 1/2 cup mayonnaise ? 1/2 cup sour cream ? 1 tbsp Dijon mustard ? Salt and pepper to taste ? 2 tbsp fresh chives, chopped (optional for garnish) list end INSTRUCTIONS list of 5 items 1. Prepare the dressing: In a small bowl, whisk together the mayonnaise, sour cream, Dijon mustard, salt, and pepper. Set aside. 2. Layer the salad: In a large clear glass bowl or trifle dish, begin layering the salad. Start with the lettuce as the base, followed by layers of tomatoes, cucumbers, red onion, peas, and shredded cheese. 3. Add the dressing: Spread the prepared dressing evenly over the top of the salad layers. 4. Top with eggs and bacon: Arrange the sliced hard-boiled eggs on top of the dressing, followed by the crumbled bacon. Garnish with fresh chives if desired. 5. Chill and serve: Cover and refrigerate the salad for at least 1 hour before serving to allow the flavors to meld. Serve cold. list end This Layered Salad is as beautiful as it is delicious, offering a perfect combination of textures and flavors in every bite. It’s sure to be a hit at any gathering! |
||||||||||||||||||||||||||
|
Chicken Fajitas (marketgrow.com)
Chicken fajitas are classic Tex-Mex dishes that combine marinated and seared strips of chicken with vibrant, colorful bell pepper and onion. Served sizzling hot with warm tortillas and a variety of toppings, this dish is both flavorful and fun to assemble. The marinade, which typically includes lime juice, garlic and spices, infuses the chicken with a zesty kick, while the vegetables add sweet and smoky depth. Perfect for family dinner or casual gathering, chicken fajitas are customizable and sure to please everyone at the table. Pair them with guacamole, salsa and sour cream for a complete and delicious meal. INGREDIENTS FOR THE MARINADE: list of 9 items ? 1/4 cup lime juice (about 2 limes) ? 3 tablespoons olive oil ? 2 cloves garlic, minced ? 1 teaspoon ground cumin ? 1 teaspoon chili powder ? 1/2 teaspoon smoked paprika ? 1/2 teaspoon salt ? 1/4 teaspoon black pepper ? 1/4 teaspoon cayenne pepper (optional, for heat) list end FOR THE FAJITAS: list of 8 items ? 1 1/2 pounds boneless, skinless chicken breasts, sliced into thin strips ? 2 tablespoons olive oil ? 1 red bell pepper, sliced ? 1 yellow bell pepper, sliced ? 1 green bell pepper, sliced ? 1 large onion, sliced ? 8-10 flour tortillas ? Optional toppings: sour cream, guacamole, salsa, shredded cheese, chopped cilantro list end INSTRUCTIONS list of 6 items 1. Marinate the Chicken: In a large bowl, whisk together the lime juice, olive oil, garlic, cumin, chili powder, smoked paprika, salt, black pepper, and cayenne pepper. Add the chicken strips to the marinade and toss to coat. Cover and refrigerate for at least 30 minutes or up to 4 hours. 2. Cook the Chicken: Heat a large skillet or cast-iron pan over medium-high heat. Add 1 tablespoon of olive oil. Remove the chicken from the marinade, letting the excess drip off, and cook in the skillet until browned and cooked through, about 5-7 minutes. Transfer the chicken to a plate and cover to keep warm. 3. Sauté the Vegetables: In the same skillet, add the remaining 1 tablespoon of olive oil. Add the sliced bell peppers and onion, and sauté for 5-7 minutes until the vegetables are tender and slightly charred. 4. Combine and Heat: Return the chicken to the skillet with the vegetables. Toss everything together and cook for an additional 2-3 minutes until heated through. 5. Warm the Tortillas: Warm the flour tortillas in a dry skillet over medium heat or in the microwave until pliable. 6. Assemble the Fajitas: Serve the chicken and vegetable mixture in the warm tortillas. Top with your choice of sour cream, guacamole, salsa, shredded cheese, and chopped cilantro. list end Chicken fajitas are a vibrant and flavorful dish that’s perfect for any occasion, offering a delicious blend of textures and tastes that everyone will enjoy. Customize with your favorite toppings for a personalized meal that’s as fun to make as it is to eat! |
||||||||||||||||||||||||||
|
Southwest Turkey Soup, from marketgrow.com
Southwest turkey soup is a hearty and flavorful dish that transforms leftover turkey into a vibrant, comforting meal. Infused with the bold flavor of the Southwest, this soup combines tender turkey with black beans, corn, tomato and a medley of spices, all simmered in savory broth. The addition of fresh lime juice, cilantro and a touch of heat from chili powder and cumin gives this soup a zesty kick, making it both warming and satisfying. Perfect for a cozy dinner or tasty way to use up holiday leftovers, Southwest turkey soup is easy to make and sure to please with its rich, layered flavor. INGREDIENTS: list of 17 items ? 2 tablespoons olive oil ? 1 onion, finely chopped ? 3 cloves garlic, minced ? 1 red bell pepper, chopped ? 1 green bell pepper, chopped ? 1 jalape?o pepper, seeded and minced (optional for extra heat) ? 1 teaspoon ground cumin ? 1 teaspoon chili powder ? 1/2 teaspoon smoked paprika ? 6 cups turkey or chicken broth ? 2 cups cooked turkey, shredded or chopped ? 1 can (14.5 ounces) diced tomatoes with green chilies ? 1 can (15 ounces) black beans, drained and rinsed ? 1 cup frozen or canned corn kernels ? 1/4 cup fresh cilantro, chopped ? Juice of 1 lime ? Salt and freshly ground black pepper to taste list end For 开云体育: list of 5 items ? Sliced avocado ? Tortilla strips or chips ? Shredded cheese ? Sour cream ? Additional cilantro and lime wedges list end INSTRUCTIONS: list of 6 items 1. Sauté the Vegetables: list of 1 items nesting level 1 ? In a large pot, heat the olive oil over medium heat. Add the chopped onion, garlic, red bell pepper, green bell pepper, and jalape?o (if using). Sauté until the vegetables are softened, about 5-7 minutes. list end nesting level 1 2. Add the Spices: list of 1 items nesting level 1 ? Stir in the ground cumin, chili powder, and smoked paprika. Cook for another 1-2 minutes to toast the spices and enhance their flavors. list end nesting level 1 3. Add the Broth and Turkey: list of 1 items nesting level 1 ? Pour in the turkey or chicken broth and add the shredded or chopped turkey. Bring the soup to a simmer. list end nesting level 1 4. Add the Beans, Tomatoes, and Corn: list of 1 items nesting level 1 ? Stir in the diced tomatoes with green chilies, black beans, and corn. Continue to simmer the soup for 15-20 minutes, allowing the flavors to meld together. list end nesting level 1 5. Finish the Soup: list of 1 items nesting level 1 ? Stir in the fresh cilantro and lime juice. Season with salt and freshly ground black pepper to taste. list end nesting level 1 6. Serve: list of 1 items nesting level 1 ? Ladle the soup into bowls and top with sliced avocado, tortilla strips, shredded cheese, and a dollop of sour cream. Garnish with additional cilantro and serve with lime wedges on the side. list end nesting level 1 list end Southwest Turkey Soup is a deliciously zesty and comforting dish that’s perfect for making the most of leftover turkey. With its rich, bold flavors and satisfying ingredients, this soup is sure to become a family favorite. |
||||||||||||||||||||||||||
|
Coleslaw with Poppyseed Dressing, from marketgrow.com
Coleslaw with poppyseed dressing is a refreshing and vibrant side dish that adds delightful crunch and a burst of flavor to any meal. This coleslaw combines crisp cabbage, carrot and other fresh vegetables with sweet and tangy poppyseed dressing, creating a perfect balance of texture and taste. The dressing, made with a hint of honey and apple cider vinegar, pairs beautifully with the vegetables, making this dish a great complement to grilled meat, sandwiches or summer barbecues. Easy to prepare and always a crowd pleaser, this coleslaw is a versatile and delicious addition to your recipe collection. INGREDIENTS: For the Coleslaw: list of 6 items ? 4 cups shredded green cabbage ? 2 cups shredded red cabbage ? 1 cup shredded carrots ? 1/2 cup thinly sliced red onion ? 1/2 cup sliced almonds (optional) ? 1/2 cup dried cranberries (optional) list end For the Poppy Seed Dressing: list of 6 items ? 1/2 cup mayonnaise ? 2 tablespoons apple cider vinegar ? 2 tablespoons honey ? 1 tablespoon poppy seeds ? 1/2 teaspoon Dijon mustard ? Salt and freshly ground black pepper, to taste list end INSTRUCTIONS: list of 4 items 1. Prepare the Coleslaw: list of 1 items nesting level 1 ? In a large mixing bowl, combine the shredded green cabbage, red cabbage, carrots, and red onion. If using, add the sliced almonds and dried cranberries for extra texture and flavor. list end nesting level 1 2. Make the Poppy Seed Dressing: list of 2 items nesting level 1 ? In a small bowl, whisk together the mayonnaise, apple cider vinegar, honey, poppy seeds, and Dijon mustard until smooth and well combined. ? Season the dressing with salt and freshly ground black pepper to taste. list end nesting level 1 3. Combine and Toss: list of 2 items nesting level 1 ? Pour the poppy seed dressing over the coleslaw mixture. ? Toss everything together until the vegetables are evenly coated with the dressing. list end nesting level 1 4. Chill and Serve: list of 2 items nesting level 1 ? Cover the coleslaw and refrigerate for at least 30 minutes to allow the flavors to meld. ? Serve the coleslaw chilled, and enjoy as a side dish with your favorite meals. list end nesting level 1 list end Enjoy your crisp and flavorful Coleslaw with Poppy Seed Dressing, a perfect addition to any gathering or family dinner! |
||||||||||||||||||||||||||
|
Walnut Snowball Cookies, from marketgrow.com
Walnut snowball cookies are timeless treats specially popular around the holidays. These delicate, buttery cookies have melt-in-your-mouth texture, thanks to a combination of finely ground walnut and rich butter. Rolled in powdered sugar, they resemble little snowballs and add a festive look to any dessert spread. Perfect with a cup of tea or coffee, these cookies are easy to make, but their light, nutty flavor and satisfying sweetness make them irresistible. INGREDIENTS: list of 6 items ? 1 cup (2 sticks) unsalted butter, softened ? 1/2 cup powdered sugar, plus more for rolling ? 1 teaspoon vanilla extract ? 2 cups all-purpose flour ? 1 cup walnuts, finely chopped or ground ? 1/4 teaspoon salt list end INSTRUCTIONS: list of 8 items 1. Preheat the oven to 350°F (175°C). Line a baking sheet with parchment paper. 2. In a large mixing bowl, cream the softened butter and 1/2 cup powdered sugar together until light and fluffy. 3. Mix in the vanilla extract, then gradually add the flour and salt, stirring until just combined. 4. Fold in the walnuts until evenly distributed throughout the dough. 5. Scoop out small portions of the dough (about 1 tablespoon each) and roll into balls. Place the dough balls on the prepared baking sheet, about 1 inch apart. 6. Bake for 12-15 minutes, or until the bottoms are lightly golden. Let the cookies cool on the baking sheet for about 5 minutes. 7. While still warm, roll each cookie in powdered sugar. Allow them to cool completely, then roll them in powdered sugar once more for a sweet, snowy finish. 8. Store in an airtight container at room temperature for up to a week. Enjoy! list end |
||||||||||||||||||||||||||
|
Bourbon Caramel Sauce
Bourbon Caramel SauceCourse:?Dessert Cuisine:?American Keyword:?bourbon caramel sauce, caramel sauce Prep Time:?5minutes?minutes Cook Time:?15minutes?minutes Total Time:?20minutes?minutes 开云体育s:?1?cup ?Calories:?158kcal ?Author:?Julie Kotzbach Bourbon Caramel Sauce is a rich, easy-to-make topping with sweet, salty, and smoky flavors that's perfect for all of your favorite desserts! EquipmentIngredients
Instructions
Source: Bread Booze Bacon ~~~~~ Rhonda in MO |
||||||||||||||||||||||||||
|
Whole Berry Cranberry Sauce
Yield: 1 1/2 cups Whole Berry Cranberry Sauce Recipe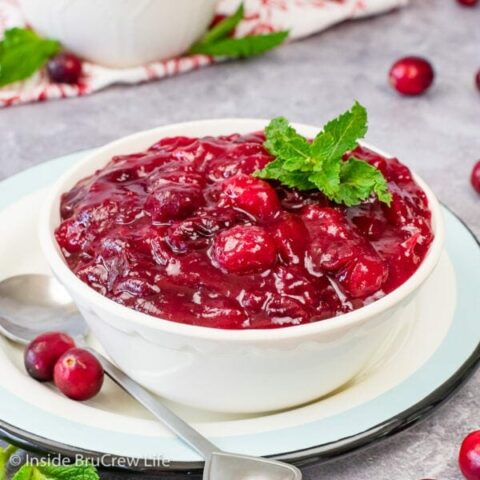 You are going to love this easy recipe for?Whole Berry Cranberry Sauce. It comes together in minutes and is an easy way to make your dinner taste like Thanksgiving or Christmas without all the fuss. Prep Time15 minutes Total Time15 minutes Ingredients
Instructions
NotesThis can also be made without cornstarch. The berries have enough natural pectin in them to thicken the filling. Using cornstarch just yields a much smoother and silkier texture. Nutrition Information:?Yield:?6?开云体育 Size:?1Amount Per 开云体育:?Calories:?106Total Fat:?0gSaturated Fat:?0gTrans Fat:?0gUnsaturated Fat:?0gCholesterol:?0mgSodium:?24mgCarbohydrates:?27gFiber:?2gSugar:?21gProtein:?0g Source: Inside Bru Crew Life ~~~~~ Rhonda in MO |
||||||||||||||||||||||||||
|
Homemade Pizza Sauce with Tomato Sauce
Yield: 2 cups Homemade Pizza Sauce with Tomato Sauce Learn how to make?Pizza Sauce with Tomato Sauce?in 5 minutes using 7 simple ingredients. Years ago, my husband's family used this homemade pizza sauce recipe in their restaurant, Bru Brother's Pizza. It's a family favorite, and you won't need another recipe after trying this no-cook version. Prep Time5 minutes Total Time5 minutes Ingredients
Instructions
Nutrition Information:?Yield:?32?开云体育 Size:?1Amount Per 开云体育:?Calories:?19Total Fat:?0gSaturated Fat:?0gTrans Fat:?0gUnsaturated Fat:?0gCholesterol:?0mgSodium:?77mgCarbohydrates:?5gFiber:?1gSugar:?3gProtein:?1g Source: Inside Bru Crew Life ~~~~~ Rhonda in MO |
||||||||||||||||||||||||||
|
Puff Pastry Sausage Rolls (marketgrow.com)
Puff pastry sausage rolls are classic favorites, combining flaky, buttery pastry with savory, flavorful sausage filling. Perfect for parties, snacks or a casual lunch, these rolls are versatile and always hits. The golden, crisp exterior contrasts beautifully to the juicy, seasoned sausage, making every bite irresistible. Quick and easy to make with store-bought puff pastry, these rolls are the ultimate crowd pleasers that can be customized with herbs, spices or even cheese to suit your taste. INGREDIENTS list of 9 items ? 1 lb (450 g) ground sausage (pork, chicken, or turkey) ? 1/4 cup breadcrumbs ? 1 egg, lightly beaten (plus 1 egg for egg wash) ? 2 tbsp fresh parsley, finely chopped ? 1 tsp garlic powder ? 1/2 tsp paprika ? 1/2 tsp black pepper ? 1 package puff pastry (2 sheets), thawed ? Sesame seeds or poppy seeds (optional, for garnish) list end INSTRUCTIONS list of 6 items 1. Prepare the Filling: list of 1 items nesting level 1 ? In a mixing bowl, combine the ground sausage, breadcrumbs, beaten egg, parsley, garlic powder, paprika, and black pepper. Mix until well combined. list end nesting level 1 2. Roll Out the Pastry: list of 1 items nesting level 1 ? Preheat your oven to 400°F (200°C). On a lightly floured surface, roll out the puff pastry sheets slightly to smooth the edges. Cut each sheet in half lengthwise, creating four long strips. list end nesting level 1 3. Assemble the Rolls: list of 2 items nesting level 1 ? Divide the sausage mixture into four equal portions. Shape each portion into a long log and place it down the center of each puff pastry strip. ? Fold one side of the pastry over the sausage, then roll tightly to enclose the filling. Press the seam gently to seal. list end nesting level 1 4. Cut and Glaze: list of 2 items nesting level 1 ? Cut each roll into smaller pieces, about 2-3 inches long, depending on your preference. Place the rolls seam-side down on a parchment-lined baking sheet. ? Brush the tops with the remaining beaten egg and sprinkle with sesame or poppy seeds if desired. list end nesting level 1 5. Bake: list of 1 items nesting level 1 ? Bake in the preheated oven for 20-25 minutes, or until the pastry is golden brown and puffed, and the sausage is cooked through. list end nesting level 1 6. Serve: list of 1 items nesting level 1 ? Allow the sausage rolls to cool slightly before serving. They can be enjoyed warm or at room temperature. list end nesting level 1 list end |
||||||||||||||||||||||||||
|
Bacon-avocado Deviled Eggs (marketgrow.com)
Bacon-avocado deviled eggs are deliciously modern twists on classic appetizers, combining the creamy richness of avocado with the savory crunch of crispy bacon. This recipe elevates traditional deviled eggs by incorporating mashed avocado in the yolk mixture, resulting in smooth and flavorful filling that’s both healthy and satisfying. Topped with crumbled bacon and a sprinkle of paprika, these deviled eggs make for irresistible party snacks or delightful additions to any brunch spread. With their vibrant green hue and delicious taste, they are sure to be hits with family and friends! INGREDIENTS: list of 9 items ? 6 large eggs ? 1 ripe avocado, peeled and pitted ? 2 tablespoons mayonnaise ? 1 teaspoon Dijon mustard ? 1 teaspoon lime juice ? Salt and pepper to taste ? 3-4 slices of cooked bacon, crumbled ? Paprika, for garnish ? Chopped chives or cilantro, for garnish (optional) list end INSTRUCTIONS: list of 5 items 1. Boil the Eggs: Place the eggs in a saucepan and cover them with cold water. Bring to a boil over medium-high heat. Once boiling, cover the pot, remove it from heat, and let it sit for 10-12 minutes. Afterward, transfer the eggs to an ice bath to cool for about 5 minutes, then peel them. 2. Prepare the Filling: Cut the peeled eggs in half lengthwise and gently remove the yolks, placing them in a mixing bowl. Add the avocado, mayonnaise, Dijon mustard, lime juice, salt, and pepper to the bowl. Mash everything together until smooth and creamy. 3. Fill the Eggs: Spoon or pipe the avocado-yolk mixture back into the hollowed-out egg whites. You can use a pastry bag or a plastic bag with the corner snipped off for a more polished look. 4. Add the Bacon: Sprinkle the crumbled bacon on top of the filled eggs and dust with paprika for color. If desired, garnish with chopped chives or cilantro for a fresh touch. 5. Serve: Arrange the Bacon Avocado Deviled Eggs on a serving platter and enjoy immediately, or refrigerate for up to 2 hours before serving. These tasty bites are sure to impress at your next gathering! list end |
||||||||||||||||||||||||||
|
Beer Biscuits (marketgrow.com)
Beer biscuits are light, fluffy and flavorful with slight tang from the beer. The beer acts as a leavening agent, making these biscuits rise beautifully without the need for yeast. They’re easy to make and pair perfectly with soup, stews or even as bases for breakfast sandwiches. INGREDIENTS: list of 5 items ? 2 cups self-rising flour (or 2 cups all-purpose flour + 1 tablespoon baking powder + 1/2 teaspoon salt) ? 1 tablespoon sugar (optional for a hint of sweetness) ? 1/4 cup cold unsalted butter, cubed ? 1 cup beer (lager or light beer works well) ? 2 tablespoons melted butter (for brushing) list end INSTRUCTIONS: list of 8 items 1. Preheat the oven: Preheat your oven to 425°F (220°C). Grease a baking sheet or line it with parchment paper. 2. Mix the dry ingredients: In a large bowl, whisk together the self-rising flour and sugar (if using). If you are using all-purpose flour, whisk it with the baking powder and salt. 3. Cut in the butter: Using a pastry cutter or your fingers, cut the cold cubed butter into the flour mixture until it resembles coarse crumbs. The butter should be pea-sized. 4. Add the beer: Pour the beer into the flour mixture and stir gently until just combined. Be careful not to overmix the dough—it’s okay if it’s a bit lumpy. 5. Shape the biscuits: Turn the dough onto a floured surface and knead it gently a few times. Pat the dough to about 3/4-inch thickness and use a biscuit cutter or glass to cut out rounds. Place the biscuits on the prepared baking sheet. 6. Bake: Bake the biscuits in the preheated oven for 12-15 minutes, or until they are golden brown on top. 7. Brush with butter: As soon as the biscuits come out of the oven, brush them with melted butter for extra flavor. 8. Serve: Serve the beer biscuits warm with butter, honey, or your favorite spread. list end These beer biscuits are soft, buttery, and slightly tangy from the beer, making them the perfect complement to savory dishes or even enjoyed on their own! |
||||||||||||||||||||||||||
|
Bisquick Chicken Tenders (marketgrow.com)
Bisquick chicken tenders are quick and easy ways to enjoy crispy, homemade chicken strips without the fuss of deep-frying. Coated with a blend of Bisquick mix and flavorful seasonings, these tenders are baked to perfection, offering a crunchy exterior with juicy, tender chicken inside. This recipe is ideal for busy weeknights or as fun appetizers for parties and gatherings. Served with your favorite dipping sauces, like honey mustard, ranch or barbecue sauce, Bisquick chicken tenders are sure to be hits with both kids and adults alike. With minimal ingredients and easy preparation, this dish is a convenient and delicious addition to your meal rotation. INGREDIENTS: list of 10 items ? 1 cup Bisquick mix ? 1/2 teaspoon paprika ? 1/2 teaspoon garlic powder ? 1/2 teaspoon onion powder ? 1/2 teaspoon salt ? 1/4 teaspoon black pepper ? 1/4 cup grated Parmesan cheese (optional) ? 1/2 cup milk ? 1 1/2 pounds chicken tenders ? 2 tablespoons melted butter Bisquick mix Parmesan cheese list end INSTRUCTIONS: list of 5 items 1. Preheat the Oven: list of 1 items nesting level 1 ? Preheat your oven to 450°F (230°C). Line a baking sheet with parchment paper or lightly grease it. list end nesting level 1 2. Prepare the Coating: list of 1 items nesting level 1 ? In a shallow dish or bowl, combine the Bisquick mix, paprika, garlic powder, onion powder, salt, black pepper, and Parmesan cheese (if using). Mix well to combine. list end nesting level 1 3. Coat the Chicken Tenders: list of 1 items nesting level 1 ? Pour the milk into a separate shallow dish. Dip each chicken tender into the milk, allowing any excess to drip off, then coat the chicken in the Bisquick mixture, pressing lightly to adhere. Place the coated chicken tenders on the prepared baking sheet. list end nesting level 1 4. Bake the Chicken Tenders: list of 1 items nesting level 1 ? Drizzle the melted butter over the coated chicken tenders to help them brown and crisp. Bake in the preheated oven for 12-15 minutes, or until the chicken is cooked through and the coating is golden brown and crispy. Turn the chicken tenders halfway through the baking time for even browning. list end nesting level 1 5. Serve: list of 1 items nesting level 1 ? Remove the chicken tenders from the oven and let them cool slightly. Serve with your favorite dipping sauces. list end nesting level 1 list end Bisquick Chicken Tenders are a simple and satisfying meal that delivers all the crunch and flavor of fried chicken with the convenience of baking. Perfect for dipping and sharing, they make an excellent addition to any meal or party platter. |