
Keyboard Shortcuts
Likes
- Felderownersgroup
- Messages
Search
|
Re: Building, upgrading and servicing machines
Marty,
I can understand putting off that task! At least you have the luxury?of doing it outside. Today it was 32 and rainy here in Minneapolis. No outside work for another couple months! Do you refine with rasps and files after the grinder? Jason Holtz J. Holtz Furniture 3307 Snelling Ave. South Minneapolis, MN 55406 612 432-2765 -- Jason J. Holtz Furniture 3307 Snelling Ave. South Minneapolis, MN 55406 |
|
Re: Bill Belanger's products on Etsy
开云体育Thanks for the kind words and I’m so happy that you’re happy!!! Let me know if you need anything else. BB On Mon, Feb 27, 2023 at 14:45 PK via <pk=[email protected]> wrote: Bill, |
|
Re: Building, upgrading and servicing machines
开云体育Hi Derek: ? A couple of questions below, all with thanks for taking the time to post. There’s a lot in your post for the forum! Cheers. ?
?
?
? Thanks. ? Warm regards, Lucky ? From:
[email protected] <[email protected]> on behalf of Derek Cohen <derekcohen@...> After completing furniture building deadlines, I enjoy taking some time to clean the workshop, clean the machines, and build a tool or two. I have recently completed two bedside tables for my son and daughter-in-law,
sent them a new base for a chest of drawers (which had been damaged in move from Sydney to Canberra), and then built a new bed for my wife and myself. The latter is below ... ? |
|
Re: Cast iron table flatness issue
#k700s
Like the doors on my Fiat Spider, they wouldn't open when the car was on a lift supporting the frame.? Kind of scary.
|
|
Re: Bill Belanger's products on Etsy
Thank you On Mon, Feb 27, 2023 at 3:59?PM Bill Belanger <Bill@...> wrote:
|
|
Re: Bill Belanger's products on Etsy
开云体育Here you go Jeff.... Bill On Mon, Feb 27, 2023 at 1:40 PM Jeff via <onehpbmw=[email protected]> wrote:
|
|
Re: Bill Belanger's products on Etsy
开云体育Try this link:David Best DBestWorkshop@... https://www.flickr.com/photos/davidpbest/collections/ https://www.youtube.com/@David_Best
|
|
Re: Bill Belanger's products on Etsy
How does one find Bill's Etsy store?? ?A search on Etsy just brought up pages of bill paying ideas.? TIA On Mon, Feb 27, 2023 at 3:30?PM Bill Belanger <Bill@...> wrote:
|
|
Re: Cast iron table flatness issue
#k700s
开云体育Why deal with dips in the cast iron surface from the weight of trunion assemblies when one can just operate their machine in outer space where there is zero gravity? Benefit of this is unlimited infeed and outfeed space so theoretically one can run 1000’ material with no problem. Although I imagine at that length the machine might just ride itself along the length of the board. Kind of like those videos of people planing beams with lunchbox planers.? Food for thought.? On Feb 26, 2023, at 8:53 PM, David P. Best <dbestworkshop@...> wrote:
|
|
Re: Bill Belanger's products on Etsy
toggle quoted message
Show quoted text
On Mon, Feb 27, 2023 at 13:11 Ken Sutton via <ssutton16=[email protected]> wrote: FYI, I recently purchased a non DRO fence extension for my KF 700 from Bill's Etsy site. |
|
Bill Belanger's products on Etsy
FYI, I recently purchased a non DRO fence extension for my KF 700 from Bill's Etsy site.
Received it in just a few days packaged well and in good condition. It fit perfectly without any modifications. I highly recommend Bill to any of our group for any of his products. It is great to do business with someone who? is so professional. Thanks Bill! |
|
Re: Altendorf, The inventor of the slider
开云体育Tom do you have any pictures or videos of your mentioned set up? I’m considering making a slab flattening jig and that might offer some inspiration.? On Feb 27, 2023, at 11:02 AM, tomruth@... wrote:
|
|
Re: Building, upgrading and servicing machines
Thanks for the tips on lubing the raise/lower screw. I am experiencing the?same problem and was dreading diving into the mechanism. I am going to fix this today. Kevin On Mon, Feb 27, 2023 at 7:42 AM marty shultz <azmartys@...> wrote: Nice furniture!? I like the improvements you’re making to your tools. --
Kevin J. Wells |
|
Re: Altendorf, The inventor of the slider
Great video. Love the wooden sliders. Sorry as this is a bit off topic, but years ago before I could afford a real slider, I made a sliding table saw using a 10' aluminum channel and these linear bearings. I also used their bearings to build a 13 spindle boring machine. I wanted to share this website as others here into making metal things might find it useful. Their simple "dual vee" wheel and track systems are really pretty reasonable and durable. Tom Ruth
https://www.bwc.com/ |
|
Made some sawdust yesterday.
I’ve been putting off grinding Rocking chair. ?Woke up yesterday morning and decided to get after it. My wife took a video about halfway through. Lots of dust!

FDE9F568-B8B3-45AA-987D-DA25060CC00D.jpeg

9394823B-E703-4334-BF41-D9485B2BB68B.jpeg
FullSizeRender.MOV
FullSizeRender.MOV
|
|
Re: Building, upgrading and servicing machines
Thanks Jonathan. Make the fine adjuster! It is fantastic. It is possible to shave off smidgeons from the sides of boards being prepared as drawer fronts to precisely fit drawer cases.? The large knob locks the stop mechanism, and the small knob/screw adjust the stop in-and-out. Regards from Perth Derek |
|
Re: Building, upgrading and servicing machines
Nice work as alway Derek. Interesting to see your fine adjustment set up on the cross cut side. Does it work well? I'm thinking of doing something similar. Graphite or a soft pencil is my go to lube in situations where dust can build up. Many times I've had folk complaining that they have oiled or greased there lock and it still stiff! Kindest regards Jonathan Samways On Mon, 27 Feb 2023, 5:27 am David Kumm, <davekumm@...> wrote:
|
|
Re: Building, upgrading and servicing machines
开云体育
Beautiful bed and a reasonable number of pillows.? I hate removing pillows but my wife loves buying them.? Dave
From: [email protected] <[email protected]> on behalf of Derek Cohen <derekcohen@...>
Sent: Sunday, February 26, 2023 11:14 PM To: [email protected] <[email protected]> Subject: [FOG] Building, upgrading and servicing machines ?
After completing furniture building deadlines, I enjoy taking some time to clean the workshop, clean the machines, and build a tool or two. I have recently completed two bedside tables for my son and daughter-in-law, sent them a new base for a chest of
drawers (which had been damaged in move from Sydney to Canberra), and then built a new bed for my wife and myself. The latter is below ...
Old bed (solid Jarrah, built 25 years ago) ... 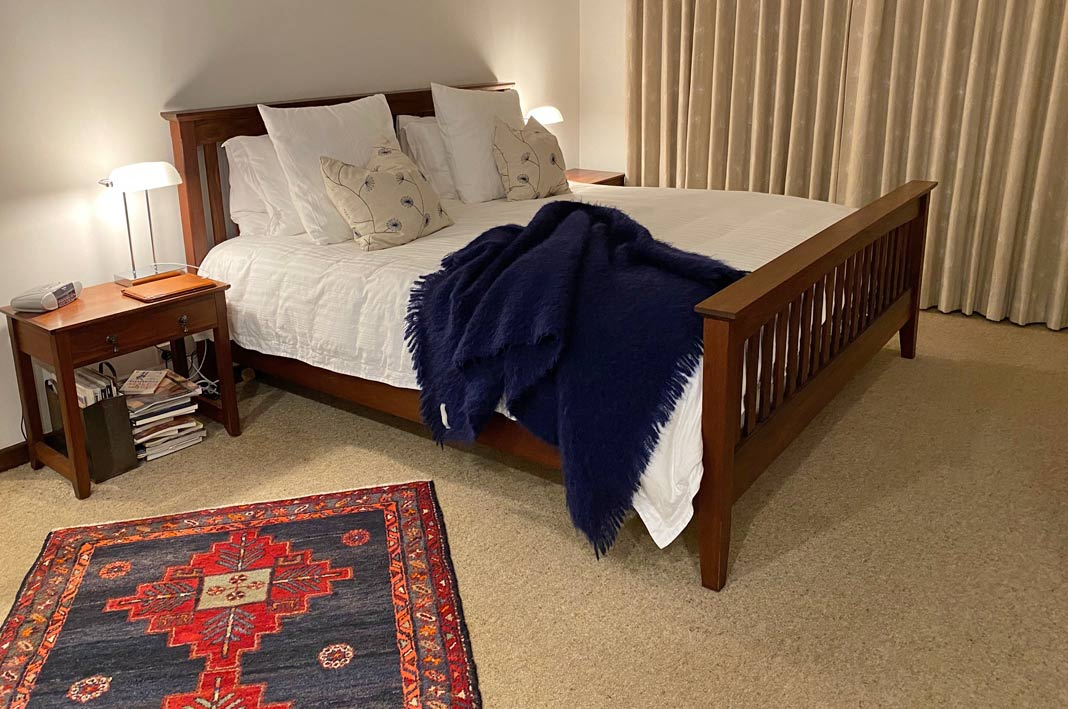 New bed .. 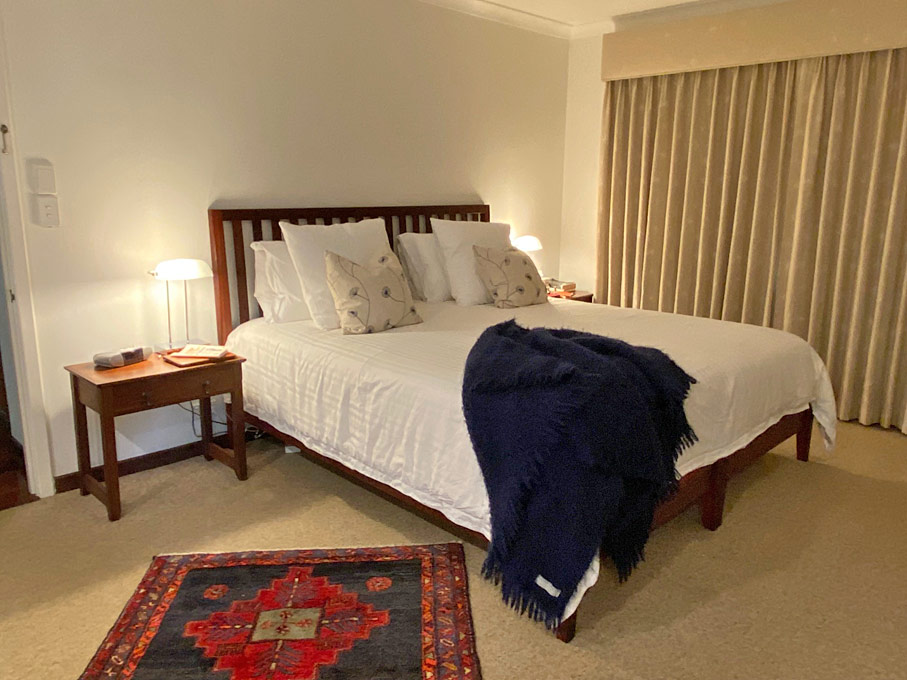 Curved head board ...  Anyway, I hope some of the following will be interesting and, better still, useful for yourself. I had purchased a never-used 20 year old Festool tracksaw, and decided to build a MFT to find out what all the fuss is about. I thought that, sawing aside, the MFT would work well for holding small parts for routing and sanding, as well as an assembly table and outfeed for the K3 slider and A3-31 jointer. Details on routing the holes here:?? The MFT has a flip up/down extension, as well as an old Record vice. The top is a 25mm thick panel ... 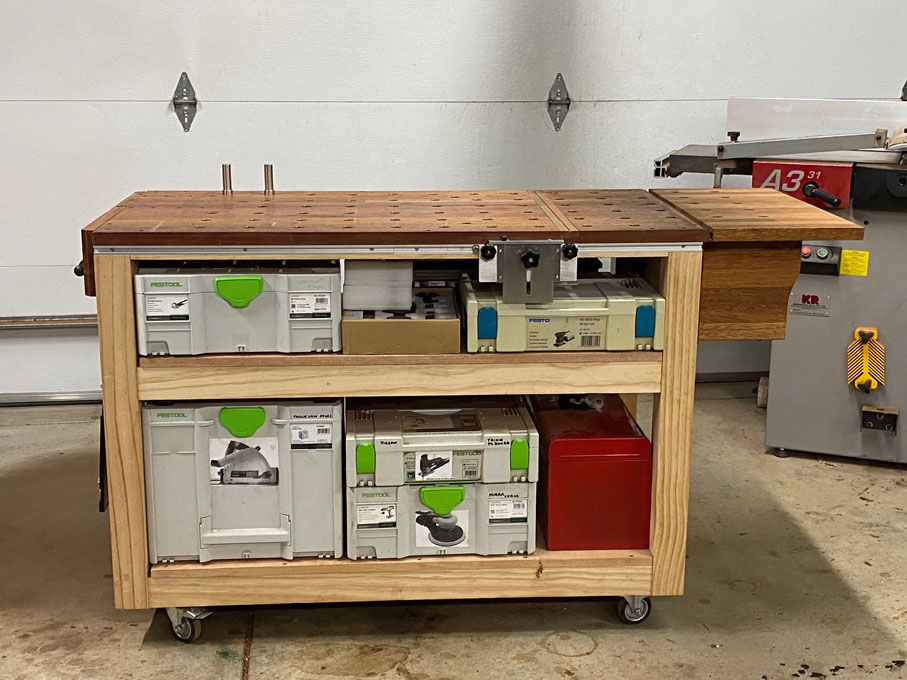 Owing to the exorbitant cost of MFT hinges for tracks in Oz, I decided to build my own in aluminium ... 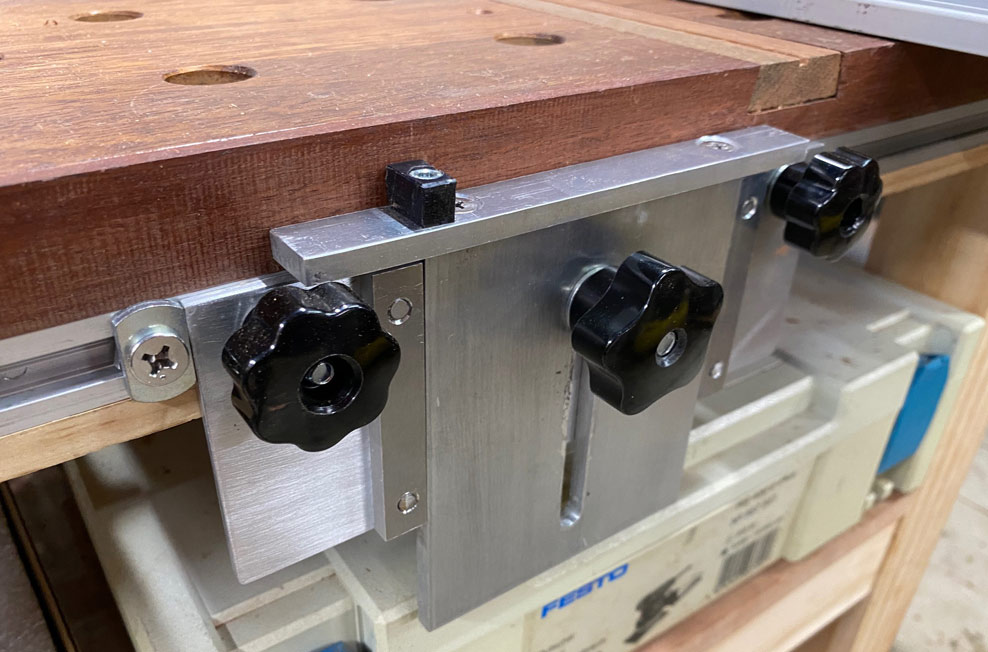 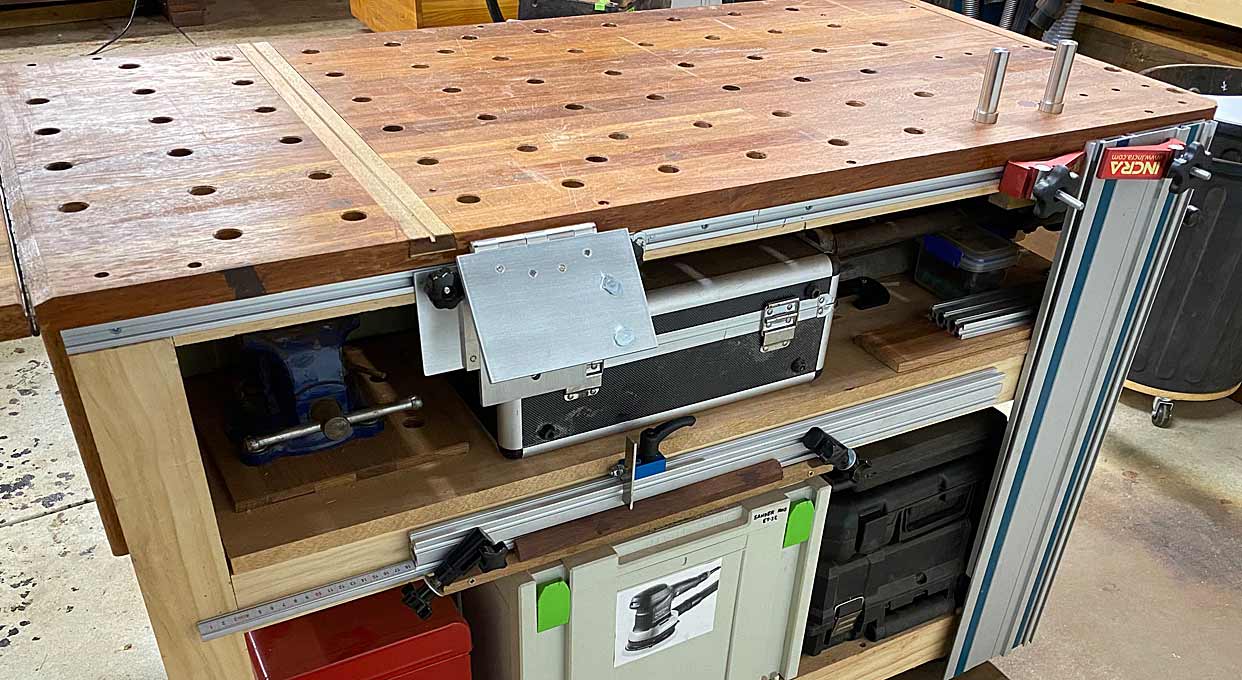 And fence from a 6020 extrusion ... 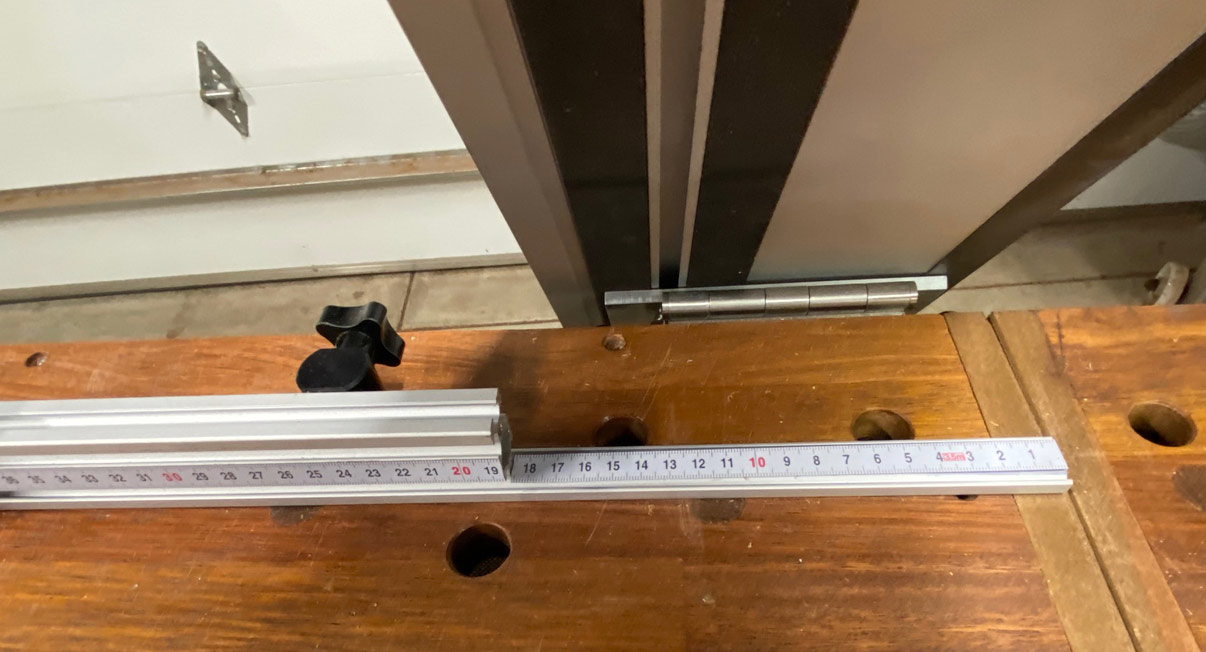 Details for all are here:?? I fine-tuned the parallel guide for my Hammer K3 slider. This involved swapping out the connecting hex bolts for knobs, and adding a stop on the fence face. The knobs allow the parallel guide to be moved easily and quickly along the slider for different lengths of boards ... 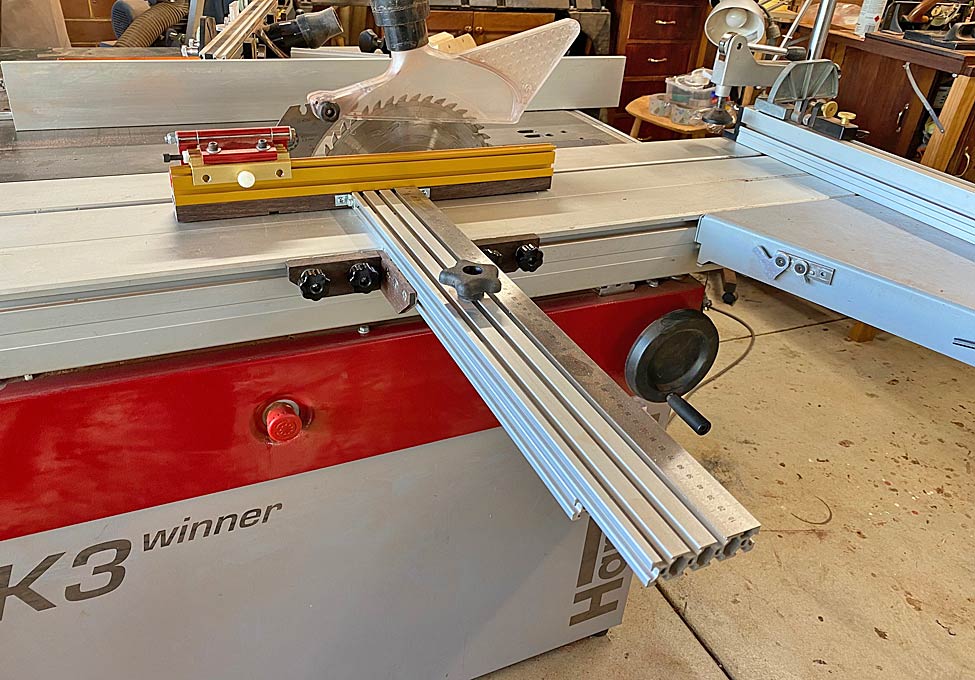 The parallel guide and cross cut stops are calibrated to be equal ... 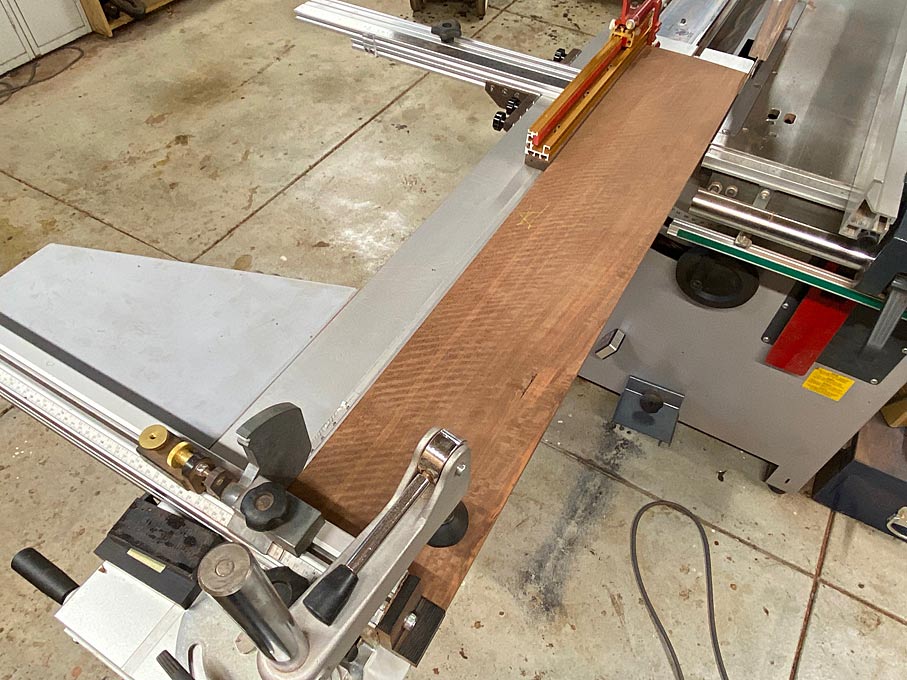 The fine adjuster for the crosscut fence received new knobs .. 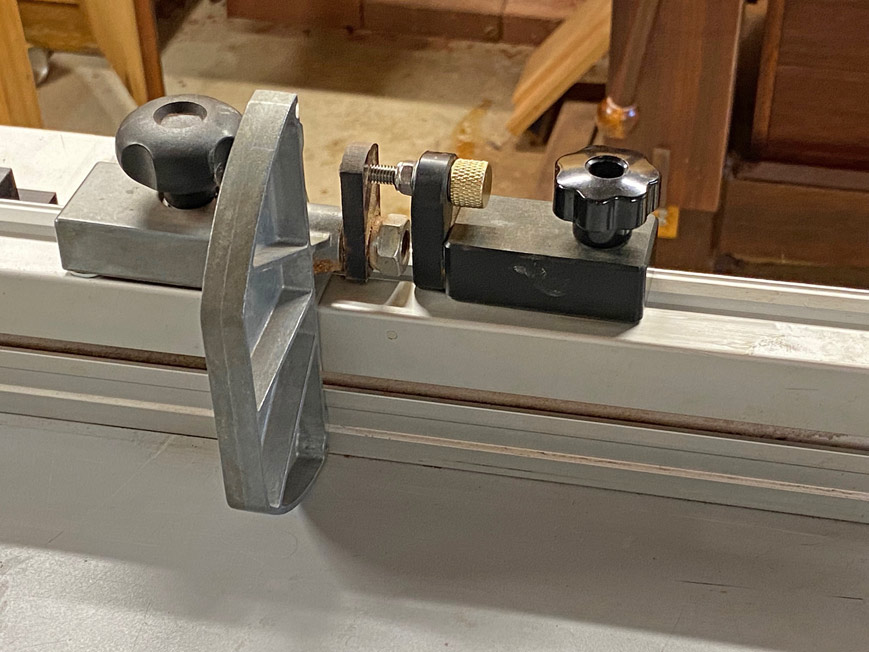 Two years ago I completed a new router table and fence in the outfeed of the K3 ...  For a while I've been meaning to change the way the fence is adjusted. Here it is running on a track, and the tall knobs clamp it down. But the downside of this system is that there is no micro-adjust. Today I got around to modifying the router table fence by connecting it to the rip fence ... 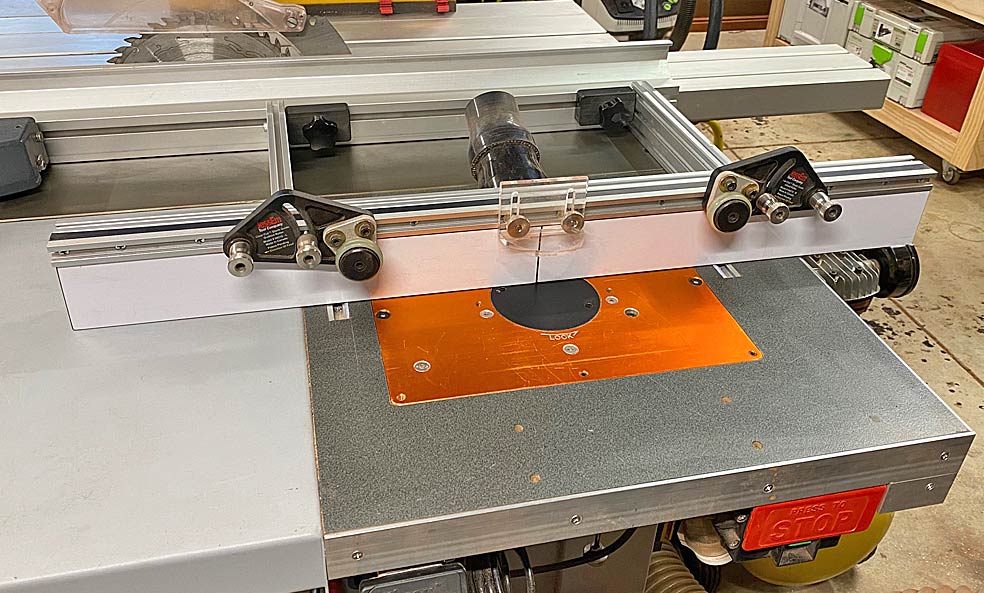 The router table fence was built out of 8040 extrusion, and the side supports are 8020 extrusion attached with brackets ...  The side supports are connected to the K3 rip fence track. This makes it a simple matter to loosen and remove until needed ...  The fence is not only linked to the rip fence, but also adjusted by its micro adjuster. Not only that, but there is a Wixey digital gauge, and this both aids in monitoring the amount of adjustment, as well as marking a position and returning to it ... 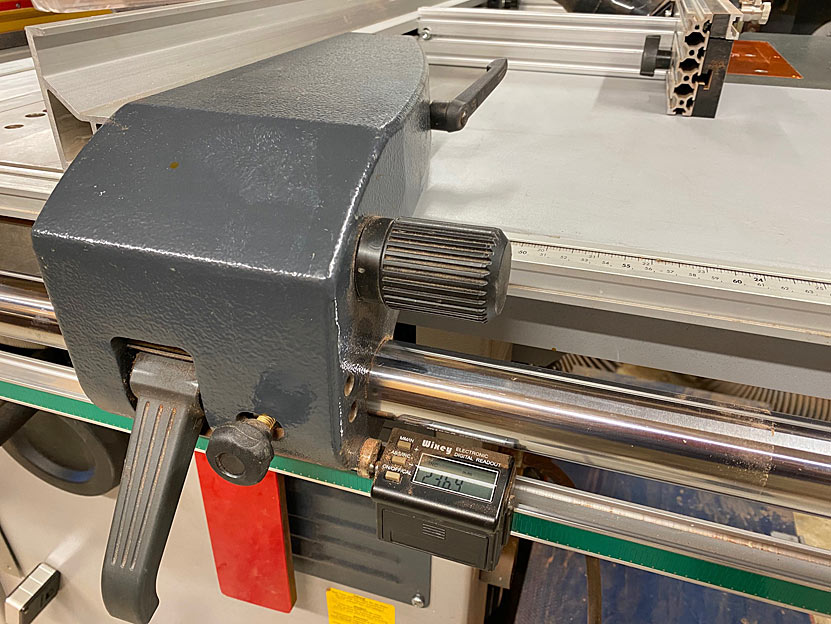 Lastly ... Sooner or later your blade adjuster on your K3 will become stiff and require two hands to turn the wheel. It may take a few years, but it will occur, and then you will need to lube the mechanism. I know Chris Parks has a modification he has made, but I barely knew where the mechanism was, let alone had the courage to do this. About a year ago I called in Felder to sort it out, as the local guys are good folk and very responsive. They came out, but I was not that happy with the result. The adjuster felt stiffer still than when original. And it cost me a couple of hundred bucks. The adjuster was so stiff in recent weeks, that even two hands was a struggle. This weekend I decided to do it myself. The result was very successful, and I wanted to pass on what I did. First you have to open up access to the winder. Remove the switch panel ... 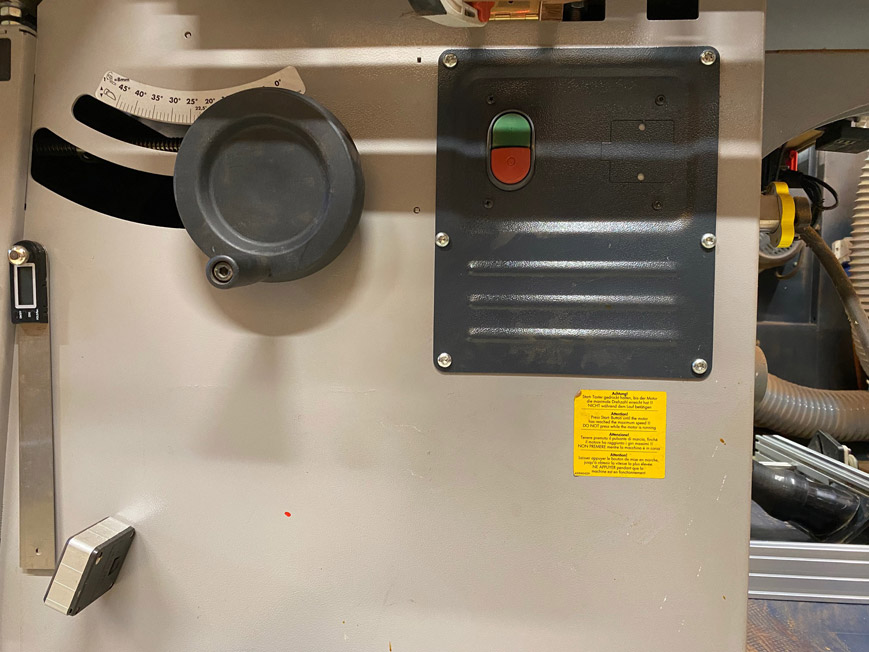 Slide away the box ... 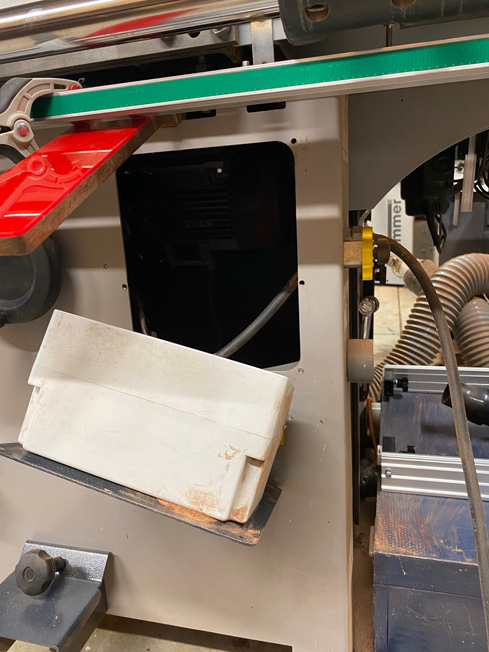 The thread with the blade lowered all the way ... 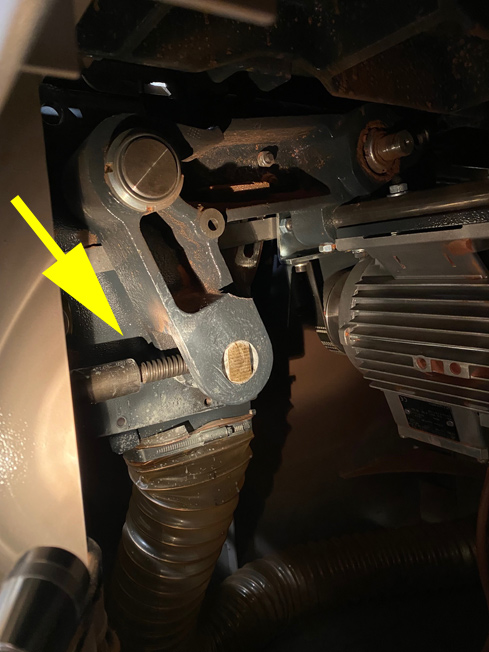 The thread with the blade fully up ...  After cleaning all the dust inside the cabinet, and then blowing out any remaining dust, a silicon spray was directed at the thread. This was repeated several times with the winder in-and-out. It made little if any difference. When Felder were here a year ago, the technician used lithium grease. So I sprayed this on, again repeatedly, and wound the handle in-and-out. A little imrovement, but not much better than Felder achieved. Finally I added a bunch of graphite to the thread, and wound it in-and-out. This made a big difference. And the more I wound the wheel, the better it got. I am not sure if the graphite helped clear any remaining gunk, or whether it was the lubricant needed. I returned to the wheel later, and it was now winding up (down is always easy) very comfortably with one hand. Those who have done this might chip in her with anthing else to be done or tried. I did add some graphite to the slider, and this really smoothed it. Regards from Perth Derek ?
|