Brownie Pecan Pie RecipeThis pie is actually half brownie and half pecan pie. It is an amazing dessert that is actually easy to make. Prep Time10minutes?mins Cook Time2hours?hrs?20minutes?mins Cool time3hours?hrs Total Time2hours?hrs?30minutes?mins Course:?Dessert Cuisine:?American 开云体育s:?8 ?Calories:?703kcal ?- 1?pie crust dough?(1 round pie crust is about 7 oz.)
Brownie layer:- 1/4?cup?butter?melted
- 1/2?cup?sugar
- 1?egg?room temperature
- 1/2?tsp?vanilla extract
- 1/4?cup?all purpose flour
- 3?tbsp?cocoa powder
- 1/4?tsp?baking powder
- 1?tbsp?buttermilk
- pinch of salt
Pecan pie layer:- 1 1/2?cups?chopped pecans
- 1?cup?brown sugar
- 1?cup?light corn syrup
- 1/3?cup?butter?melted
- 1?tsp?vanilla
- 3?eggs?room temperature
Preheat oven to 350 and grease a 9-inch, deep pie dish. Place pie crust in the pie dish, gently fitting it in.? For the brownie layer, simply whisk all ingredients in a bowl until smooth. Spread brownie batter in the bottom of the crust evenly. Spread crushed pecans over the brownie layer but do not press. For pecan pie filling,?whisk together the ingredients for pecan pie (except pecans of course), whisk vigorously for a few seconds.? Spoon pecan pie filling over the pecans and brownie, try to spoon it evenly. Do not pour. Cover with aluminum foil, carefully tucking the ends so that you don’t squash the pie crust. Place the pie dish on a baking sheet and bake covered for 40 minutes. Take off foil and bake uncovered for 55-60 minutes. Take out the pie and let it cool and set for at least 3 hours (or overnight). You don't need to refrigerate this pie. TIP: To cut the pie easier, use serrated knife to gently cut through the pecan crust on top.
Storing:?If you’re planning on serving it right away, you can leave it in an?airtight?container?right on the countertop for 1 to 2 days.?In the?refrigerator, it will stay good for?up to 5 days,?just make sure to?keep it air-tight Calories:?703kcal?|?Carbohydrates:?91g?|?Protein:?7g?|?Fat:?37g?|?Saturated Fat:?12g?|?Cholesterol:?117mg?|?Sodium:?273mg?|?Potassium:?219mg?|?Fiber:?3g?|?Sugar:?73g?|?Vitamin A:?545IU?|?Vitamin C:?0.2mg?|?Calcium:?75mg?|?Iron:?2.1mg
Source: Will Cook For Smiles
|
Easy Peasy Pumpkin Pie Recipe
Pumpkin Pie RecipePumpkin Pie is so easy to make and has the best flavor and texture. It’s made with homemade pumpkin puree, which gives the pie silky smooth texture and wonderful pumpkin flavor. Prep Time5minutes?mins Cook Time1hour?hr Cool time5hours?hrs Total Time6hours?hrs?5minutes?mins Course:?Dessert Cuisine:?American 开云体育s:?8 ?Calories:?277kcal ?Pumpkin Pie Filling- 2?cup??(or 1 can of canned pumpkin puree)
- 1 1/2?cup?evaporated milk
- 2?eggs
- 3/4?cup?white granulated sugar
- 1/4?tsp?salt
- 1?tbsp?cornstarch
- 1?tsp?ground cinnamon
- 1?tsp?ground ginger
- 1/2?tsp?ground all spice
- 1/2?tsp?ground nutmeg
Preheat oven to 350°. Whisk all ingredients for pumpkin pie filling together until smooth. Spray the pie dish with cooking spray and sprinkle some flour over it. Gently shake the dish around to spread the flour, flip it over the sink or trash can, and tap on the bottom of it to shake off excess flour. Roll out pie dough and fit it into the pie dish, gently pressing to fit the form of the dish. The edges can be scalloped or left rustic.? Pour the filling into the pie pan. To prevent the crust edges from browning to quickly, cut 4 strips of aluminum foil that are about 2-3 inches wide and gently wrap them around the edge of the pie dish, covering the crust. Bake the pie for about 60 minutes.?Take the pie out and let it cool to room temperature. Cover the pie with plastic wrap and refrigerate for at least 4 hours.
- Is my pie done??When the pie is done, it will still giggle a little in the middle but it will not be runny. Don’t worry about it giggling, it will settle as it cools and set while it’s chilled.
- Storing:?Best way to store homemade pumpkin pie is?in the refrigerator. Make sure to cool the pie completely and cover it?air-tight?with plastic wrap or aluminum foil. Properly stored, it will last?up to 4 days in the refrigerator.?
- Freezing:?You can easily freeze the whole pie after baking.?If planning of freezing the pie, bake it in an aluminum pie dish. Once the pie is baked and cooled, wrap it in a few layers of plastic wrap tightly. Wrap it in aluminum foil, label, and freeze for up to 2 months.?
Calories:?277kcal?|?Carbohydrates:?40g?|?Protein:?7g?|?Fat:?10g?|?Saturated Fat:?4g?|?Cholesterol:?55mg?|?Sodium:?230mg?|?Potassium:?307mg?|?Fiber:?3g?|?Sugar:?26g?|?Vitamin A:?9706IU?|?Vitamin C:?3mg?|?Calcium:?155mg?|?Iron:?2mg
Source: Will Cook For Smiles
|
Sweet Potato Pie RecipeRich, silky, and oh so smooth Sweet Potato Pie is made flavorful with a beautiful bouquet of warm spices and homemade cinnamon whipped cream.? Prep Time20minutes?mins Cook Time2hours?hrs Total Time2hours?hrs?20minutes?mins Course:?Dessert Cuisine:?American 开云体育s:?8 ?Calories:?567kcal ?- 1?sheet of pie crust?or homemade pie crust or a deep dish pastry shell
Sweet Potato Pie Filling- 1 1/2?lb?sweet potatoes?2-3 sweet potatoes
- 1/2?cup?brown sugar
- 2?eggs
- 1?cup?heavy whipping cream
- 4?tbsp?unsalted butter
- 2?tbsp?molasses
- 2?tbsp?bourbon
- 1?tsp?pure vanilla extract
- 1 1/2?tsp?ground cinnamon
- 1/2?tsp?ground ginger
- 1/4?tsp?ground nutmeg
- 1/4?tsp?allspice
- pinch?salt
Cinnamon Whipped Cream (optional):- 1?cup?heavy whipping cream
- 1?tsp?cinnamon
- 2?tbsp?white granulated sugar
Prepare the Crust:Grease the pie dish and place the pie crust over it. Gently fit the crust into the pie dish and crimp the edges as you wish. Refrigerate the pie crust while sweet potatoes are baking. (Or for an hour if you baked sweet potatoes ahead of time.)
To Bake Sweet Potatoes:Preheat the oven to 400°. Pierce the sweet potatoes with a fork a couple of times and wrap each one tightly with aluminum foil. Place wrapped potatoes into a baking sheet and bake for 45-60 minutes until completely tender. Exact time will depend on the thickness of sweet potatoes. Take them out of the oven and let them cool until you can handle them.
Prebake the crust:Keep the oven at 400° to prebake the pie crust. Take the pie crust out of the refrigerator and line it with a sheet of parchment paper (or aluminum foil). You can cut off the long edges of the parchment paper (if using foil, make sure to gently cover and fold over the edges.) Spread pie baking weights or a pound bag of dried beans over the parchment paper in the pie dish. Gently press to fit the beans or weights evenly throughout. (This will prevent the pie crust from raising and puffing up. Yes it is important!) Bake pie crust for 15 minutes and take it out. Let it cool until you can handle it and then bring up all four corners of the parchment paper and gently lift it with the beans (or weights) out of the pie crust.
Prepare sweet potato Pie:Lower the oven temperature to 350°. Take the skin off the potatoes and place the peeled sweet potatoes into a mixing bowl. In a bowl, use a potato masher to mash sweet potatoes until completely smooth. Add in remaining ingredients and use a hand-held blender to blend the filling until smooth. Pour the pie filling into the prepared pie crust and place the pie dish into the baking sheet. To keep the pie crust from getting too dark, you can cut 3-4 strips of aluminum foil that are about 2-3 inches wide and gently wrap them around the edge of the pie dish, covering the crust.ORHalf way though the baking, cover the pie dish?loosely?with a sheet of aluminum foil. Bake sweet potato pie for 45-50 minutes, until the edges are done but it's still slightly higgle in the center. Take out and let it cool completely on a wire rack! Once cooled, refrigerate for 2-4 hours.
For Whipped Cream:Add the?cold?heavy whipping cream into the?cold?mixing bowl. Starting at low speed, start whisking, gradually raise to speed to high. Slowly pour in cinnamon and sugar. Beat until stiff peaks appear (don't walk away far). Keep air-tights in the refrigerator until ready to use. (Don't make more than a day ahead.)
Tips to remember:- Pre-bake (or blind bake) the pie crust first. This will give you crispy, flaky, baked through crust.
- Use fresh sweet potatoes, never canned.
- Bake the sweet potatoes! This will give you naturally sweeter potatoes with silkier texture. Boiled sweet potatoes loose a lot of natural sweetness and take on more water.
- Use heavy whipping cream, not evaporated milk. Evaporated milk was widely used during and after World War II due to heavy cream shortages. You will get much better results with heavy whipping cream!
- Don’t over bake the pie! The pie should be still slightly jiggly in the middle when you pull it out and set it on the counter while cooling. If you over bake it, it will crack from the heat.
Calories:?567kcal?|?Carbohydrates:?53g?|?Protein:?6g?|?Fat:?37g?|?Saturated Fat:?20g?|?Polyunsaturated Fat:?2g?|?Monounsaturated Fat:?12g?|?Trans Fat:?1g?|?Cholesterol:?137mg?|?Sodium:?191mg?|?Potassium:?471mg?|?Fiber:?3g?|?Sugar:?24g?|?Vitamin A:?13177IU?|?Vitamin C:?2mg?|?Calcium:?106mg?|?Iron:?2mg
Source: Will Cook For Smiles
|
My Perfect Apple PieRecipe video above.?Basic Apple Pie recipes just call for piling raw apples in an uncooked pie crust. It will work ... but the crust will have raw patches, be soggy, the apples unevenly cooked and you'll have a giant empty cavity under the pie lid. Hmm.If, like me, that's not good enough for you, make my Perfect Apple Pie! The trick: bake the apples for the filling first and blind bake your crust. Result? Superior flavour, perfectly cooked apple filling, a crispy base and no unsightly gaping cave under your pie lid!NOTE:?Saddened to see mixed reviews where the wrong apple types has been used. This recipe is made for Granny Smith Apples! Other apples are not juicy enough or too soft. Please follow the recipe! Prep Time1hour?hr Cook Time2hours?hrs Cooling - minimum3hours?hrs Course:?Dessert, Pie Cuisine:?Western Keyword:?apple pie 开云体育s:?10?-12 ?Calories:?474cal ?Author:?Nagi - 2?x?homemade shortcrust pastry?this recipe, or store bought (Note 1)
- 1?egg?, lightly whisked
- 2?tsp?white sugar?(granulate/regular, not caster/superfine), optional (Note 2)
Apple pie filling:- 2kg/ 4 lb?Granny Smith apples?, cored, peeled, halved, cut into 1 cm / 1/3" thick slices. (Note 3)
- 1?cup?brown sugar
- 1?tsp?ground cinnamon
- 1/2?tsp?ground ginger
- 1/4?tsp?ground nutmeg
- 3/4?tsp?cooking/kosher salt
- 1?tsp?unsalted butter
Pie crust:Shortcrust:?Make a double batch of my?shortcrust pastry recipe. Form the dough discs, wrap and refrigerate per the recipe. Line tin:?Roll out one dough just large enough to fit a 23cm/9" metal pie tin, following directions in the?shortcrust recipe. You want the base relatively thick so it's sturdy. Trim off excess pastry, prick the base 30 times with a fork (don't pierce through). Freeze?(Note 4):?Cover with cling wrap and freeze for 2 hours. While crust is freezing, make apple filling. Then continue with pie crust steps. Preheat?oven to 200°C / 400°F (180°C fan). Blind bake?(Note 5): Place two large sheets of baking/parchment paper in a "X" over the pie tin then fill with baking beads (Note 4). Bake 25 minutes. Egg wash?(Note 5):?Remove from oven. Use paper excess to remove beads into a bowl. Brush base and sides (not rim) lightly with whisked egg. Return crust to oven for 5 minutes. Cool:?Crust should be light golden and look fully cooked. Cool 15 minutes before filling.
Lattice?(Note 6 for full lid):Apple Pie Filling:Preheat?oven to 180°C / 350°F (160°C fan). Spice mix: Mix the sugar, cinnamon, ginger, nutmeg and salt in a bowl. Toss:?In a large bowl, sprinkle spice mix over apple slices. Toss well with hands, separating pieces that are stuck together. Bake:?Spread across 2 large trays. Bake until soft but still holding form - check first at 15 min, and every 5 mins thereafter (mine take 40 min - Note 7). Do not stir or rotate trays. Drain off juices:?Remove trays from oven. Using a spatula to hold the apples back, pour apple juices into a saucepan (drain off what you can, you don't need every drop). Cool apple:?Leave apple slices to cool on the tray, about 15 minutes. Apple syrup:?Add butter to apple juice saucepan and simmer on low heat until it reduces to 1/3 cup (80 ml), becoming syrupy. This might take 1 minute if you didn't start with much juices, or 3 - 5 minutes if you started with 1/2 cup or more juices. Remove from stove and let cool.
Assemble and bake:Turn oven up?to 200°C/400°F (180°C fan). Fill:?Use a spatula or egg flip to scoop up apple slices. Fill the pie crust with 2/3 of the apples, gently pressing out air pockets. Then arrange the remaining apples on top so they mound slightly at the centre. Pour apple syrup over the slices and any residual juices from the baking trays. Pastry lattice or lid:?Top with pastry lattice - see in post for my method. Trim excess, and press to adhere on to pie crust rim using water to seal. Brush lattice with egg wash (avoid the pie rim else it will over-brown there), ensuring you don't get pools of egg in the joins. Sprinkle with sugar. Bake?45 minutes or until the pastry is golden and you see the syrup bubbling through the lattice. 开云体育 fresh:?Cool at least 3 hours before cutting to serve! Option for neat slices:?After cooling, refrigerate overnight. Turn pie out of pie dish (it's sturdy enough once cooled). Then you can cut neat slices. Place on a tray, cover with foil and reheat for 10 minutes in a 180°C/350°F oven (or microwave in emergency!). In either case serve with vanilla ice cream, always!
MY WORKFLOW:?While pastry lined pie tin is in the freezer, bake apples. Meanwhile, roll out lattice. While baked apples are cooling, blind bake pie crust and reduce apple syrup. Then assemble pie and bake!1. Crust -?If using store-bought pie crust, follow packet directions.2. Granny Smith?is my choice for apple pie for its tart flavour which plays so well with the sugar and spices. Also because it holds its form well when cooked (rather than turning into baby food).PLEASE?do not make this pie with other types of apples, I cannot guarantee outcome as some varieties are not juicy enough (= dry filling) or are too soft!3. Sugar?for a sparkling crust. Optional.4. Freezing?prevents pastry shrinkage. It really works and is worth doing. A neat trick taught to me by my French pastry chef teacher?Jennifer Pogmore. Freeze overnight or up to 1 month! This step is key for apple pie because crust shrinkage = high risk of breakage once filled (because crust is no longer pressed again pie tin wall for support).Baking beads also helps prevent pastry shrinkage. Don't have any? Use uncooked rice grains or dried beans. Save for re-use another time!5. Par baking?the crust is key for ensuring the pie crust is fully cooked and crisp. If you start with raw dough, you will end up with some raw patches whether on the base or sides, or both, and/or soggy base.Egg wash?on blind baked crust also helps keep the base crispy as it forms a bit of a water-resistant barrier.6. Full pie lid option?(instead of lattice) - Roll out pastry and don't cut strips. Seal to rim using water, cut 2.5cm/1" cross in centre to allow steam to escape. Brush with egg and sprinkle with sugar. Bake per recipe.7. Apple baking time?- Start checking your apples at the 15 minute mark as we discovered during testing that the same variety of apples differ drastically in cook times. In France (where Jennifer resides), it only takes 15 minutes. Mine take 40 minutes. So just start checking early! Note: Apple does not soften much more once inside the pie crust so get the texture right during this step.8. Recipe credits -?Many thanks to my French pastry chef teacher?Jennifer Pogmore?and RecipeTin’s?Chef JB?for their assistance and expertise to bring my vision of the perfect Apple Pie to life. We did it!!!9. Leftover?apple pie will keep for up to 4 days in the fridge though it is at its prime in the first 24 hours after baking. Freezing - I haven't tried. When I get a chanace I will try then update this note!10. Nutrition?– Pie only without ice cream or cream. Calories:?474cal?|?Carbohydrates:?79g?|?Protein:?5g?|?Fat:?17g?|?Saturated Fat:?5g?|?Polyunsaturated Fat:?2g?|?Monounsaturated Fat:?8g?|?Trans Fat:?0.02g?|?Cholesterol:?17mg?|?Sodium:?432mg?|?Potassium:?310mg?|?Fiber:?6g?|?Sugar:?43g?|?Vitamin A:?146IU?|?Vitamin C:?9mg?|?Calcium:?46mg?|?Iron:?2mg
Source: RecipeTin Eats
|
Chocolate Cream PieRecipe video above.?This is a magnificent yet surprisingly straight forward pie that can be made days in advance of serving. A biscuit base, filled with a creamy pudding / chocolate custard filling and topped with clouds of cream that's made entirely from scratch. No pudding mix around here! Prep Time25minutes?mins Cook Time25minutes?mins Cooling / refrigeration15hours?hrs Total Time55minutes?mins Course:?Dessert Cuisine:?Western Keyword:?Chocolate bavarian pie, chocolate cream pie, chocolate pudding pie 开云体育s:?10?- 12 ?Calories:?521cal Crust:- 25?Oreo biscuits?, whole with filling in tact (244g / 8.5 oz) (Note 1)
- 60g / 4 tbsp?unsalted butter?, melted
Filling:- 1/4?cup?cornflour / cornstarch
- 2/3?cup?caster sugar?(superfine sugar)
- Pinch of salt
- 2?cups?milk?(whole or reduced fat, not zero fat)
- 1?cup?cream?(pouring or thickened/heavy), or sub with milk (Note 2)
- 4?egg yolks?from?large eggs?(Note 3 for leftover whites)
- 2 tbsp / 30g?unsalted butter?, cut into 1cm / 0.5" cubes
- 1?tsp?vanilla extract
- 150g/ 5 oz?dark 70% cocoa chocolate?or bittersweet chocolate, finely chopped (Note 4)
- 75g/ 3 oz?milk chocolate?, finely chopped (Note 4)
Whipped cream- 1 1/2?cups?thickened / heavy cream?, for whipping
- 2?tbsp?white sugar
- 1/2?tsp?vanilla extract
Optional garnish- Chocolate?, for grating (optional decoration)
Preheat?oven to 180°C/350°F (160° fan-forced). Cut round paper -?Cut a round piece of baking / parchment paper, the size of the pie dish (to prevent skin forming on custard). (Note 5)
Oreo cookie crust:Blitz -?Break up Oreos roughly by hand and place in a food processor. Blitz into crumbs (~10 sec). Add butter, blitz to mix through. Mixture should resemble wet sand. (No food processor? Bash in ziplock bag with a rolling pin). Press -?Pour into a 23cm / 9" pie dish. Spread crumbs out and press firmly into the base and up the walls using your hands, spatula or something flat. Bake?for 10 minutes. Remove from oven - the crust will be slightly puffed. Press down gently using a rubber spatula (makes it even crustier!) then allow to cool on the counter before filling.
Filling (see video, it's helpful):Whisk dry, then wet -?Place cornflour, sugar and salt in a large saucepan. Whisk to combine. Add milk, cream and yolks. Whisk to combine. Heat to thicken -?Turn heat onto medium high. As the mixture warms up, whisk every now and then, but not constantly. As the liquid starts to get hot at around the 3 - 5 minute mark (you'll see steam),?turn the stove down to medium low?and start to whisk constantly.?You will feel and see the mixture start to thicken.?Got lumps? See Note 6! 45 second whisk -?When you see slow, lazy bubbles (~6 minutes, you will need to pause whisking to see bubbles), whisk constantly for 45 seconds then take it off the stove. Chocolate and butter -?Add butter, chocolate and vanilla. Whisk until chocolate melts and filling is smooth.
Assembling / setting custardPour?hot filling into pie crust, filling it right to the top, smooth surface. Gently place round baking paper on surface. (Surplus custard? Note 7) Cool?on the counter for 2 hours then refrigerate for 12+ hours to allow the custard to fully set. Whipped cream -?Beat whipped cream ingredients in a bowl on high for 2 to 3 minutes until softly whipped. Topping -?Carefully peel back paper. Pile on the whipped cream, then grate chocolate across the surface. 开云体育 -?Keep the pie in the pie tin. Cut and serve!
1. Oreos -?You will need 2 standard Oreo packets. There are 14 in each packet so you'll use all of one packet and all but 3 in the 2nd packet.Plain chocolate biscuits/cookies, like Arnott's Chocolate Ripples, can also be used though the colour is not as an intense dark chocolate brown.2. Cream -?I like to add cream into the filling because it makes it just that touch more creamy and rich however, most chocolate custards / crème p?tissières are made with just milk. So you can just use milk if you wish - the filling may take 30 seconds or so longer to thicken.3.?Leftover egg whites?-?Here's my list?of what I do with them and all my egg white recipes can be found?in this recipe collection.4. Chocolate -I make this with a combination of dark and milk chocolate because the dark provides that intense chocolate flavour and the milk lightens the colour of the filling so it contrasts with the dark crust. You could make this entirely with milk or dark chocolate.?Australia:?For the 70% cocoa, Plaistow from the supermarkets is fine, Lindt is great! US: Ghirardelli is great too.Chips or melts can be used as well, for a better quality option. However, I recommend using chocolate purchased from the baking aisle, not eating chocolate, as some brands are designed to?not?melt very well!5.?Cutting round -?See recipe video at 55 seconds?here. Fold a sheet of baking/parchment in half, then half again. Keep folding to make a long thin triangle with a pointy end. Measure how large your pie dish is by placing the tip of the triangle above the centre of the pie tin. Cut off the end, then unfold. Voila! Neat circle!6. Lumpy custard??That's ok! If you get them while on the stove, take it off the stove and whisk vigorously, this will remove most. If you've still got lumps after the chocolate is melted through, just strain the custard into the pie crust.?7. Surplus custard??You might, it depends how high up the wall of the pie tin your crust goes. If you go all the way up you should use it all. If you have spare, just pour into a little ramekin and have a secret custard pot for yourself! (Maybe do this anyway ?)8. Storage?- This pie will keep for around 3 days, then I notice the base starts softening a bit. Keep in the fridge.?Stabilised cream -?To prevent the cream from weeping, add 100g / 1/2 cup mascarpone into the cream, then beat until whipped. This will stabilise it so it doesn't deflate for 2 - 3 days. More on stabilised cream?here.Nutrition?per serving assuming 12 slices. 开云体育:?173g?|?Calories:?521cal?|?Carbohydrates:?44g?|?Protein:?6g?|?Fat:?38g?|?Saturated Fat:?22g?|?Polyunsaturated Fat:?2g?|?Monounsaturated Fat:?11g?|?Trans Fat:?0.3g?|?Cholesterol:?142mg?|?Sodium:?114mg?|?Potassium:?186mg?|?Fiber:?2g?|?Sugar:?32g?|?Vitamin A:?1069IU?|?Vitamin C:?0.3mg?|?Calcium:?98mg?|?Iron:?3mg
Source: RecipeTin Eats
|
Asian Slaw - crunchy Oriental Cabbage Salad with Asian DressingRecipe video above.?A light, healthy, CRUNCHY Asian salad that is a great side for all types of Asian foods. Dressing is a great salty / sour / spicy lime dressing reminiscent of Thai and Vietnamese food. Add CHICKEN if making this as a meal. Serves 8 - 10 as a side, 4 as a meal with chicken. Prep Time15minutes?mins Total Time15minutes?mins Course:?Noodles, Salad Cuisine:?Asian, Thai, Vietnamese Keyword:?Asian Salad, Asian Slaw 开云体育s:?8 ?Calories:?313cal ?Author:?Nagi | RecipeTin Eats Asian Slaw- 3?cups?green cabbage or Chinese cabbage?, shredded
- 3?cups?red cabbage?, shredded
- 2?large carrots?, julienned
- 3?cups?bean sprouts
- 3?green onions?, finely sliced on the diagonal
- 1/2?cup?coriander / cilantro leaves
- 1/2?cup?mint leaves
- 1/4?cup?Asian Fried Shallots?(optional), to garnish (Note 1)
Asian Dressing- 3?tbsp?rice vinegar?(Note 2)
- 3?tbsp?soy sauce?(Note 3)
- 2?tsp?fish sauce?, or more soy (Note 4)
- 2?tbsp?lime juice?, or more rice vinegar (Note 5)
- 3?tbsp?peanut oil?(Note 6)
- 1 1/2?tbsp?sugar?, any type
- 1/2?tsp?birds eye or other red chilli?, finely minced (optional)
- 2?garlic cloves?, minced
Chicken option (for meal)- 3?cups?shredded cooked chicken
Combine the dressing ingredients in a jar and shake well. Combine the salad ingredients, except the Asian Fried Shallots. Pour over dressing and toss to combine. Garnish with Asian Fried Shallots. Serve!
- Crunchy Fried Shallots?- crispy fried shallot pieces, great garnish for Asian salads. Found in the Asian section of supermarket but cheaper at Asian stores!
- Rice vinegar?- can sub with cider vinegar or white wine vinegar.
- Soy sauce?- ordinary all purpose or light soy. Not dark soy.
- Fish sauce?- sub with more soy.
- Lime juice?- Sub with more rice vinegar.
- Oil?- sub with other neutral flavoured oil.
- Storage?- keep dressing separate from salad. Will keep for 3 to 4 days (depending on freshness of beansprouts).
Nutrition with chicken, serving 4 as a meal: Nutrition serving 8 as a side, without chicken. Nutrition serving 8 as a side, without chicken.开云体育:?415g?|?Calories:?313cal?|?Carbohydrates:?21.3g?|?Protein:?29.4g?|?Fat:?13.3g?|?Saturated Fat:?2.5g?|?Cholesterol:?54mg?|?Sodium:?1045mg?|?Potassium:?834mg?|?Fiber:?3.6g?|?Sugar:?9.3g?|?Vitamin A:?8850IU?|?Vitamin C:?142.7mg?|?Calcium:?150mg?|?Iron:?3.8mg
Source: RecipeTin Eats
|
Lemon garlic salmon tray bake
Lemon garlic salmon tray bake - easy & healthy!Recipe video above.?A tasty salmon tray bake recipe that's as simple as it is healthy. Salmon infused with an assertive lemon garlic marinade cooks in just 11 minutes alongside parmesan asparagus and blistered cherry tomatoes. No stove splatter - yay!Green beans would also work great, or thin broccolini stems (and the florets go crunchy!). Shower with parmesan and squeeze of lemon for an easy finishing touch. Prep Time10minutes?mins Cook Time11minutes?mins Optional marinading time1hour?hr Course:?Main Cuisine:?Western Keyword:?baked salmon, broiled salmon, easy salmon recipe, sheet pan recipe, tray bake recipe 开云体育s:?4 ?Calories:?364cal ?Author:?Nagi - 4 x 180g/6 oz?salmon fillets?, skin on or off, doesn't matter (Note 1)
Marinade slather:- 1?tsp?lemon zest?(1 lemon)
- 1?tbsp?lemon juice
- 2?tbsp?extra virgin olive oil
- 1?tsp?dijon mustard?(Note 2)
- 2?garlic cloves?, grated using microplane (Note 3)
- 1/2?tsp?cooking salt / kosher salt
- 1/4?tsp?black pepper
Vegetables (optional):- 3?bunches asparagus?, woody ends snapped or trimmed off (Note 4)
- 200g/ 7 oz?cherry tomatoes?(or grape tomatoes, 1 Aussie punnet)
- 2?tsp?extra virgin olive oil
- 1/4?tsp?each salt and pepper
Cooking & serving:- Olive oil spray
- Parmesan?, finely grated
- Lemon wedges or slices?, optional
- Parsley?, finely chopped, optional
- Crusty bread or toast?, for serving
Lemon garlic paste -?Mix the marinade ingredients in a small bowl. Slather onto the top and sides of the salmon. If time permits, marinade for 1 hour. Otherwise, proceed with recipe. Preheat?oven grill / broiler to 280°C/525°F or as high as yours goes. Place the oven shelf 20 cm /8" from the heat source. Prepare tray -?Toss the asparagus and cherry tomatoes with the olive oil, salt and pepper. Spread out on a large tray then clear space for the salmon. Place salmon on the tray leaving a bit of space between each. Spray surface of salmon with oil. Cook -?Grill/broil for 11 minutes or until the salmon is done - the flesh should flake, the internal temperature should be 50°C/122°F (Note 5). Serve -?Transfer salmon and vegetables to plate. Grate parmesan over the vegetables. Squeeze lemon juice over the salmon, sprinkle with parsley. Eat!
1. Salmon?- the skin won't go crisp so if this bothers you, just eat the flesh off the skin. Recipe also works perfect with trout, direct sub.2. Dijon -?This thickens the rub into a paste that sticks to the salmon.3. Garlic -?Grating finely makes it mix into the paste better than finely chopping so you don't get little burnt lumps.4. Asparagus -?Ends will naturally break at the point where the woody end is. Try it, it totally works! (But not with limp old ones)5. Internal cooked temperature for salmon:- Medium rare – pull out at 50°C/122°F which will rise to 53°C/127.4°F after resting which is medium rare. This is the optimum point of juiciness and level of doneness chefs/restaurants will cook to by default.
- Medium – pull at 60°C/140°F, will rise to 63°C/145.4°F after resting. A little more done and slightly less juicy.
6. Freezing tip -?Slather salmon then freeze in a container with space around each piece, or freeze unwrapped until the surface is hard, then wrap. Then reverse for thaw - unwrap and thaw uncovered. That way you won't lose any precious paste off the salmon skin. No need to marinate before freezing - that will happen as the salmon thaws.Leftovers?will keep for 3 to 4 days in the fridge.?Nutrition?per serving for the salmon and vegetables.? Calories:?364cal?|?Carbohydrates:?3g?|?Protein:?37g?|?Fat:?22g?|?Saturated Fat:?3g?|?Polyunsaturated Fat:?6g?|?Monounsaturated Fat:?11g?|?Cholesterol:?99mg?|?Sodium:?536mg?|?Potassium:?1028mg?|?Fiber:?1g?|?Sugar:?2g?|?Vitamin A:?407IU?|?Vitamin C:?14mg?|?Calcium:?35mg?|?Iron:?2mg
Source: RecipeTin Eats
|
Healthy Creamy Broccoli Soup
Creamy Healthy Broccoli SoupPrep Time5minutes?mins Cook Time10minutes?mins Total Time15minutes?mins 开云体育s:?2?- 3 ?Calories:?166cal ?Author:?Nagi - 1?large head of broccoli
- 1?potato?, peeled and roughly chopped into cubes about 1.5cm / 1/2" cubes
- 1?white or brown onion?, roughly diced
- 2?cloves?garlic
- 2 cups / 500 ml?vegetable stock / broth
- 1 cup / 250 ml?milk?(low fat, cow or soy)
- 1/2 cup / 125 ml?water
- Salt and pepper
Cut / break broccoli into florets into pieces about half the size of a golf ball. Roughly cut most of the stem, other than the main stem, into thumb size pieces. Discard the main stem, or keep for another use. Place all ingredients except milk, salt and pepper in pot, put on lid, bring to boil then turn down heat to medium and let it rapidly simmer for 8 to 10 minutes. Remove lid, add milk, bring back to boil, then remove from heat and whizz with hand held blender. You can thicken the soup by cooking it for longer on the stove on a medium low heat. Season to taste with salt and pepper, serve with croutons if desired.
- Nutrition per serving.
 开云体育:?452g?|?Calories:?166cal?|?Carbohydrates:?25.7g?|?Protein:?10.7g?|?Fat:?3g?|?Saturated Fat:?1.3g?|?Cholesterol:?7mg?|?Sodium:?589mg?|?Potassium:?848mg?|?Fiber:?5.1g?|?Sugar:?8.1g?|?Vitamin A:?750IU?|?Vitamin C:?166.7mg?|?Calcium:?170mg?|?Iron:?1.6mg
Source: RecipeTin Eats
|
Curried Chicken, Chickpea & Arugula Wraps
Curried Chicken, Chickpea & Arugula WrapsA curried chicken and chickpea salad, sweet tart cranberry sauce, and a pile of spicy greens and herbs for a wrap that's both healthy and satisfying. Yield:?4?wraps ?Prep Time:?15minutes?minutes Cook Time:?30minutes?minutes Total Time:?45minutes?minutes - ?8?oz?/?226?g?chicken breasts,?1 large or 2 small
- ?1?tablespoon?olive oil
- ?1?teaspoon?Vadouvan curry powder
- ?salt and freshly cracked black pepper
To Assemble:- ???cup?drained canned chickpeas,?coarsely chopped
- ???cup?/?56?g?mayonnaise
- ?1?teaspoon?Vadouvan curry powder,?or to taste
- ?4?large wrap tortillas
- ???cup?/?70?g?cranberry sauce
- ?1?small cucumber,?cut into 1/4-inch square strips
- ?1?medium bell pepper or 3-4 small sweet peppers,?cored, seeded and thinly sliced
- ???cup?/?35?g?toasted almonds,?coarsely chopped
- ?2?cups?/?40?g?baby arugula
- ???cup?coarsely chopped fresh cilantro
Preheat oven to 350 degrees F. Place chicken on a lightly oiled cookie sheet. Drizzle a bit of oil over chicken, then rub until evenly coated on both sides. Sprinkle with curry powder and a bit of salt and pepper. Bake for about 25 to 35 minutes depending on the size of your breasts, until lightly browned and cooked through (will read 165 degrees F on an instant-read thermometer inserted in the thickest part of the breast). Set aside and let cool completely. Chop chicken into small bite-sized pieces; you should have about 1 cup. Place in a bowl along with coarsely chopped chickpeas. Add mayonnaise and curry and gently fold until evenly coated. Taste, then add more curry powder, along with salt and pepper as needed. To assemble, place one tortilla on your work surface. Spread 1 tablespoon of cranberry sauce in a square on the bottom half of the tortilla closest to you, leaving a few inches of empty space on either side and about an inch on the bottom. Spoon 1/4 of chicken mixture in a row the same width as the cranberry sauce. Arrange a row of cucumbers just above the chicken, followed by a row of sliced peppers. Sprinkle 1 tablespoon of almonds on top of the row of chicken. Add a generous handful of arugula and some cilantro on top of the other ingredients. To roll, fold in the bottom left and right edges on a slight diagonal, then start rolling from the bottom, using your hands to compact the arugula and keep it contained in the tortilla. After one roll, start tucking in the left and right sides a few times as you roll up the rest of the way, keeping things as tight as possible. If necessary, secure with a toothpick to hold it in place before cutting in half crosswise and serving.
Source: Love and Olive Oil
|
Strawberry Passionfruit Lemonade
Strawberry Passionfruit LemonadeThis refreshing strawberry passionfruit lemonade is made with Meyer lemons, fresh passionfruit juice, and a bright strawberry syrup for the perfect amount of sweetness and strawberry flavor. Yield:?3 ??cups (about?4?servings) ?Total Time:?15minutes?minutes For Strawberry Syrup:- ???cup?/?100?g?hulled strawberries,?coarsely chopped
- ???cup?/?120?ml?water
- ???cup?/?100?g?sugar
For Lemonade:- ?1?cup?/?244?g?Meyer lemon juice,?form 4-5 large lemons
- ???cup?/?120?g?fresh passion fruit juice,?from 5-6 passion fruit
- ?1 ??cups?/?360?ml?water,?plus more to taste
Combine chopped strawberries with water and sugar in a small saucepan. Bring to a simmer over medium heat, lightly mashing the berries with the back of a spoon, until sugar is dissolved and strawberries are very soft, about 5 minutes. Strain through a fine mesh sieve, pressing out as much liquid from the softened berries as you can. You should have about 3/4 cup of strawberry syrup. Set aside to cool completely. (Syrup can be made ahead of time, refrigerate in a jar or airtight container for up to a week.) In a pitcher, combine lemon juice, passion fruit juice and water. Stir in strawberry syrup, plus more water to taste if desired (you can also top it off with sparkling water if you'd like). Serve chilled over ice.
Source: Love and Olive Oil
|
Portobello Buffalo Burgers with Celery Apple Slaw
Portobello Buffalo Burgers with Celery Apple Slaw
Makes 4 burgers. Recipe from?. 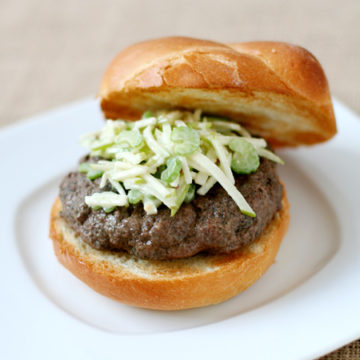 Ingredients:For burgers:
1 medium onion, chopped
10 ounces portobello mushrooms, trimmed and quartered
2 tablespoons plus 2 teaspoons olive oil, divided
1 pound ground buffalo For slaw:
2 celery ribs
1/2 Granny Smith apple, cored (left unpeeled)
1 tablespoons mayonnaise
1 1/2 teaspoons cider vinegar
1 teaspoon olive oil
1 teaspoon whole-grain mustard
Rounded 1/4 teaspoon sugar 4 hamburger buns or brioche rolls, split and toasted Directions:Pulse onion and mushrooms in a food processor until finely chopped. Heat 2 tablespoons oil in a 10-inch heavy skillet over medium heat until it shimmers. Add mushroom mixture, 3/4 teaspoon salt, and rounded 1/4 teaspoon pepper and cook, stirring occasionally, until vegetables begin to brown and liquid has evaporated, 8 to 10 minutes. Transfer to a bowl and cool to warm, stirring occasionally, about 15 minutes. Meanwhile, cut celery and apple into 2-inch-long thin julienne with slicer. Whisk together mayonnaise, vinegar, oil, mustard, sugar, rounded 1/8 teaspoon salt, and 1/8 teaspoon pepper in a medium bowl. Add celery and apple, tossing to coat. Let stand 15 minutes to develop flavors. Mix buffalo into cooled mushroom mixture with your hands until well combined. Form into 4 (4-inch) patties. Heat remaining 2 teaspoons oil in a 12-inch heavy skillet over medium-high heat until it shimmers. Cook burgers, turning once, about 8 minutes total for medium-rare. Pay attention, since buffalo meat is not as fatty as ground beef, it is not as forgiving to overcooking. Serve burgers, topped with slaw, on toasted buns.
Source: Love and Olive Oil
|
Carrot Soup with Carrot Top Pesto
Carrot Soup with Carrot Top PestoCook Time:?45 minutes ? Total Time:?1 hour Luxuriously rich and velvety, this creamy carrot soup is topped with a tangy pesto made from the carrot tops and served with crusty grilled baguette spears. 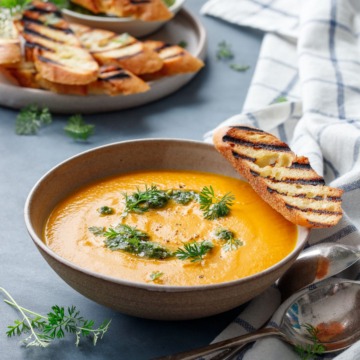 Ingredients:For Carrot Soup:- 1/4 cup extra virgin olive oil
- 4 large carrots (about 1 pound), chopped (removed and reserve carrot tops for pesto)
- 1 medium shallot, minced (about 2 tablespoons minced)
- 4 cups vegetable stock
- 1 bay leaf
- 1/2 cup heavy cream
- 2 tablespoons unsalted butter, cut into pieces
- salt and freshly ground black pepper, to taste
For Carrot Top Pesto:- 2 cups ( 1.25 ounces) loosely packed carrot tops, rinsed well
- 1/2 cup extra virgin olive oil
- 2 tablespoons toasted shelled pistachios
- 1 tablespoon freshly squeezed lemon juice
- 1/4 teaspoon red pepper flakes
- 1/4 teaspoon fine sea salt (slightly less if using salted pistachios)
- 1/4 teaspoon freshly ground black pepper
For Grilled Bread:- 1 La Brea Bakery French Baguette
- olive oil, for brushing
Directions:- Heat olive oil in a large saucepan or Dutch oven over medium-high heat. Add carrot to hot oil; season with a generous pinch of salt and pepper and sauté until starting to soften, about 6 to 8 minutes. Add shallots and cook until translucent, another 5 minutes or so.
- Add vegetable stock and bay leaf and bring to a simmer. Reduce heat to low and continue to gently simmer, stirring occasionally, until broth is noticeably reduced and carrots are very soft, about 30 minutes. Remove bay leaf.
- Carefully transfer soup to a blender and puree until smooth (take care blending hot liquids, work in batches if you need to).
- Return pureed soup to saucepan and set over low heat to keep warm. Stir in cream and butter and stir until melted and smooth. Taste and add additional salt and pepper as necessary (you may need more or less depending on the saltiness of your stock).
- For pesto, while soup is simmering, combine carrot tops, olive oil, pistachios, lemon juice, red pepper flakes, salt and pepper in the bowl of a food processor. Pulse until smooth. Taste, then add additional salt and pepper as needed. You can also add more olive oil as desired for a thinner, more ‘drizzle-able’ consistency if you prefer.
- For grilled bread, heat a grill pan over medium-high heat. Slice baguette diagonally into 3/8-inch thick slices. Brush one side of slices generously with olive oil. Place bread slices, oil side down, onto grill pan, lining up the grill ridges so the marks will run diagonally across the pieces of bread.
- Place a heavy skillet on top of bread slices to press them deeper into the grill pan, which will result in better defined grill marks. Let sit for about 2 minutes or until grill marks are very dark brown and crispy. If you want to grill both sides, brush the tops with more olive oil then flip slices over and repeat on second side.
- To serve, ladle soup into warm bowls. Top with a drizzle of pesto and a sprinkle of flake sea salt and finely ground black pepper. Serve with still-warm grilled bread and enjoy!
Source: Love and Olive Oil
|
Cabbage & Zucchini Okonomiyaki
Cabbage & Zucchini OkonomiyakiA savory Japanese cabbage pancake topped with a combination of okonomi sauce, Japanese mayo, crispy bacon, scallions, sesame seeds and bonito flakes. 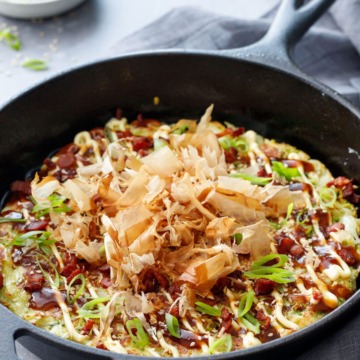 Ingredients:- 4 ounces bacon, chopped
- 1/2 head (300g) savoy cabbage, very thinly shredded (about 5 cups shredded)
- 1 medium zucchini (100g), grated
- 1 cup all-purpose flour
- 3/4 cup water
- 3 large eggs, lightly beaten
- 1 teaspoon chicken bouillon paste (optional, you can also use chicken broth instead of water)
- okonomi sauce
- kewpi mayonnaise
- sliced green onions
- toasted sesame seeds
- bonito flakes, for topping
Directions:- Cook bacon in a 9-inch cast iron skillet over medium heat. When crispy, transfer with a slotted spoon to a paper-towel lined plate and set aside.
- Spoon out about half of bacon fat and save for the second pancake (about 2 tablespoons worth).
- Return skillet to heat.
- In a large bowl, toss shredded cabbage and zucchini with flour, water, eggs and bouillon. Spoon half of mixture into hot skillet, patting it out into an even layer over the entire bottom of the pan.
- Cook for 8 to 10 minutes or until bottom is nice and browned. Carefully place a plate upside down on top of the skillet, then flip the entire skillet over so the pancake falls onto the plate (use silicone-grip oven mits if you have them, it’ll make things much easier!)
- Slide pancake back into skillet so the browned side is now facing up. Cook for an additional 5 to 7 minutes or second side is also golden brown. Slide out of skillet onto serving platter or a baking sheet (keep in a warm oven while you cook the second pancake).
- Return skillet to heat along with reserved bacon fat. Repeat process with remaining cabbage mixture.
- To serve, drizzle with okonomi sauce and kewpi mayonnaise and sprinkle with bacon bits, green onions and sesame seeds. Top with a handful of bonito flakes. Enjoy while still warm.
Source: Love and Olive Oil
|
Posole1 bag of dried red chiles
2 lbs of pork shoulder (cut into 1/2 inch cubes)
2 tbls salt
2 tbls minced garlic (~4 cloves)
1 tbls pepper
3 tbls oregano
4-29oz cans hominy, drained and rinsed
2 cups dry pinto beans
cabbage, onion, radishes, limes, fried tortilla strips (garnish) Remove stems and deseed chiles. Put in microwave-safe dish and cover with water. Microwave on high for 10 minutes. Set aside. Put meat and seasonings into a large pot and cover with 2-3 inches of water (above the meat). Bring to a boil, reduce heat, cook for 2-3 hours. Add pinto beans and cook 1-2 hours. Add hominy and cook 1 hour. Take chiles and put in a blender with a little salt, pepper, garlic, and oregano. Blend to make a paste. Add about half of the paste to the soup. Stir to combine. Taste. Add additional paste? if desired. Cook 1 more hour. (Note: Save remaining paste for another batch) For less fat, put finished soup in the fridge overnight and skim the fat off the top. Traditionally served with chopped white onion, shredded cabbage, sliced radishes, fried tortilla strips, and lime wedges. (In the picture above, Hubbyman added sour cream and shredded cheese.)
Source: Around My Family Table
|
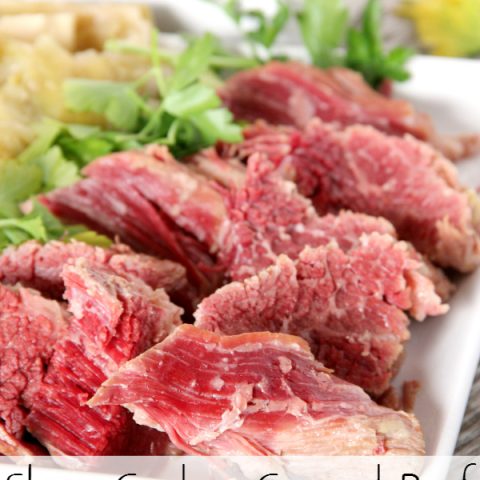
Slow Cooker Corned Beef RecipeMaking corned beef in a slow cooker produces tender, juicy corned beef, perfect for a St. Patrick's Day meal! Prep Time10 minutes Cook Time7 hours Total Time7 hours?10 minutes Ingredients- 5-6 pounds fresh corned beef
- 2 onions, studded with 4 whole cloves each
- 4 carrots, peeled and halved
- 2 ribs celery, halved
- 1 green cabbage, cored and cut into 4 wedges
- 12 small red new potatoes
- 6 carrots, peeled and cut into 2 1/2 inch lengths
- salt and pepper
- 2 tbsp chopped fresh parsley
Instructions- Line slow cooker with a disposable liner.
- Place corned beef brisket in the crock and add the onions, halved carrots, celery, & parsley. Cover with cold water and cook on high for about 5 hours.
- Remove the onion, parsley, and carrots from pot and then add the cabbage, potatoes, cut up carrots, salt, and pepper. Continue cooking for an additional 2 hours until meat is fall apart tender.
- Arrange beef on a serving platter and surround it with the cooked vegetables. Ladle the broth over the beef and vegetables and sprinkle with 2 tbls of chopped parsley.
Nutrition Information:?Yield:?16?开云体育 Size:?4 oz corned beef
Amount Per 开云体育:?Calories:?635Total Fat:?7.6gCarbohydrates:?133.08gProtein:?18.54g
Source: Around My Family Table
|
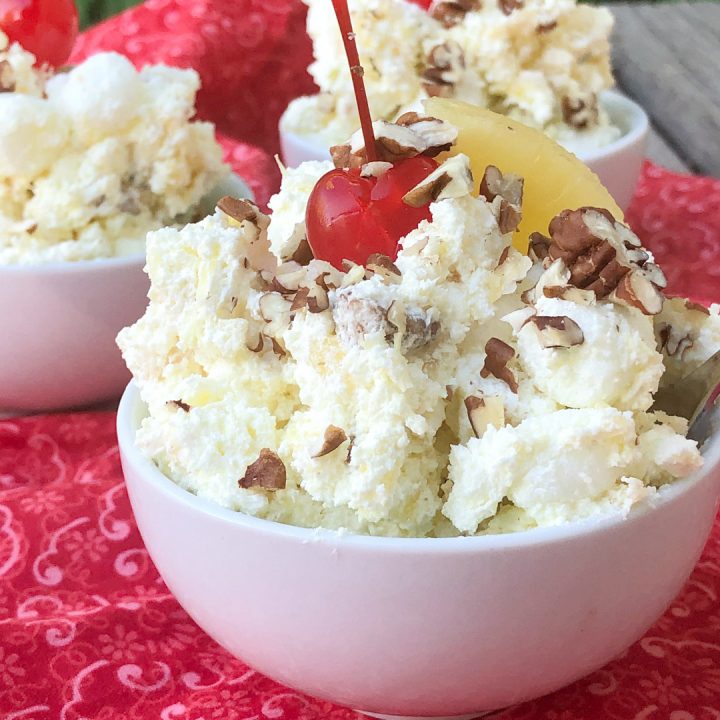
Classic Pineapple FluffCool and creamy, my Classic Pineapple Fluff has been a summer family favorite since I was a little girl.? It's the perfect dessert for summer, a BBQ, or just because you love pineapple! Prep Time20 minutes Additional Time2 hours Total Time2 hours?20 minutes Ingredients- 16 ounces Shamrock Farms cottage cheese
- 2 3-ounce boxes pineapple gelatin mix
- 16 ounces frozen whipped topping, thawed
- 1 20-ounce can crushed pineapple, well drained
- 2 cups?mini marshmallows
- 3/4 cup chopped pecans
InstructionsIn a large bowl, puree cottage cheese with an immersion blender (or use a food processor) until smooth.
Add in dry pineapple gelatin mixes until thoroughly incorporated. Then use a rubber spatula to fold in the whipped topping until no streaks remain.
Gently fold in crushed pineapple, mini marshmallows, and pecans.
Cover and refrigerate for at least 2 hours.
If desired, serve topped with fresh pineapple slices, chopped nuts and a cherry.
NotesIf you have trouble finding the pineapple gelatin, I've found it at??or?. Nutrition Information:?Yield:?20?开云体育 Size:?1
Amount Per 开云体育:?Calories:?161Total Fat:?10gSaturated Fat:?6gTrans Fat:?0gUnsaturated Fat:?3gCholesterol:?4mgSodium:?93mgCarbohydrates:?16gFiber:?1gSugar:?14gProtein:?4g
Source: Around My Family Table
|
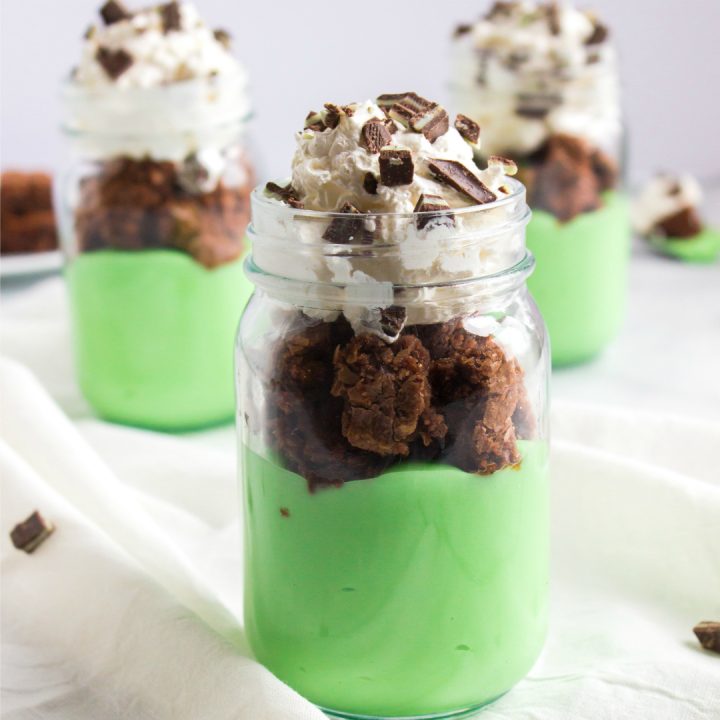
Chocolate Mint TrifleThis easy?Chocolate Mint Trifle Recipe?is the perfect addition to any March festivities, but it's great year round too. All you need is some homemade brownies, pudding, chocolate mints, and a little whipped cream for this fun dessert. Prep Time15 minutes Chill Time1 hour?30 minutes Total Time1 hour?45 minutes Ingredients- 1 brownie recipe (boxed or?, prepared according to directions and cooled
- 1 box (5.1 oz) instant vanilla pudding mix
- 2 cups milk*
- 1/2 tsp mint (or peppermint) extract
- 1/2 cup??or chopped Andes Mints
- whipped topping
Instructions- Cut prepared brownies into bite sized pieces.
- Combine vanilla pudding mix, milk (*amount according to package), and mint extract. Whisk well to combine or use a blender to gently mix. Add food coloring until desired color is reached. Store in refrigerator until pudding is set.
- In individual serving dishes or a large trifle dish layer pudding, brownie, mints, pudding, whipped cream, and top with additional mints.
NotesVariations: - Use mint oreos
- Use chocolate cake
- Use white chocolate pudding
- Use a gluten free cake or brownie mix
- Use dairy free pudding/whipped cream
- Use red food coloring for Valentine's
- Use an??(to keep it dye free)
Nutrition Information:?Yield:?8?开云体育 Size:?1
Amount Per 开云体育:?Calories:?259Total Fat:?11gSaturated Fat:?6gTrans Fat:?0gUnsaturated Fat:?4gCholesterol:?16mgSodium:?254mgCarbohydrates:?35gFiber:?1gSugar:?26gProtein:?5g
Source: Around My Family Table
|
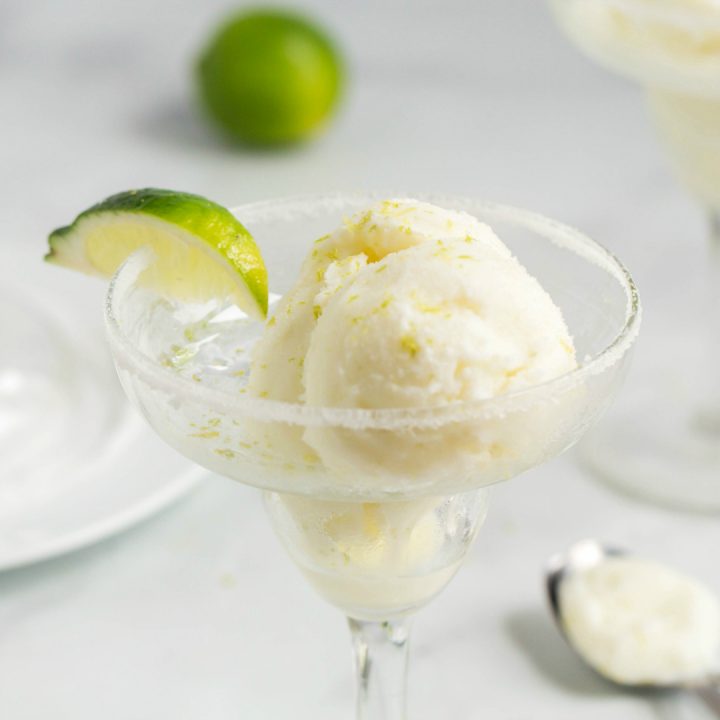
Frozen Margarita Lime Sherbet
Frozen Margarita Lime SherbetLime sherbet marries a frozen margarita recipe to make a delicious, cool dessert! Make this easy sherbet recipe to enjoy this summer! Prep Time25 minutes Freezing Time4 hours Total Time4 hours?25 minutes Ingredients- 1 tbsp lime zest (2 limes)
- 3/4 cup sugar
- 1/2 cup hot water (just use the hottest water from your tap)
- 1/2 cup lime juice (4 limes)
- 1/4 cup tequila
- 1 3/4 cup milk of choice (soy, almond, rice, 2%, etc)
- dash of salt
- additional limes, coarse kosher salt, coarse sugar for garnish (opt)
Instructions- **Plan ahead!?You will need about 4 hours to freeze the bowl and 4 hours for sherbet to set up in the freezer.**
- Place ice cream maker bowl in freezer to freeze for several hours.
- In a large bowl with a pour spout, add zest, sugar, and lime juice. Add hot water and stir well to dissolve sugar. Add tequila, milk, dash of salt and stir well.
- Assemble ice cream maker, turn on, and pour in liquid. Let mix for about 20 minutes or until it resembles soft ice cream. Pour into freezer safe dish and freeze for several hours or overnight.
Notes**Plan ahead!?You will need about 4 hours to freeze the bowl and 4 hours for sherbet to set up in the freezer.** Nutrition Information:?Yield:?4?开云体育 Size:?1
Amount Per 开云体育:?Calories:?242Total Fat:?2gSaturated Fat:?1gTrans Fat:?0gUnsaturated Fat:?1gCholesterol:?9mgSodium:?243mgCarbohydrates:?48gFiber:?1gSugar:?39gProtein:?4g
Source: Around My Family Table
|
DescriptionAn easy, moist, and flavorful cake with the flavors of your favorite classic banana pudding! Prepped in just minutes, this cake bakes up perfectly every time! - 1?(15.25- ounce) box yellow cake mix
- 1?(3.25- ounce) box Banana Cream Pudding mix
- 4?large eggs
- 1/4 cup?vegetable oil
- 1 cup?water
- 2?medium ripe bananas, mashed (about?3/4 cup)
- 2 cups?powdered sugar
- 1/3 cup?heavy cream, *see note
- 1 teaspoon?vanilla extract (or vanilla bean paste)
- 1/2 cup?coarsely crushed Nilla Wafer cookies
- Preheat the oven to 350°F. Coat a 10- cup??liberally with baking spray, set aside.
- Add the cake mix and pudding mix into the bowl of your??fitted with the?. Stir to combine.
- Add in the eggs, vegetable oil, water, and mashed bananas. Turn the mixer to low and mix for 30 seconds. Scrape the sides of the bowl as necessary and turn the mixer up to medium speed and mix for 1 minute.?
- Pour the batter into the prepared pan and bake for 50 – 55 minutes.?
- Allow the cake to cool in the pan for 15 – 20 minutes. Loosen the sides of the cake from the pan with a butter knife and then invert the cake pan onto a wire rack to cool completely.?
- Icing: Whisk together the powdered sugar, heavy cream, and vanilla until smooth. You can add more cream if you prefer a thinner icing. Spread the icing onto the cooled cake and garnish with crushed cookies.
Notes*if you don’t have heavy cream, you can use milk, but start with only 2 -3 tablespoons and add more until desired consistency is reached. Store airtight at room temperature for 3 -4 days.
Source: Cookies and Cups
|
DescriptionCongo Bars are an amped up chocolate chip cookie bar with 2 types of chocolate to make them extra gooey! - 1 cup?butter, room temperature
- 1 cup?dark brown sugar, packed
- 1 cup?light brown sugar, packed
- 3?large eggs
- 1 tablespoon?vanilla extract
- 1 teaspoon?kosher salt
- 2 teaspoons?
- 2 1/2 cups?all purpose flour
- 2 cups?semi-sweet chocolate chunks, or chopped chocolate
- 1/2 cup?milk?
- Preheat the oven to 350°F. Line a 9×13 pan with??and coat with nonstick spray. Set aside.
- In the bowl of your??fitted with the??mix the butter and the light and dark brown sugars together for 2 minutes on medium speed. Add in the eggs, vanilla, salt and??and mix for an additional minute on medium, scraping the sides of the bowl as necessary.
- Turn the mixer to low and add in the flour, mixing until just combined.
- Finally add in both kinds of chocolate and stir to incorporate.
- Spread the dough into the prepared pan and bake for 30 minutes or until the edges are set and lightly golden and the center appears slightly under-baked.
- Remove the pan from the oven and allow the bars to cool completely before cutting.
- Alternately you can chill the bars before cutting.
Notesstore at room temperature for up to 3 days or in the refrigerator for up to 5 days. Nutrition- 开云体育 Size:?1 bar
- Calories:?303
- Sugar:?29.5 g
- Sodium:?68 mg
- Fat:?14.8 g
- Carbohydrates:?41.5 g
- Protein:?3.8 g
- Cholesterol:?44.4 mg
Source: Cookies and Cups
|