Instant Pot Pulled PorkThis?Instant Pot Pulled Pork?is tender, juicy, perfectly seasoned and so incredibly delicious! Using the Instant Pot has the meat easily falling apart and ready to melt in your mouth in no time! Great for sandwiches, tacos, nachos and more! ?CourseDinner, Main Dish ?CuisineAmerican ?Keywordinstant pot pulled pork, pulled pork in instnat pot, pulled pork instant pot ?Prep Time10minutes?minutes ?Cook Time1hour?hour?15minutes?minutes ?开云体育s10 ?Calories184kcal ?AuthorTrish - Mom On Timeout - 3?pounds?boneless pork shoulder roast
- 1 to 2?tablespoons?extra virgin olive oil or vegetable oil or avocado oil
Pulled Pork Seasoning- 2?tablespoons?brown sugar?packed
- 2?teaspoons?smoked paprika
- 1?teaspoon?garlic powder
- 1?teaspoon?onion powder
- 1 ??teaspoons?salt
- 1?teaspoon?fresh ground black pepper
- 1?teaspoon?ground mustard
- ??teaspoon?ground cumin
- ??teaspoon?ground cayenne?optional
BBQ Sauce- ??cup?tomato sauce
- ??cup?dark brown sugar?packed
- ??cup?apple cider vinegar
- 1?teaspoon?Worcestershire sauce?optional
- ??teaspoon?liquid smoke?optional
For 开云体育- brioche buns?optional
- potato chips?optional
- pickles?optional
- coleslaw?optional
- barbecue sauce?optional
Combine seasoning ingredients in a small bowl and set aside. Use a sharp knife to cut the pork into 3 to 4 large pieces and trim off any large pieces of fat. Sprinkle the seasoning mix all over the pieces of pork and rub it in making sure it is evenly distributed on all sides of the meat. Turn on the Instant Pot to the sauté function and add oil. Once hot, add the pork and sear for 2 to 3 minutes on each side, or until a crust has formed. Repeat with remaining pork if needed. While the pork is sauteeing, whisk together the tomato sauce, dark brown sugar and apple cider vinegar in a medium bowl. Turn off the instant pot. Pour the sauce over the pork and then place the lid on the instant pot?and lock it into place. Cook the pork using the meat/stew function for 60 minutes or until the pork easily pulls apart with two forks. Once the pork has finished cooking, release the steam using the quick release valve to manually release the pressure. Transfer the pork to a large plate and shred using two forks. Toss the pulled pork with some of the sauce in the instant pot and/or toss with your favorite BBQ sauce. Serve on buns with coleslaw and bbq sauce, optional.
Storage InformationThis pulled pork instant pot recipe can be stored in an airtight container in the refrigerator for up to 4 days or in the freezer for up to 3 months.To store in the refrigerator, let the pulled pork cool to room temperature before transferring it to an airtight container. Make sure to press out any excess air before sealing the container, as this will help to prevent spoilage.To store in the freezer, put the pulled pork in a freezer-safe container or a resealable plastic bag, again, removing as much air as possible before sealing.When?reheating the pulled pork, it is best to reheat it in a saucepan over low heat, or in a slow cooker on low. This will help to prevent the pork from drying out. If you are reheating from frozen, thaw overnight in the fridge first before reheating. This recipe reheats really well and is perfect for leftover sandwiches, tacos, nachos, and the like!__Nutritional value does not include buns or coleslaw or any toppings. Calories:?184kcal?|?Carbohydrates:?15g?|?Protein:?17g?|?Fat:?6g?|?Saturated Fat:?2g?|?Polyunsaturated Fat:?1g?|?Monounsaturated Fat:?3g?|?Cholesterol:?56mg?|?Sodium:?483mg?|?Potassium:?369mg?|?Fiber:?0.5g?|?Sugar:?14g?|?Vitamin A:?278IU?|?Vitamin C:?2mg?|?Calcium:?30mg?|?Iron:?1mg
Source: Mom on Timeout
|
Instant Pot SpaghettiThis Instant Pot Spaghetti is a no-fuss, mouthwatering dinner that is ready in just 20 minutes! This delicious, one pot recipe combines ground beef (or use Italian sausage if you prefer), onion, garlic and a scrumptious sauce all cooked to perfection with your favorite spaghetti. Perfect for busy weeknights when you need a delicious, filling, family-friendly meal, fast! ?CourseMain Course, Main Dish ?CuisineItalian ?Keywordinstant pot spaghetti, spaghetti in instant pot, spaghetti instant pot ?Prep Time5minutes?minutes ?Cook Time15minutes?minutes ?开云体育s6 ?Calories507kcal ?AuthorTrish - Mom On Timeout - 1?pound?lean ground beef?or Italian sausage or use half and half
- 1?tablespoon?extra virgin olive oil
- ??medium onion?diced or use ? teaspoon onion powder
- 2?teaspoons?minced garlic?or use ? teaspoon garlic powder
- 2?teaspoons?Italian seasoning
- ??teaspoon?salt
- 2 ??cups?low sodium beef broth?or stock, divided (chicken broth or water can also be used)
- 16?ounces?spaghetti noodles
- 48?ounces?spaghetti sauce?(use your favorite brand and flavor)
- ??cup?grated Parmesan cheese?freshly grated
Garnish (optional)- grated Parmesan cheese
- chopped basil
- chopped parsley
- crushed red pepper flakes
Set the instant pot to sauté mode. Add olive oil to the pot and then add the ground beef. Break it up with a wooden spoon or silicone spatula. Cook for about 3 to 4 minutes and then add the diced onion. Continue cooking for another 2 to 3 minutes or until the meat is mostly cooked. Stir in the minced garlic, Italian seasoning and salt and cook for an additional minute, stirring frequently. Turn off the heat. Stir in ? cup of beef broth. Break the spaghetti in half and sprinkle it into the instant pot, criss-crossing the noodles and making sure the spaghetti doesn’t lay in a big clump. Pour the spaghetti sauce over the noodles followed by the remaining 2 cups of beef broth. Gently press the spaghetti down with a spatula ensuring it’s covered by liquid. Place on the lid on the Instant Pot and lock it into place. Turn the valve to the ‘sealing’ position. Pressure cook on high for 8 minutes (this does not include the time needed to pressurize the pot. When finished, open the quick release valve to manually release the pressure. Carefully remove the lid from the Instant Pot. Stir the spaghetti well to incorporate any standing liquid. Add the grated Parmesan cheese and stir to combine. Serve immediately with additional fresh grated Parmesan, fresh basil and/or red pepper flakes. Garlic bread on the side is a must!
Storage InformationLeftover spaghetti should be stored in an airtight container and refrigerated for up to 3 days.To freeze, let spaghetti cool and then transfer to a freezer safe, airtight container for up to 3 months. To thaw, place in the fridge overnight. Reheat by warming spaghetti in the microwave or on the stove top until heated through. Stir in a tablespoon or so of water or broth so the spaghetti isn’t too dry. Calories:?507kcal?|?Carbohydrates:?71g?|?Protein:?33g?|?Fat:?10g?|?Saturated Fat:?4g?|?Polyunsaturated Fat:?1g?|?Monounsaturated Fat:?4g?|?Trans Fat:?0.3g?|?Cholesterol:?54mg?|?Sodium:?1653mg?|?Potassium:?1345mg?|?Fiber:?6g?|?Sugar:?11g?|?Vitamin A:?1066IU?|?Vitamin C:?17mg?|?Calcium:?143mg?|?Iron:?5mg
Source: Mom on Timeout
|
Instant Pot CheesecakeInstant Pot Cheesecake?has a rich and decadent filling that is unbelievably creamy - pure indulgence in every bite. It pairs perfectly with the sweet and crunchy graham cracker crust and can be topped with your choice of fresh berries,?whipped cream,?hot fudge?or even?caramel sauce. The perfect choice for every occasion! ?CourseDessert ?CuisineAmerican ?Keywordinstant pot cheesecake, instant pot cheesecake recipe ?Prep Time20minutes?minutes ?Cook Time24minutes?minutes ?Chill Time6hours?hours ?开云体育s10 ?Calories493kcal ?AuthorTrish - Mom On Timeout Crust:- 1 ??cups?graham cracker crumbs
- ??cup?granulated sugar
- 6?tablespoons?unsalted butter?melted
Cheesecake:- 24?ounces?cream cheese?room temperature
- ??cup?granulated sugar
- ??cup?sour cream?room temperature
- 2?teaspoons?vanilla extract
- 2?large eggs?room temperature
- 1?tablespoon?all purpose flour
- 2?tablespoon?heavy cream
Optional Toppings:- fresh berries
- whipped cream
Prepare Graham Cracker CrustMix graham cracker crumbs, sugar, and butter in a small bowl. Press the crumb mixture into the bottom of the prepared springform pan and about an inch or two up the sides. Cover tightly with plastic wrap and place in the freezer while you prepare the cheesecake filling.
Prepare CheesecakeIn a large mixing bowl or the bowl of a stand mixer, beat together the cream cheese and sugar until smooth and combined, about 2 to 3 minutes on medium speed. Mix in the sour cream and vanilla extract and continue beating, just until smooth. Do not overmix. Add the eggs, one at a time, mixing on low speed or with a spoon just until incorporated. Do not overmix. Stir in flour and heavy cream just until combined. Remove the crust from the freezer and remove the plastic wrap. Pour the cheesecake filling into the crust. Gently tap the springform pan on the counter several times to bring any bubbles to the surface. Continue tapping gently until all of the bubbles have popped. If you have any stubborn bubbles, use the tip of a knife to pop them. Cover the top of the pan with a paper towel. Make sure the paper towel is long enough that it can be wrapped under the pan. Note, the paper towel should not be touching the cheesecake. (The paper towel will absorb any excess moisture.) Cover the cheesecake loosely with aluminum foil, using the foil to keep the paper towel in place. Create a foil sling for the instant pot by folding heavy duty foil into two strips about 18 inches long. Place the two strips crosswise (they should form an X) underneath the cheesecake and then use the sling to lower the cheesecake into the instant pot. (Slings are really useful with instant pots so consider purchasing a silicone sling.)
Pressure Cook CheesecakeSeal the instant pot and set to pressure cook for 24 minutes. Allow the instant pot to naturally release steam for 10 full minutes before releasing the rest of the pressure manually. Carefully lift the cheesecake from the instant pot using the foil sling and then carefully remove the foil and paper towel from the top of the cheesecake. Look for the outside edge to be set and the center to have a slight jiggle to it. You can use a thermometer in the middle of the cheesecake, you’re looking for 140°F-150°F. If the cheesecake is not fully cooked, return to the instant pot and pressure cook for an additional 5 minutes. Bring the cheesecake to room temperature, sitting out for at least 2 hours. Run a knife gently around the edge of the pan to release the cheesecake. Cover tightly with plastic wrap and refrigerate for at least 6 hours or overnight Remove the cheesecake from the springform pan, garnish as desired and serve.
Equipment Needed:Instant Pot Springform Pan?(7 to 8 inches)Storage InformationYou can store leftover cheesecake in the refrigerator for up to 1 week. Make sure to wrap tightly with plastic wrap or place in an airtight, ziploc bag.You can also freeze this cheesecake for up to 2 months. Wrap tightly in plastic wrap, followed by foil and then place in an airtight, freezer safe ziploc bag. Thaw overnight in the refrigerator before serving. Calories:?493kcal?|?Carbohydrates:?36g?|?Protein:?7g?|?Fat:?36g?|?Saturated Fat:?21g?|?Polyunsaturated Fat:?2g?|?Monounsaturated Fat:?10g?|?Trans Fat:?0.3g?|?Cholesterol:?132mg?|?Sodium:?316mg?|?Potassium:?151mg?|?Fiber:?0.4g?|?Sugar:?28g?|?Vitamin A:?1311IU?|?Vitamin C:?0.2mg?|?Calcium:?101mg?|?Iron:?1mg
Source: Mom on Timeout
|
Beef-bean Taco Salad Casserole (marketgrow.com)
Beef-bean taco salad casserole is a hearty and flavorful twist on classic taco salad, perfect for weeknight dinners or casual gatherings. This casserole layers seasoned ground beef, refried beans, salsa and crunchy tortilla chips with generous topping of melted cheese and fresh toppings, like lettuce, tomato and sour cream. It’s a crowd-pleasing dish that delivers the best parts of taco salad in warm, comforting casserole form - easy to prepare and even easier to love.
INGREDIENTS list of 12 items 1 pound ground beef 1 packet taco seasoning mix 1/2 cup water 1 (15-ounce) can refried beans 1 cup salsa (mild or spicy, your choice) 2 cups tortilla chips, slightly crushed 1 1/2 cups shredded cheddar or Mexican blend cheese 1 cup shredded lettuce 1 medium tomato, diced 1/2 cup sour cream 1/4 cup sliced green onions (optional) 1/4 cup sliced black olives (optional) list end
INSTRUCTIONS list of 11 items 1. Preheat the oven to 375°F (190°C). 2. Brown the beef in a large skillet over medium heat until fully cooked, breaking it apart with a spoon. Drain excess fat. 3. Add taco seasoning and water to the skillet. Stir to combine and simmer for 3–5 minutes until the sauce thickens. 4. Stir in the refried beans and salsa, mixing well until heated through. 5. Layer the crushed tortilla chips in the bottom of a 9×13-inch baking dish. 6. Spread the beef and bean mixture evenly over the chips. 7. Sprinkle the shredded cheese over the top. 8. Bake, uncovered, for 15 to 20 minutes until the cheese is melted and bubbly. 9. Remove from oven and let sit for 5 minutes. 10. Top with shredded lettuce, diced tomato, sour cream, and any other desired toppings. 11. Serve immediately with extra chips or a side of guacamole. list end
This dish also makes great leftovers and can be customized with jalapeno, avocado slices or hot sauce for added flavor.
|
Potato Chip Tortilla (marketgrow.com)
Potato chip tortilla is a clever twist on the classic Spanish tortilla, perfect for when you’re short on time or fresh potatoes. This version uses crushed potato chips, instead of sliced potato, creating a dish that’s both savory and satisfyingly crisp. With a rich, custardy egg base and the salty crunch of chips, it’s ideal for brunch, lunch or a quick weeknight dinner. Pair it with a simple green salad, or serve it as tapas with olives and cured meat. It’s budget-friendly, pantry-based and surprisingly delicious. ----- POTATO CHIP TORTILLA RECIPE 开云体育s: 4 Prep Time: 10 minutes Cook Time: 15 minutes Total Time: 25 minutes INGREDIENTS: list of 9 items ? 6 large eggs ? 1/2 cup whole milk or heavy cream ? 1/2 teaspoon salt ? 1/4 teaspoon black pepper ? 1/4 teaspoon smoked paprika (optional) ? 5 oz plain salted potato chips (about 5 cups loosely crushed) ? 1 tablespoon olive oil ? 1 small onion, thinly sliced (optional) ? Fresh parsley or chives, chopped (for garnish) list end INSTRUCTIONS: list of 6 items 1. Whisk the Eggs In a large mixing bowl, whisk the eggs with milk or cream, salt, pepper, and smoked paprika until well combined. 2. Add the Chips Gently crush the potato chips in the bag (not into crumbs—just broken up). Add the chips to the egg mixture and stir gently to coat. Let them sit for 5 minutes so they absorb some of the liquid. 3. Sauté the Onion (Optional) In a nonstick 8-inch skillet, heat olive oil over medium heat. If using onion, sauté until soft and lightly golden, about 5 minutes. 4. Cook the Tortilla Pour the egg and chip mixture into the skillet. Spread it evenly and reduce heat to medium-low. Cook uncovered for 6–8 minutes, or until the edges are set and the center is just slightly wobbly. 5. Flip and Finish Carefully place a large plate over the skillet, invert the tortilla onto the plate, then slide it back into the skillet to cook the other side. Cook for another 3–5 minutes, or until fully set and lightly golden. 6. Serve Slide onto a serving plate, let rest for 5 minutes, then slice into wedges. Garnish with fresh herbs and serve warm or at room temperature. list endjoy your Potato Chip Tortilla as a quirky and delicious take on a Spanish classic!
|
Mozzarella Stuffed Italian Meatballs
Mozzarella Stuffed Italian Meatballs Author:?Ashley Recipe type:?dinner Cuisine:?Italian Prep time:??15 mins Cook time:??30 mins Total time:??45 mins Serves:?12-15 meatballs ? - 1 pound ground beef
- 3 cloves garlic, chopped small
- ? cup yellow onion, chopped small
- ? cup of grated Parmesan cheese
- 1 cup unseasoned breadcrumbs
- 2 large eggs
- Sprinkle top with dried parsley and oregano (I don't measure)
- Add dried basil (little more than parsley & oregano)
- Sprinkle a little ground black pepper over top
- Add a splash of water
- 12-15 1-inch fresh Mozzarella balls
- Preheat oven to 400 degrees F. and grease 9×13-inch baking dish or jelly roll pan with nonstick cooking spray (or use silicone baking mat).
- Place all of the ingredients EXCEPT for the mozzarella balls into a large mixing bowl and with clean hands, mix until just combined. Do not overwork the meat or it will make them tough.
- With wet hands, take ? cup beef mixture, form into a ball, and press into center with your thumb to make room for cheese ball. Place cheese ball in the middle then with hands enclose the cheese with the beef, making sure the cheese is completely covered and evenly in the center. Place meatballs on prepared baking dish and bake for 30 to 32 minutes, or until cooked through*. Some mozzarella cheese may have escaped, but that's OK. They will still taste amazing.
- *If adding to a pot of spaghetti sauce, remove from oven at 10-12 minutes and place meatballs into your sauce and allow to cook in sauce until serving time (an hour or so). They will soak up the flavor of the sauce and also flavor the sauce itself. It's very good this way.
- Serve over top your favorite pasta or inside a warm roll for delicious meatball sandwiches.
Source: Wishes and Dishes
|
Creamy Beef and ShellsAshleyCreamy Beef and Shells is the ultimate creamy pasta recipe!? It is incredibly rich, filling, and screams comfort food! Prep Time15minutes?mins Cook Time25minutes?mins Total Time40minutes?mins - 8?ounces?medium pasta
- 1?tbsp?olive oil
- 1?lb?ground beef
- 1/2?medium onion, diced
- 2?cloves garlic, minced
- 1.5?tsp?Italian seasoning
- 2?tbsp?all-purpose flour
- 2?cups?beef stock
- 1 (15-ounce)?can tomato sauce
- 3/4?cup?heavy cream
- salt and black pepper, to taste
- 1.5?cups?sharp cheddar cheese, shredded
In a?large pot?of boiling salted water, cook pasta according to package instructions; drain well. Heat olive oil in a large?skillet?over medium high heat. Add ground beef and cook until browned, about 3-5 minutes, making sure to crumble the beef as it cooks; drain excess fat. Set aside. Add onion to the skillet, and cook, stirring frequently, until translucent, about 2-3 minutes. Stir in garlic and Italian seasoning until fragrant, about 1 minute. Whisk in flour until lightly browned, about 1 minute. Gradually whisk in beef stock and tomato sauce.?Bring to a boil; reduce heat and simmer, stirring occasionally, until reduced and slightly thickened, about 6-8 minutes. Stir in pasta, beef and heavy cream until heated through, about 1-2 minutes; season with salt and pepper, to taste. Stir in cheese until melted, about 2 minutes. Serve immediately.
Source: Wishes and Dishes
|
Copycat Taco Bell Mexican Pizza
Mexican Pizza Author:?Ashley Recipe type:?Dinner Cuisine:?Mexican Prep time:??5 mins Cook time:??25 mins Total time:??30 mins Serves:?4 ? - 1 pound ground beef
- 1 packet taco seasoning
- ? cup water
- 1 can (15 oz) refried beans
- 1 can (10 oz) red enchilada sauce
- ? cup diced tomatoes
- 1? cup shredded Mexican blend cheese
- 8 flour tortillas, taco or fajita size
- 1 TBSP vegetable or canola oil
- Preheat oven to 375 degrees.
- In a??brown ground beef.
- Once cooked, add taco seasoning and ? cup water. Bring to a boil, reduce heat and simmer until most of the water is absorbed.
- In a large skillet pour half of the oil into the pan. Heat over medium high heat.
- Add tortillas and cook for 4-5 minutes, flipping frequently, until crisp, being careful not to burn them. Repeat with remaining tortillas and oil.
- Spread about ? cup of beans evenly over the bottom of each tortilla. Top with cooked beef.
- Place another tortilla over the top of the meat.
- Spread about 2 TBSP of enchilada sauce evenly over the tortilla. Divide tomatoes evenly over the top of the tortillas.
- Sprinkle the cheese over the top evenly.
- Place each Mexican pizza on a??and bake for 7-8 minutes until the cheese is melted and insides are hot.
- Cut into triangles and serve immediately!
Source: Wishes and Dishes
|
Big Mac TacosAshleyMake Taco Tuesday a little wacky with Big Mac Tacos recipe! This taco recipe is low carb with the tortillas, and all the same great taste of a McDonald's Big Mac, but without the bun! Prep Time15minutes?mins Cook Time15minutes?mins Total Time30minutes?mins - 8?Tortillas
- 2?lbs.?Ground Beef or Ground Turkey
- 8?slices?American Cheese
- Shredded Lettuce
- Dill Pickle Chips
- 1?cup?Mayo
- 2?TBSP?onion?finely chopped.
- 8?tsp?Dill Relish
- 6?TBSP?Creamy French Dressing
- 2?tsp?Sugar?or sugar substitute, if preferable
- 2?tsp?Vinegar
Start by heating up your?skillet. Add hamburger to the top of the tortilla and spread out until nearly the whole tortilla is covered. Place the hamburger side down in the skillet. Cook until the meat is cooked through. Flip and soak up grease with a paper towel. Cook the tortilla side just until it’s slightly toasted. Place a slice of cheese on top of your hamburger. Allow it to melt just a bit. Remove from heat and add shredded lettuce and pickles. Add you Mayo, onion, relish, dressing, sugar, vinegar to a large?mixing bowl. Mix until well combined. Top your taco with the mixture. Serve hot and enjoy!
Source: Wishes and Dishes
|
Bacon Cheeseburger Dip Author:?Ashley Recipe type:?Appetizer Cuisine:?American Prep time:??15 mins Cook time:??25 mins Total time:??40 mins Serves:?4-5 ? - ? ? pound ground beef
- ? 6 strips bacon, cut into 1 inch pieces
- ? 1 small onion, diced
- ? 1 clove garlic, chopped
- ? 4 ounces cream cheese, room temperature
- ? ? cup sour cream
- ? ? cup mayonnaise
- ? ? cup mozzarella, shredded
- ? ? cup sharp cheddar cheese, shredded
- ? 1 tablespoon Worcestershire sauce
- ? 2 tablespoon ketchup
- 1 teaspoon mustard
- Cook the ground beef in a?over medium heat, set it aside and drain the grease from the pan.
- ? Cook the same bacon in the pan until crispy, about 6-10 minutes, set aside and drain but reserve a tablespoon of the grease.
- ? Add the onion to the pan with the bacon grease and saute until tender, about 5-7 minutes.
- ? Add the garlic and saute until fragrant, about a minute, being careful not to let it burn.
- ? Mix the ground beef, bacon, onions and garlic, cream cheese, sour cream, mayonnaise, ? cup of the mozzarella cheese, ? cup of the cheddar cheese, Worcestershire sauce, mustard, and ketchup together in a large bowl and pour it into a??(I used a?).
- ? Bake in a preheated 350F/180C oven until the top starts turning a light golden brown and bubbling, about 20-25 minutes. A few minutes before it is done, add ? cup of cheddar cheese and ? cup of mozzarella cheese to the top and stick it back in the oven just until cheese is melted (be careful not to let it burn). Serve warm with tortilla chips. Enjoy!
Source: Wishes and Dishes
|
Course:?Breakfast Cuisine:?American Keyword:?maple bacon monkey brerad, monkey bread Prep Time:?15minutes?minutes Cook Time:?45minutes?minutes Resting Time:?15minutes?minutes Total Time:?1hour?hour?15minutes?minutes 开云体育s:?8 ?Calories:?1160kcal ?Author:?Julie Kotzbach Maple Bacon Monkey Bread is where sweet and savory flavors unite in a mouthwatering, gooey breakfast treat that everyone loves! - 12?ounces??cooked crispy and crumbled
- 48.9?ounces?refrigerated Grands! buttermilk biscuits?(3 cans - 8 biscuits each)
- 1?cup??packed, divided
- 1?cup?
- 2?tablespoons?
- 1?teaspoon?
- ??cup?
- ??cup?
- 1?teaspoon?
Preheat your oven to 350 degrees F. Liberally grease a 12-cup bundt pan with butter or non-stick cooking spray. Set aside. In a medium bowl, stir together 1/4 cup of brown sugar, granulated sugar, cinnamon, and nutmeg until evenly combined. Set aside. Open the biscuit cans and separate the biscuits. Cut each biscuit into quarters. Add 5-6 biscuit pieces into the cinnamon sugar mixture a toss to coat. Place the coated pieces into the prepared bundt pan. Repeat until there is a full layer in the pan. Add some crumbled bacon over the biscuits. Then continue coating and layering the biscuit pieces while adding bacon as you assemble. Set aside. (Reserve some of the bacon for garnish later.) To a small saucepan add the butter, the remaining 3/4 cup of brown sugar, vanilla, and maple syrup. Place over medium-high heat and whisk until the sugar has dissolved and the sauce is smooth. Remove from the heat when the sauce starts to bubble. Pour the sauce over the biscuits and bacon so that the pan is mostly filled. Bake for 35 minutes or until the biscuits are golden brown. Remove the pan from the oven and let rest for 10-15 minutes. Place a large plate over the bundt pan and then invert the pan onto the plate to remove the monkey bread from the pan. (You may need to run a knife around the edge of the bread before flipping to make it release more easily.) Sprinkle with more chopped bacon before serving.
Source: Bread Booze Bacon
|
Course:?Side Dish Cuisine:?American Keyword:?homemade white bread, white bread, white bread recipe Prep Time:?20minutes?minutes Cook Time:?30minutes?minutes Rising Time:?1hour?hour?45minutes?minutes Total Time:?2hours?hours?35minutes?minutes 开云体育s:?2?loaves ?Calories:?109kcal ?Author:?Julie Kotzbach Homemade White Bread is a simple recipe that will fill your house with the amazing aroma of freshly baked bread and is fun and easy to make! - 5 ??cups??or bread flour
- ??cup?
- 3?tablespoons?
- 3?tablespoons??softened
- 2 ??teaspoons??(one 1/4-ounce packet)
- 2?teaspoons?
- 2?cups?warm water?(115 degrees F)
- 2?tablespoons?melted (optional)
Add 2 cups of the flour along with the dry milk, sugar, butter, yeast, and salt to the bowl of a stand mixer. Using the hook attachment, mix for a few turns just enough to combine. Add the warm water and mix until combined. On slow speed, begin to add the flour a little at a time until you've added another 3 cups of flour (5 cups total). Turn the mixer up to medium-high speed. The dough should clean the sides of the bowl after a couple of minutes. If it doesn’t, add a little flour at a time until it does, only add up to another ? cup of flour, no more. Continue to mix/knead the dough on medium-high speed for 10 minutes. The dough will become smooth and elastic. Spray the dough with a little non-stick cooking spray and roll it around in the bowl, so it is lightly oiled. Cover the bowl with plastic wrap and let the dough rise in a warm place in your house for about 1 hour. Take off the plastic wrap and punch the dough down while it's in the bowl to release the air bubbles. Lightly flour a clean work surface. Turn the dough out onto the work surface and knead it a few times by hand to get any additional air bubbles out, for about 1 minute. Spray two 9-inch x 5-inch loaf pans with non-stick cooking spray. Divide the dough into two equal pieces. With your hands, roll them out into a log. Place each log into a prepared loaf pan. Let the bread loaves rise on the counter, uncovered until doubled in size, about 30-45 minutes. While they are doing this second rise, preheat your oven to 400 degrees F. Once the dough has doubled, make a slit down the center of the bread if desired. Place the loaves into the oven on the middle rack and immediately lower the oven temperature to 350 degrees F. Bake for 30-35 minutes until golden brown. Remove the loaves from the oven. If desired, immediately brush the tops of the bread with melted butter (this is optional). Let the bread loaves cool in the pan for 5 minutes before transferring them to a wire rack to cool completely, about 1 to 1 1/2 hours.
Source: Bread Booze Bacon
|
Copycat Olive Garden Breadsticks
Copycat Olive Garden Breadsticks
Course:?Side Dish Cuisine:?American Keyword:?breadsticks, copycat olive garden breadsticks, olive garden breadsticks Prep Time:?15minutes?minutes Cook Time:?13minutes?minutes Resting Time:?3hours?hours?10minutes?minutes Total Time:?3hours?hours?38minutes?minutes 开云体育s:?15?breadsticks ?Calories:?163kcal ?Author:?Julie Kotzbach Enjoy warm buttery Copycat Olive Garden Breadsticks at home, anytime you want! This simple recipe will have you baking batch after batch! Breadsticks- 1 ??cup?warm water?(110 degrees F)
- 2 ??teaspoons??(1 packet)
- 3 ??tablespoons??divided
- 3?cups??plus more as needed
- 2?teaspoons?
- 2?tablespoons?
Topping- 6?tablespoons??melted
- 2?teaspoons?
- ??teaspoon?
- ??teaspoon?
- 1?tablespoon?grated
Place the warm water, yeast, and ? tablespoon of sugar into a small bowl, and stir together. Let sit for 5-10 minutes until foamy, and the yeast is activated. To the bowl of a stand mixer fitted with the hook attachment add the remaining 3 tablespoons of sugar, 3 cups of flour, and salt. Mix to combine. Add the activated yeast mixture and oil to the bowl. Mix on medium-low speed until a dough starts to form, scraping down the sides as needed. Continue to mix until the dough starts to clean the sides of the bowl. If it is not cleaning the sides, begin to add 1 tablespoon of flour at a time until it does (up to ? cup more flour total). Once the sides of the bowl are being cleaned by the dough, turn the stand mixer speed ti medium-high. Knead for 7 minutes until a smooth dough forms. Lightly spray a large bowl with non-stick cooking spray. Place the dough in the bowl and roll it around so the dough is coated in oil. Cover with plastic wrap and allow the dough to rest until doubled in size, about 1 to 1 ? hours. Spray two baking sheets with non-stick cooking spray and set aside. Transfer the breadstick dough to a lightly floured work surface and punch it down to release any air bubbles. Divide the dough into 2-ounce portions. Roll each portion into a ball. (I got 15 pieces, but amounts may vary depending on how much flour is used.) Roll each dough ball into a long rope and then place them on the prepared baking sheets, so that they are not touching. Cover the breadsticks with a clean kitchen towel and allow them to rise again until doubled in size for 1 to 1 ? hours. Preheat your oven to 400 degrees F. In a small bowl, stir together the butter, garlic powder, salt, and Italian seasoning. Brush the breadsticks with half of the garlic butter. Bake for 11-14 minutes until golden brown. Remove from the oven and immediately brush the breadsticks with the remaining butter mixture. Sprinkle the parmesan cheese over top and serve warm.
Source: Bread Booze and Bacon
|
Course:?Breakfast, Dessert Cuisine:?European Keyword:?chocolate babka, nutella braided bread, nutella bread Prep Time:?20minutes?minutes Cook Time:?35minutes?minutes Resting Time:?2hours?hours?35minutes?minutes Total Time:?3hours?hours?30minutes?minutes 开云体育s:?12?slices ?Calories:?360kcal ?Author:?Julie Kotzbach Nutella Braided Bread is a warm yeast bread full of rich chocolaty Nutella & crunchy hazelnuts. It's a gorgeous treat that is simple to make! - ??cup??lukewarm (105-110F)
- ??cup?water?lukewarm (105-110F)
- 2?tablespoons?
- 0.25?ounces??(1 envelope)
- 1?large?
- 1?teaspoon?
- 4?tablespoons??melted
- 4?cups?
- ??cup?
- ??cup??roughly chopped
Toppings- 1?egg yolk
- 1?tablespoon?water
- ??cup?for dusting
In the bowl of a stand mixer (or a large mixing bowl)< combine the warm milk, warm water, sugar, and yeast. Whisk to dissolve the yeast. Let rest for 5-10 minutes until foamy. To the yeast mixture, add the egg, salt, melted butter, and 1 cup of flour. With the dough hook attachment in place, turn the mixer to low. Add the rest of the flour, 1 cup at a time, while the mixer is running. Once the flour is just combined, turn the mixer speed up to medium and knead for 5-8 minutes. (You can also knead the dough by hand for 25 minutes.) Transfer the dough to a large, greased bowl. Cover with plastic wrap and let rise in a warm area of your kitchen until doubled in size, about 2 hours. Line a baking sheet with parchment paper and set aside. Once the dough has doubled, dump it out onto a floured work surface. Roll the dough out into a large rectangle (about 14x18 inches). Spread the Nutella over the dough in a single layer, leaving a 1/2-inch border around the edges. Sprinkle the chopped hazelnuts all over the Nutella. Tightly roll the dough into a log, starting on the longer side. Using a sharp knife, cut the log in half lengthwise, leaving the last inch on one end intact. Twist the two strands of dough around each other, and then form the twist into a wreath. Pinch the ends together to seal the circle. Carefully transfer the wreath to the parchment-lined baking sheet. Cover loosely with plastic wrap and let rest until the dough is soft and nearly doubled in size, about 30 minutes. Preheat your oven to 350 degrees F. Beat the egg yolk and water together in a small bowl. Brush the eggs wash over the top of the bread. Bake for 30-35 minutes or until golden brown. Remove the bread from the oven and let it cool on a wire rack. Dust the bread all over with powdered sugar before cutting it into slices and serving.
Source: Bread Booze Bacon
|
Course:?Appetizer Cuisine:?American Keyword:?pepperoni bread Prep Time:?20minutes?minutes Cook Time:?40minutes?minutes Total Time:?1hour?hour 开云体育s:?6 ?Calories:?551kcal ?Author:?Julie Kotzbach Easy-to-make cheesy Pepperoni Bread is a delicious crowd-pleasing dish that's perfect for parties, game days, or weeknight dinners! - 1?pound??or bread dough, thawed
- 1?tablespoon?
- 1?tablespoon??minced
- 8?ounces?
- ??cup??peeled and chopped
- ??cup??silced
- 1 ??cup??shredded
- 1?cup?Italian cheese blend?shredded
- ??for serving
Preheat the oven to 350 degrees F. Spray a 10-inch x 15-inch or larger baking sheet with non-stick cooking spray. Place the pizza dough on the baking sheet and stretch it or roll it out to a rectangle that's about 10x15. Brush the dough with the olive oil and sprinkle on the garlic. Add the sliced pepperoni in layers, and try to keep one long edge free from toppings about 1 inch from the edge. Spread the chopped onion and sliced pepperoncini peppers evenly over the pepperoni. Sprinkle the mozzarella and Italian blend cheese on top. Roll the dough into a tight log shape starting at one long end and ending at the other side where the dough is exposed (no toppings). Pinch the seam together and then pinch the ends closed. Place the loaf seam side down and tuck the ends in under the log. Bake for 35-40 minutes or until the bread is golden brown on top. Remove from the oven and let sit for 10 minutes before slicing. Serve warm with marinara sauce for dipping.
Source: Bread Booze and Bacon
|
Apple Spinach Salad - Julia's Album
Apple Spinach Salad - Julia's Album
Serves: ?6
Made By:
Diane Phillips
"Loved this. See my pic (really need to improve the food
photography)."
20-Minute Apple Spinach Salad with homemade maple-lime mustard
dressing will make a healthy and refreshing addition to your
favorite weeknight dinner! The addition of fruit, nuts, and
cheese elevates this simple spinach salad to a
Recipe Type: Salad
Total Time: 20 min
Prep Time: 20 min
Ingredients:
| 1/3?cup |
extra virgin?olive oil |
| 3?tablespoons |
Dijon?mustard |
| 3?tablespoons |
maple syrup |
| 1 |
large?lime?(juice freshly squeezed) |
| 6?ounces |
baby?spinach |
| 1?cup |
pecans?halves (toasted, some of
them chopped finely) |
| 1/2?cup |
dried?cranberries |
| 1 |
small green?apple?((Granny Smith), cored and
diced) |
| 1 |
small red?apple?((such as Fuji or Gala),
cored and diced) |
| 1/3?cup |
goat?cheese?(crumbled) |
Directions:
Make
salad dressing
Combine all salad dressing ingredients in a mason jar. Whisk
well with a fork, until emulsified. Add more lime juice to
taste.
Assembly
I prefer to arrange the salad in individual bowls for
presentation purposes.
Add spinach to each individual salad bowl. Chop up half of the
nuts. Nestle the remaining salad ingredients on top of the
spinach.
Drizzle with the salad dressing.
Alternatively, you can combine all the salad ingredients
(except pecans) in a large serving bowl, add the dressing, and
toss to combine. Then, top the salad with toasted pecan halves
(some of them chopped).
Source:?
--
Ginny Butterfield
Cranberry Twp, Pa
|
ield: 16 muffins Mocha MuffinsTwo times the chocolate makes these?Chocolate Mocha Muffins?the perfect breakfast choice to get you going in the morning. Grab a cup of coffee and a muffin before heading out the door. Prep Time15 minutes Cook Time16 minutes Total Time31 minutes Ingredients- 1/2 cup unsalted butter, softened
- 1/3 cup brown sugar
- 1/3 cup granulated sugar
- 1 large egg
- 2 teaspoons vanilla extract
- 1 cup sour cream
- 1/3 cup milk
- 1/3 cup strong brewed coffee, cooled
- 2 teaspoons baking powder
- 1 teaspoon baking soda
- 1 teaspoon table salt
- 1/2 cup dark cocoa powder
- 2 cups all purpose flour (240g)
- 1 1/4 cups mini chocolate chips, divided
Instructions- Preheat the oven to 400°F. Place 16 cupcake liners in two cupcake pans.
- Beat the butter and sugar until fluffy. Add the egg, sour cream, and vanilla and beat until creamy.
- Sift the dry ingredients and add them alternately with the milk and coffee, beating slowly. Do not overmix.
- Stir in 1 cup mini chocolate chips by gently. Spoon the batter evenly into the cupcake liners.
- Sprinkle the tops of the batter with the remaining chocolate chips. Bake for 15-17 minutes or until a toothpick inserted in the center comes out mostly clean.
- Remove the muffins from the oven and let them cool in the pan for 2-3 minutes. Then, place the muffins on a wire rack to cool completely. Store in a sealed container.
Notes- Substitute other liquids.?If you do not like coffee or do not want any caffeine in your baked goods, you can substitute milk or water for it.
- Do NOT over-mix your batter.?Overmixing the batter can make your muffins tough.
- Skip the paper liners.?Spray the muffin pan with nonstick baking spray, then use a paper towel to wipe out the excess before filling it with batter.
- Fill them neatly.?Spoon the batter into the prepared pan using a large cookie or ice cream scoop.
- All ovens run differently.?Before the timer goes off, check the muffins by inserting a toothpick in the center. They are done when the toothpick comes out with a few moist crumbs.
- Place a muffin?in the microwave?for 10 seconds for that fresh from the oven taste.
Source: Inside BruCrew Life
|
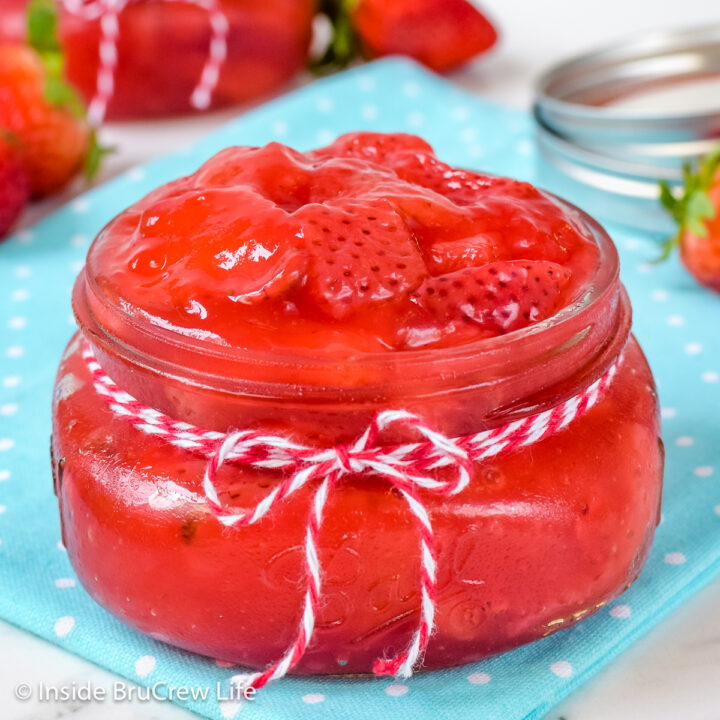
Yield: 5 cups pie filling Strawberry Pie FillingIn just 15 minutes you can make a delicious?Strawberry Pie Filling?that has a vibrant red color and is bursting with flavor.?This pie filling recipe is easy to make using 5 simple ingredients and is great for pies, cakes, cheesecake, or breakfast pastries. Prep Time15 minutes Total Time15 minutes Ingredients- 5 cups sliced fresh strawberries (24 ounces)
- 2 tablespoons lemon juice
- 3/4 cup granulated sugar
- 1/4 cup cornstarch
- 1 1/4 cup water
- 1 - 3 ounce box strawberry Jell-O powder
Instructions- Stir together the strawberries and lemon juice. Set aside.
- Whisk together the sugar and cornstarch. Stir it into the water in a large saucepan and heat over high heat until the mixture turns clear and starts to bubble.
- Remove the pan from the heat and stir in the Jello powder until dissolved.
- Add the sliced strawberries and stir until completely coated in the gel mixture.
- Let the mixture cool on the back of the stove or counter for 1-2 hours, then refrigerate until chilled all the way through.
- Keep refrigerated in a sealed container for 4-5 days. It can also be frozen if you want to keep it longer.
Notes- Avoid lumps.?In order to avoid lumps in your glaze, whisk together the cornstarch and sugar ahead of time. This will ensure a smooth consistency when the filling is finished.
- Adjust the amount of sugar.?If your berries taste extra sweet, use less sugar in the filling.
- Do not overcook the glaze.?Cornstarch starts to break down with too much heat. If this happens, your filling will not be as thick or firm when it chills.
- Use ripe strawberries.?The natural sweetness from the strawberries will shine through and give the filling a delicious flavor. Avoid berries that are mushy or moldy.
- Add other fresh fruit.?Use any mixture of sliced strawberries, raspberries, blueberries, or blackberries to change it up.
- Prevent a skin from forming.?Place a piece of plastic wrap right on top of the filling while it is hot.
- Cool before using.?This allows the pie filling time to set up and thicken before adding it to other desserts.
- Want to can the filling??Use clear-jel instead of cornstarch, if you are going to can the filling.
Source: Inside BruCrew Life
|
Small Batch Cherry Preserves
Yield: 8 Small Batch Cherry PreservesThese homemade preserves are perfect for toast, bagels, and ice cream! Prep Time15 minutes Cook Time15 minutes Total Time30 minutes Ingredients- 1 tablespoon Water
- 1 tablespoon Cornstarch
- 2 cups Dark Red Cherries, pitted and quartered
- 2 tablespoons Honey
Instructions- Whisk together the water and cornstarch in a pan. Stir in the cherries. Heat on medium heat for 10 minutes, stirring occasionally.
- Increase the heat to high and stir in the honey. Boil for 5 minutes, stirring often to keep the berries from sticking to the bottom of the pan.
- Remove from the heat and let cool. Spoon into a jar and refrigerate.
Source: Inside BruCrew Life
|
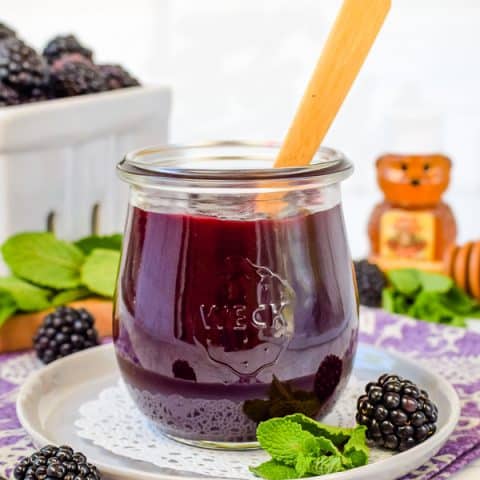
Homemade Seedless Blackberry Preserves
Yield: 1/2 cup Seedless Blackberry Preserves RecipeA jar of Homemade Seedless Blackberry Preserves only takes minutes to make. It's delicious on toast, yogurt parfaits, ice cream, or breakfast pastries. Prep Time10 minutes Cook Time5 minutes Total Time15 minutes Ingredients- 12 ounces blackberries (fresh or frozen, see note below)
- 1 Tablespoon cornstarch
- 2 Tablespoons honey
Instructions- Place the berries in a saucepan over low heat. Stir and heat until they soften and release their juice.
- Mash the berries with a fork or potato masher. Remove the pan from the heat.
- Press the mixture one spoonful at a time through a fine mesh sieve to remove the seeds. Use the back of the spoon to press the berry mixture through. You should get about 3/4 cup juice.
- Mix 2 Tablespoons of the juice with the cornstarch.
- Place the rest of the blackberry juice in the pan with the honey. Slowly stir in the cornstarch mixture. Heat over medium heat until thickened. (about 4 minutes)
- Remove the pan from the heat and let cool before placing in a jar and refrigerating.
Notes*If you use fresh blackberries, add 2 Tablespoons of water to the pan when you cook them down. **If you use frozen blackberries, thaw partially and drain the excess liquid before cooking. Do not add an additional water because the frozen berries will have some.
Source: Inside BruCrew Life
|