
Keyboard Shortcuts
Likes
Search
Suggestions for how to handle a missing pad?
#qdx
|
Greetings all,
Trying to keep this pithy ( ;-) ), in troubleshooting the essentially complete lack of RF output on my QDX, I reflowed most, if not all, of the solder joints. After doing so, the DC input, L14, T1, MOSFET chain, which had previously shown continuity and passed voltage to the MOSFETs, no longer worked, though, oddly enough, when I plugged in DC power, the QDX went through its usual boot-up cycle and appeared to have booted, so just enough power must have been making its way to the center tap on T1 so that it could, via the secondary winding, power the board. Working my way through the Vcc chain, I determined that the connections for L14 still needed enamel burned off. After unsuccessfully trying to burn it off with a soldering iron, with the aid of my Hakko 808 desoldering gun, I was able to remove L14, burn off some enamel, and reinstall it. As for T1 and the connections for the primary winding, applying more heat fixed the center tap and one of the ends of the winding. As for the OTHER end...after a few careful, though failed, attempts, I reasoned that if I removed the existing solder (or a lot of it), I'd have a better chance at burning off the enamel. After hitting it with the desoldering gun and then struggling to get a solder joint, I put the magnifying glass to it and discovered that the pad is completely gone, as can be seen in the picture below! I'm guessing that the heat weakened it enough such that it broke free when I used the desoldering gun on it. With the above said, as the picture shows, the trace leading from the now-missing pad to the MOSFETs is completely intact. As there is enough wire sticking through such that I could scrape off some trace covering and use a bit of hookup wire to make the connection, that is an option. However, before I take a sharp blade to the PCB, are there any other options I should consider? The pin spacing for the MOSFETs (Rev 3a board) is such that jumpering directly to the drains isn't feasible :-\ (well, maybe I could jumper to the drain on the end, which connects to the other drain, so perhaps that is an option!) I appreciate the help! Charles Johnson KF4AYT PS The white-ish stuff that you see around some of the solder joints is from the resin. I can gently break it up with a tiny precision screwdriver and then sweep it away with a toothbrush, but not all of it comes off. ------- |
|
Two options I would look at.? Put the component in place through the missing pad and solder a connecting wire to it and then to the soldered pad and component lead at the other end of that trace. Alternatively...?? carefully scrape the etch resist off the trace and solder a wire from the trace to the component lead in the missing pad. The first method should be safe, the second method risks damaging the trace if you are too enthusiastic in removing the etch resist and cleaning the trace
Good luck, Reg??????????????? G4NFR |
|
On 17 Nov 2022 at 10:55, Charles Johnson wrote:
I was able to remove L14, burn off I'd have a betterI still do not understand why people insist on trying to "burn off the enamel" with a soldering iron ... why not use that sharp knife, or better a single-sided razor blade, and SCRAPE off the enamel and make the wire shiny copper and TIN it before inserting in the PCB ... Why risk lifting pads off the board from so much heat? w2jc |
开云体育I use isopropyl alcohol (IPA) to remove the left over resin.???? Methylated spirits also works but the PCB won’t be as clean as using IPA.?? If you want to go the more expensive way various spray cleaners also do the job ? 73 Graham ZL1CE ? From: [email protected] <[email protected]> On Behalf Of Charles Johnson
Sent: Friday, 18 November 2022 7:56 am To: [email protected] Subject: [QRPLabs] Suggestions for how to handle a missing pad? #qdx ? Greetings all, |
|
On 11/17/22 16:38, Graham (ZL1CE) wrote:
I use isopropyl alcohol (IPA) to remove the left over resin.???? Methylated spirits also works but the PCB won’t be as clean as using IPA.?? If you want to go the more expensive way various spray cleaners also do the jobSame here, IPA and an old toothbrush. Might have to hit it twice to get everything off. I left a bit of a sticky mess after the first go around so I hit it again. -- Linux Home Automation Neil Cherry kd2zrq@... Main site My HA Blog Author of: Linux Smart Homes For Dummies KD2ZRQ |
|
I combine solvents with physical scrubbing.? I have found that so-called "acid brushes" are very effective in removing heavy deposits of flux residues; I generally cut the bristles to 1/2-2/3 length to get the right stiffness.? I generally use isopropanol but will sometimes add a dash of acetone for stubborn or burnt residues which are difficult to dissolve.??
Small boards without pots or variable capacitors come nice and clean in a solvent-filled beaker in an ultrasonic bath.? A quick air blowoff and they are sparkling clean. 73, Don N2VGU. |
|
I'm also in the "scrape off the enamel" camp rather than burning it.
When I have tried to burn it off with the soldering iron and solder during installation, there always seems to be a percentage of joints that just won't solder properly despite protracted heating. I'm happy to accept that it's probably my technique at fault but that's what I've found from experience. 73 David G4ZDT |
开云体育?It never made sense to me to trust “burning” off the coating of magnet wire when it’s so easy to scrape the coating off by any of a dozen means. ?I use my Knipex tool and love it: KNIPEX Tools - Coated-Wire Stripping Tweezers (1511120), 4.75 https://a.co/d/g1wWBbd But in a pinch I have used my pocket knife, sand paper, emery cloth, etc., and they all work. ? I even made a mini solder pot out of a heated solder sucker but I have to remember to plug it in….. ha! ?It melts the coating off and tins the wire at the same time. Ezy peezy….? Dave K8WPE since 1960 David J. Wilcox’s iPad On Nov 18, 2022, at 3:21 AM, David via groups.io <davebrodie2004@...> wrote:
|
|
On Fri, Nov 18, 2022 at 09:47 AM, Ed Kwik wrote:
Anyone building kits should have a good quality x-acto knifeThey have their place but for delicate work my preference is a surgical scalpel handle and one of the many plade shapes available.? I find #15 to be good for cutting traces, just press down and rock the blade, minimizes collateral damage.? 11 are good for getting into sharp corners.? Non-sterile ones are available but the medical gamma-sterilized ones are easier to find and still inexpensive; a box of 100 lasts me a long time; the handles, forever. 73, Don N2VGU 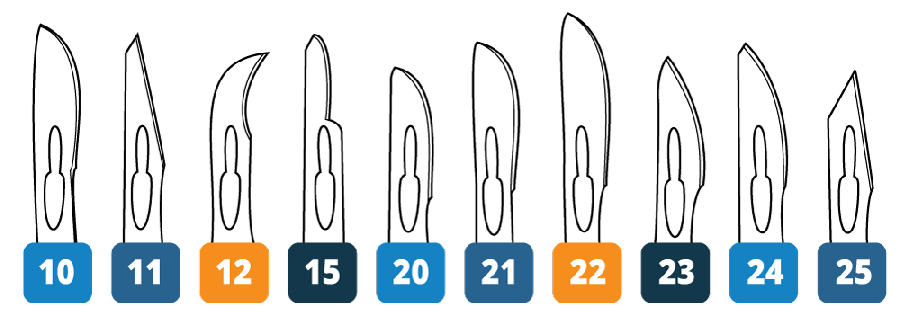 |
|
Last time I needed to tin an enameled wire, I used a tab of Acetylsalicylic Acid. Put the wire on it and heat it with soldering iron. After a second or two, combined effect of heat and chemistry eats away the coating.? Just don't breath the fumes and wipe the tip immediately. Works even on small diameter wires which are hard to scrap mechanically. I have no ideas about the chemical process involved. You might want to give?it a try.72/73 Tom 9A5TT On Fri, Nov 18, 2022, 15:11 Rob Giuliano via <kb8rco=[email protected]> wrote: Razor blade or emery cloth for me. |
|
Interesting.
From the Science Nerd forum: Aspirin will pyrolyse largely into phenol, among other things. I once did that, for the purpose of getting phenol, to use as a nylon solvent, to smooth out nylon 3d prints. It worked! Nylon isn't easily dissolved by most solvents, but phenol does it well! Whether it does anything to polyurethane I don't know, but it remains a powerful solvent so it makes sense it would work on most laquers.-- Colin - K6JTH? |
|
Phenol will definitely work - but you need to wash your hands afterwards and do not inhale the fumes. Lee KX4TT PS - I am a toxicologist by training, so this is truly up my alley. -) On Friday, November 18, 2022, 05:44:27 PM EST, 9A5TT <tkordaso@...> wrote: Last time I needed to tin an enameled wire, I used a tab of Acetylsalicylic Acid. Put the wire on it and heat it with soldering iron. After a second or two, combined effect of heat and chemistry eats away the coating.? Just don't breath the fumes and wipe the tip immediately. Works even on small diameter wires which are hard to scrap mechanically. I have no ideas about the chemical process involved. You might want to give?it a try.72/73 Tom 9A5TT On Fri, Nov 18, 2022, 15:11 Rob Giuliano via <kb8rco=[email protected]> wrote: Razor blade or emery cloth for me. |
|
Ed Mohrman WA7EM
Many good posts on stripping enamel off wire. But, the original post asked for ideas on how to recover a circuit board damaged (pad lifted/destroyed) during removal of a component. Since I have damaged boards in the past, I am interested in ideas on that subject. Original poster thought he might be able to remove solder resist on the surviving bit of trace that use to connect to the destroyed pad. Depending on how crowded it is around that trace, that could work. Of course, it depends if the damaged pad was a feed-thru from one side of the board to the other. In that case, you must reconnect things on both sides of the board. Other ideas? Ed WA7EM |